2010 Pics n Slips

2010's Planned Mods
| Wire house for 200amp, garage 60amp(240v) | done |
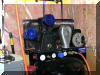
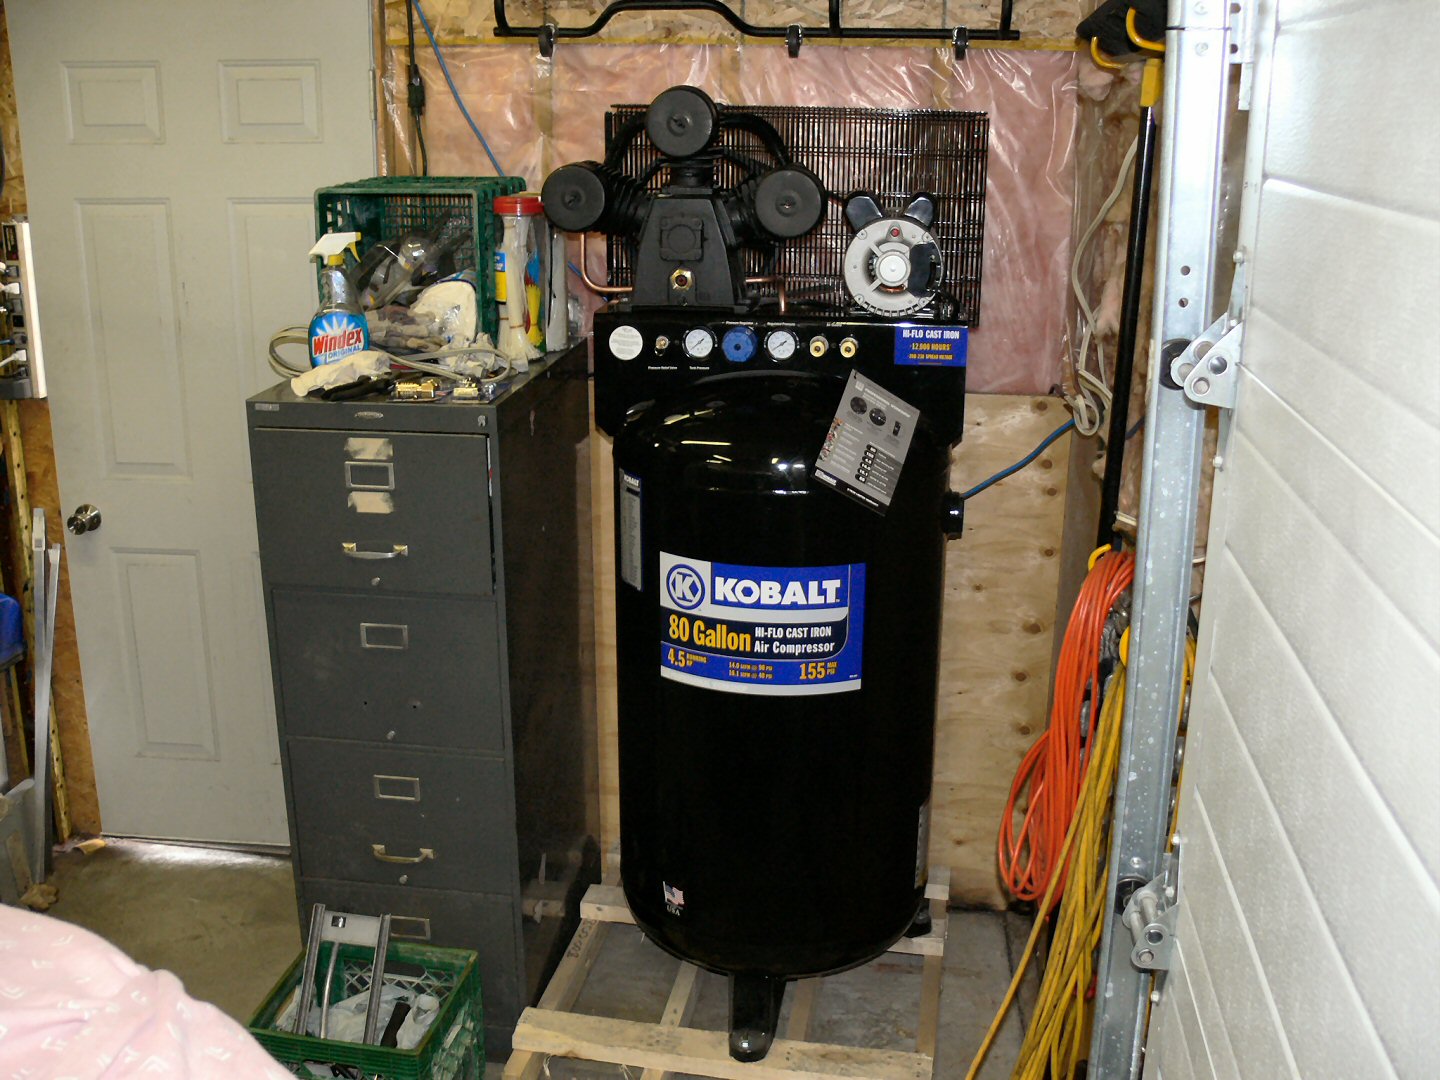
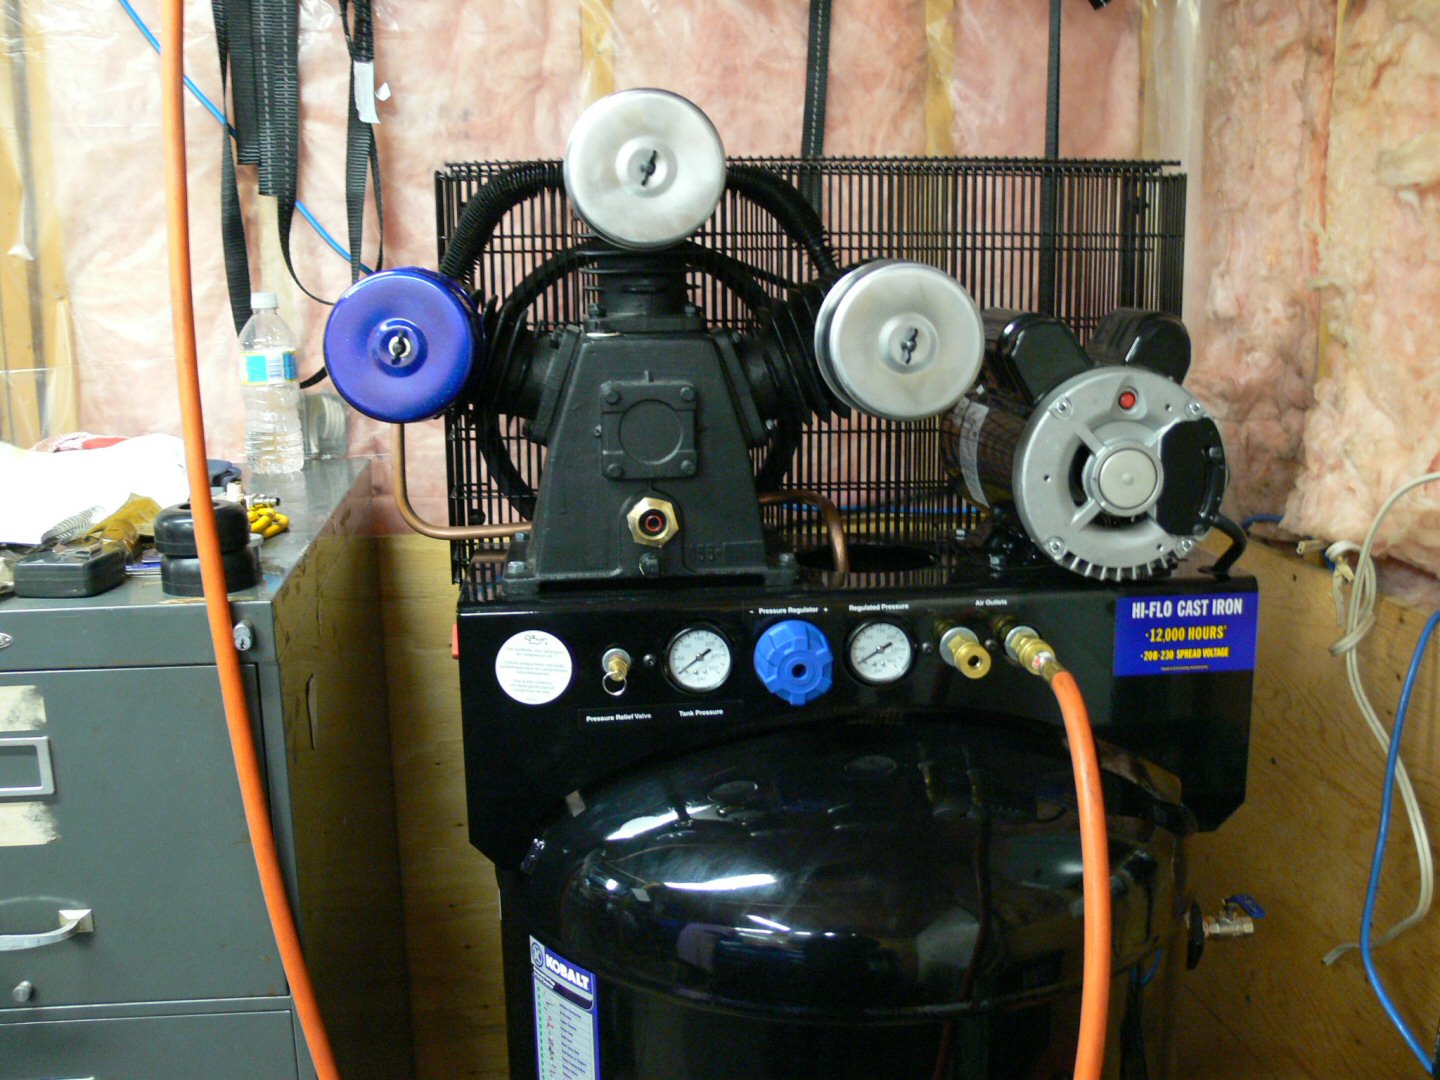
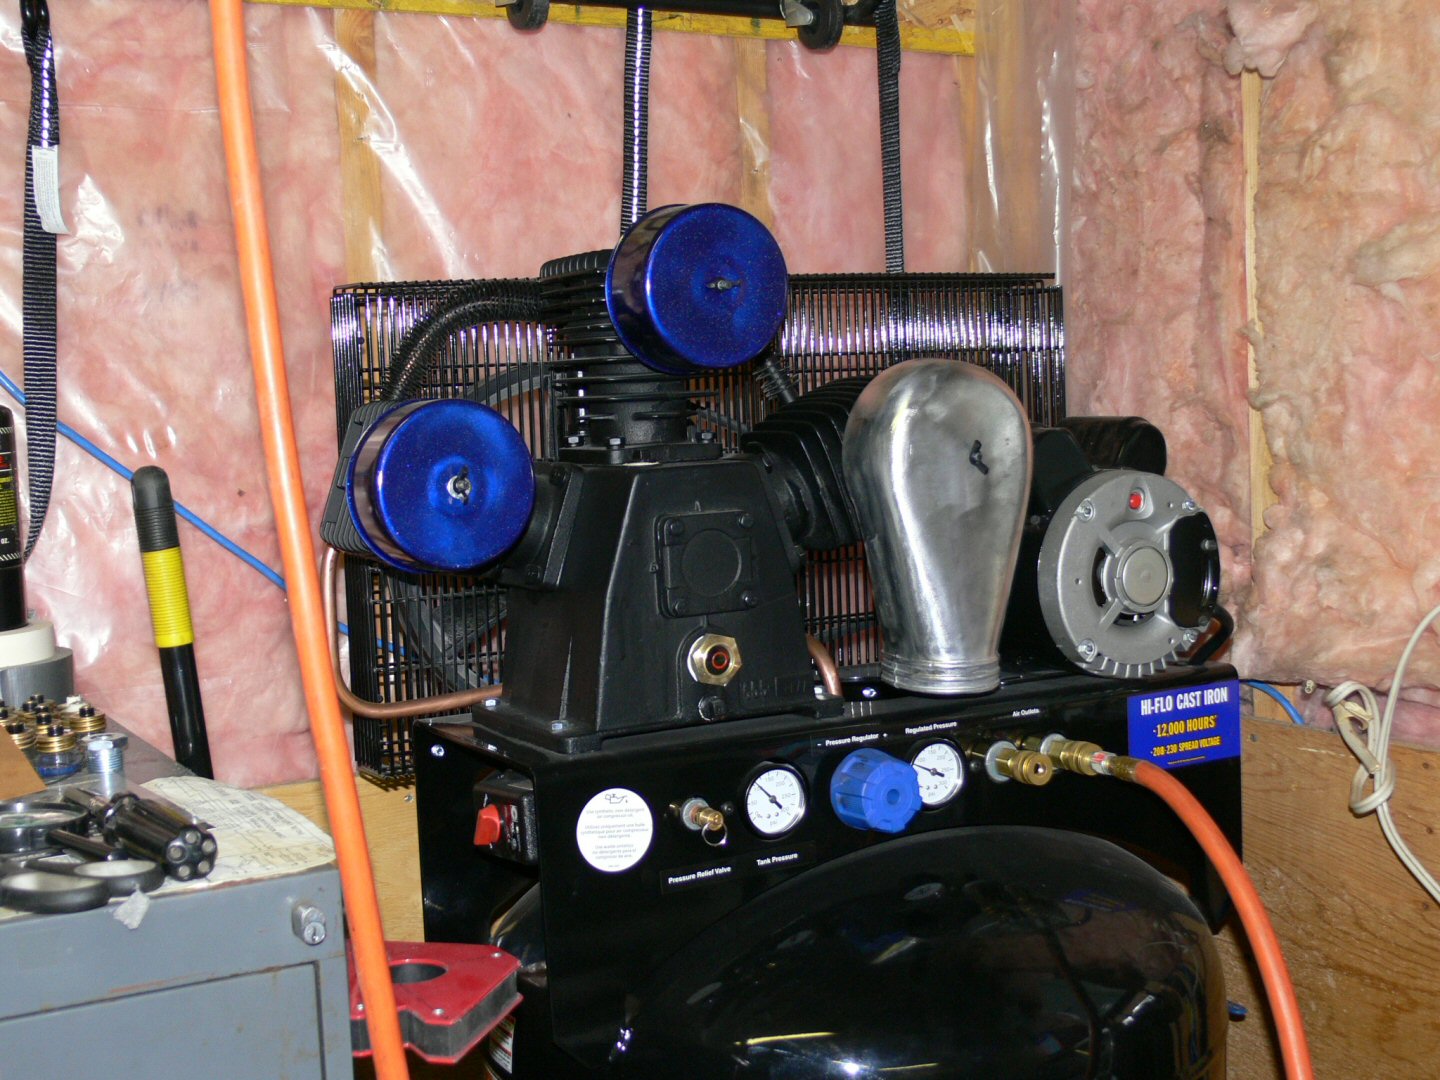
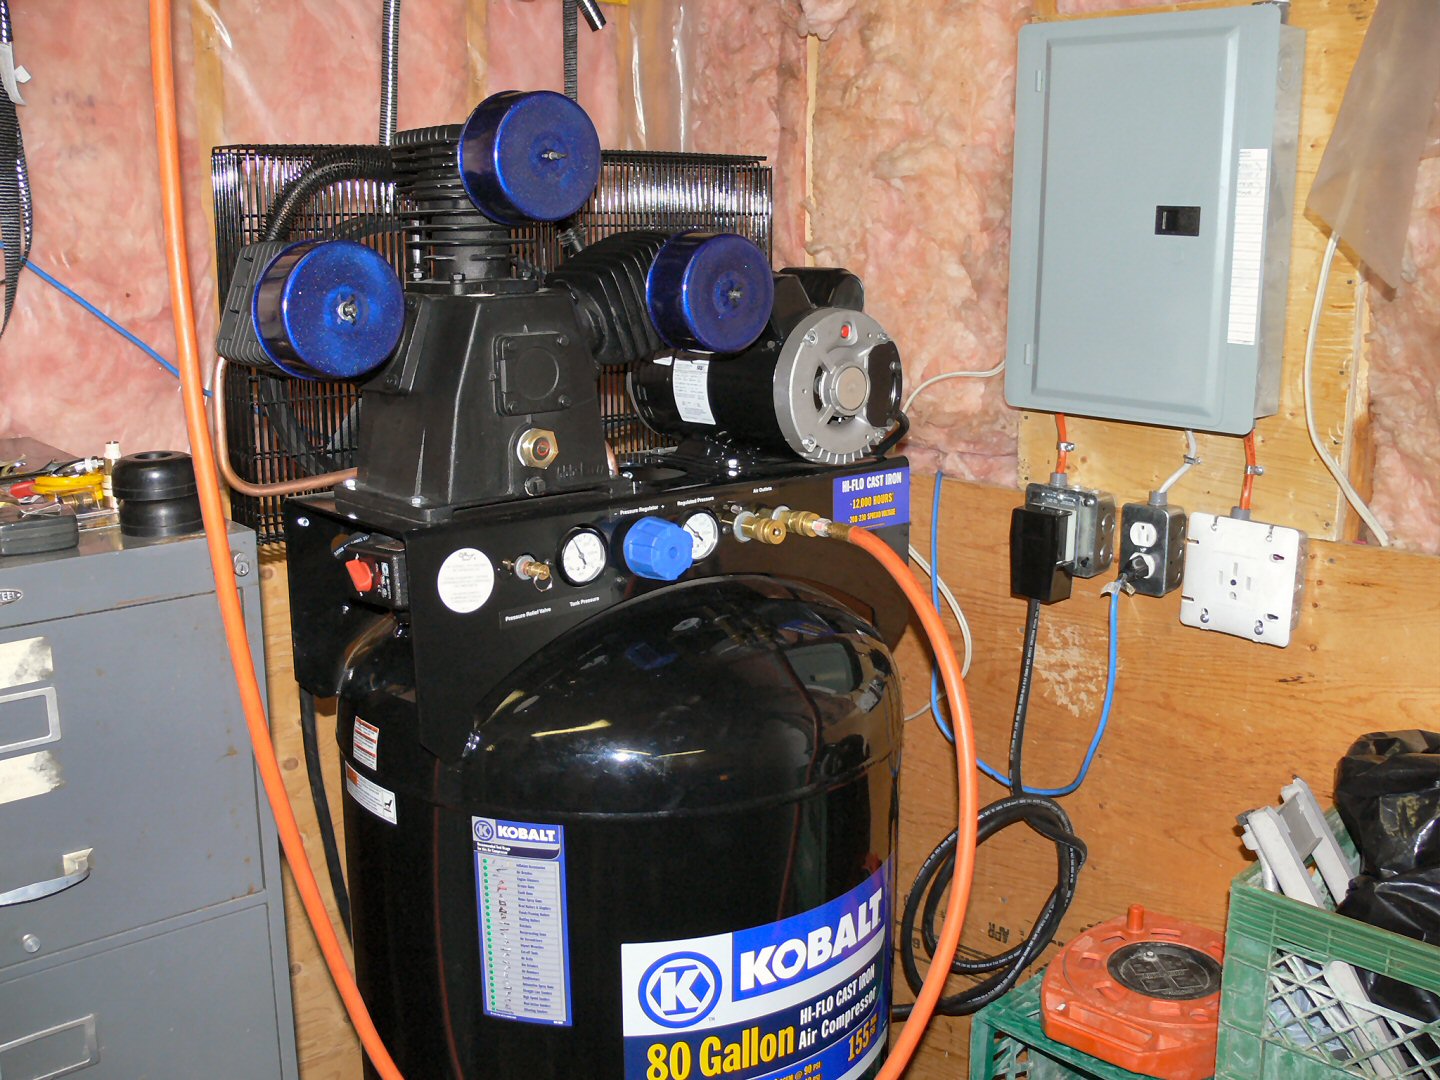
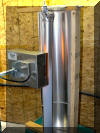
| Kobalt 4.5hp 80gallon 14cfm compressor | done |
| Tear 408 down to long block & install | |
| Install PATC Ramzilla trans & Precision 3800rpm stall tc | done |
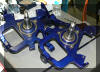
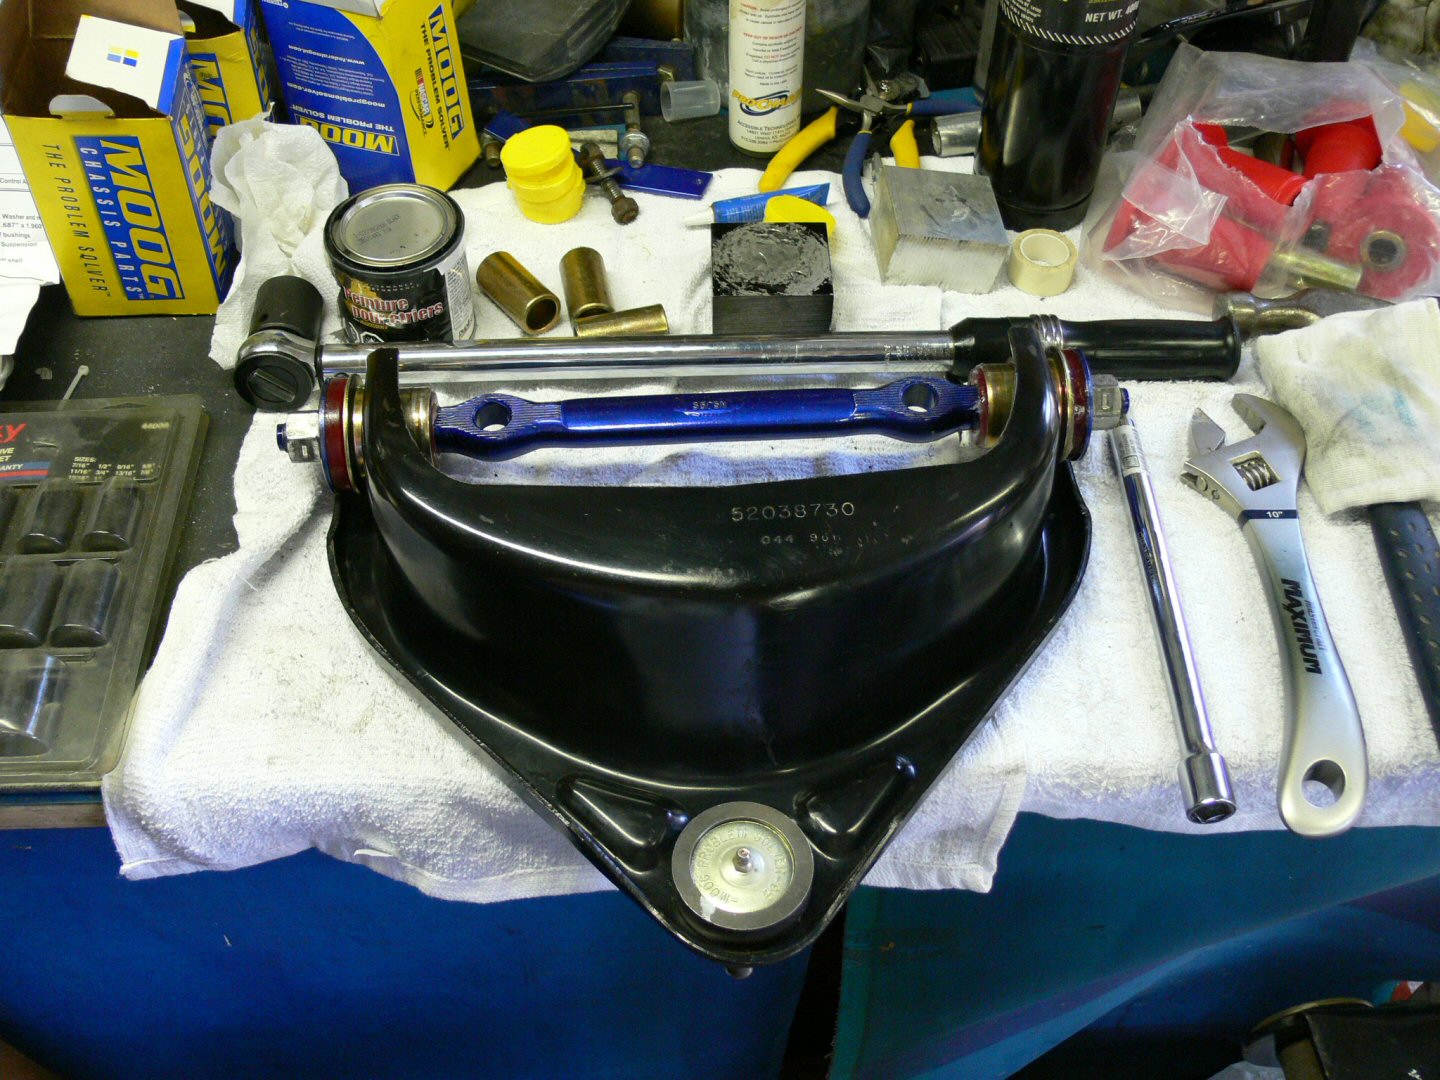
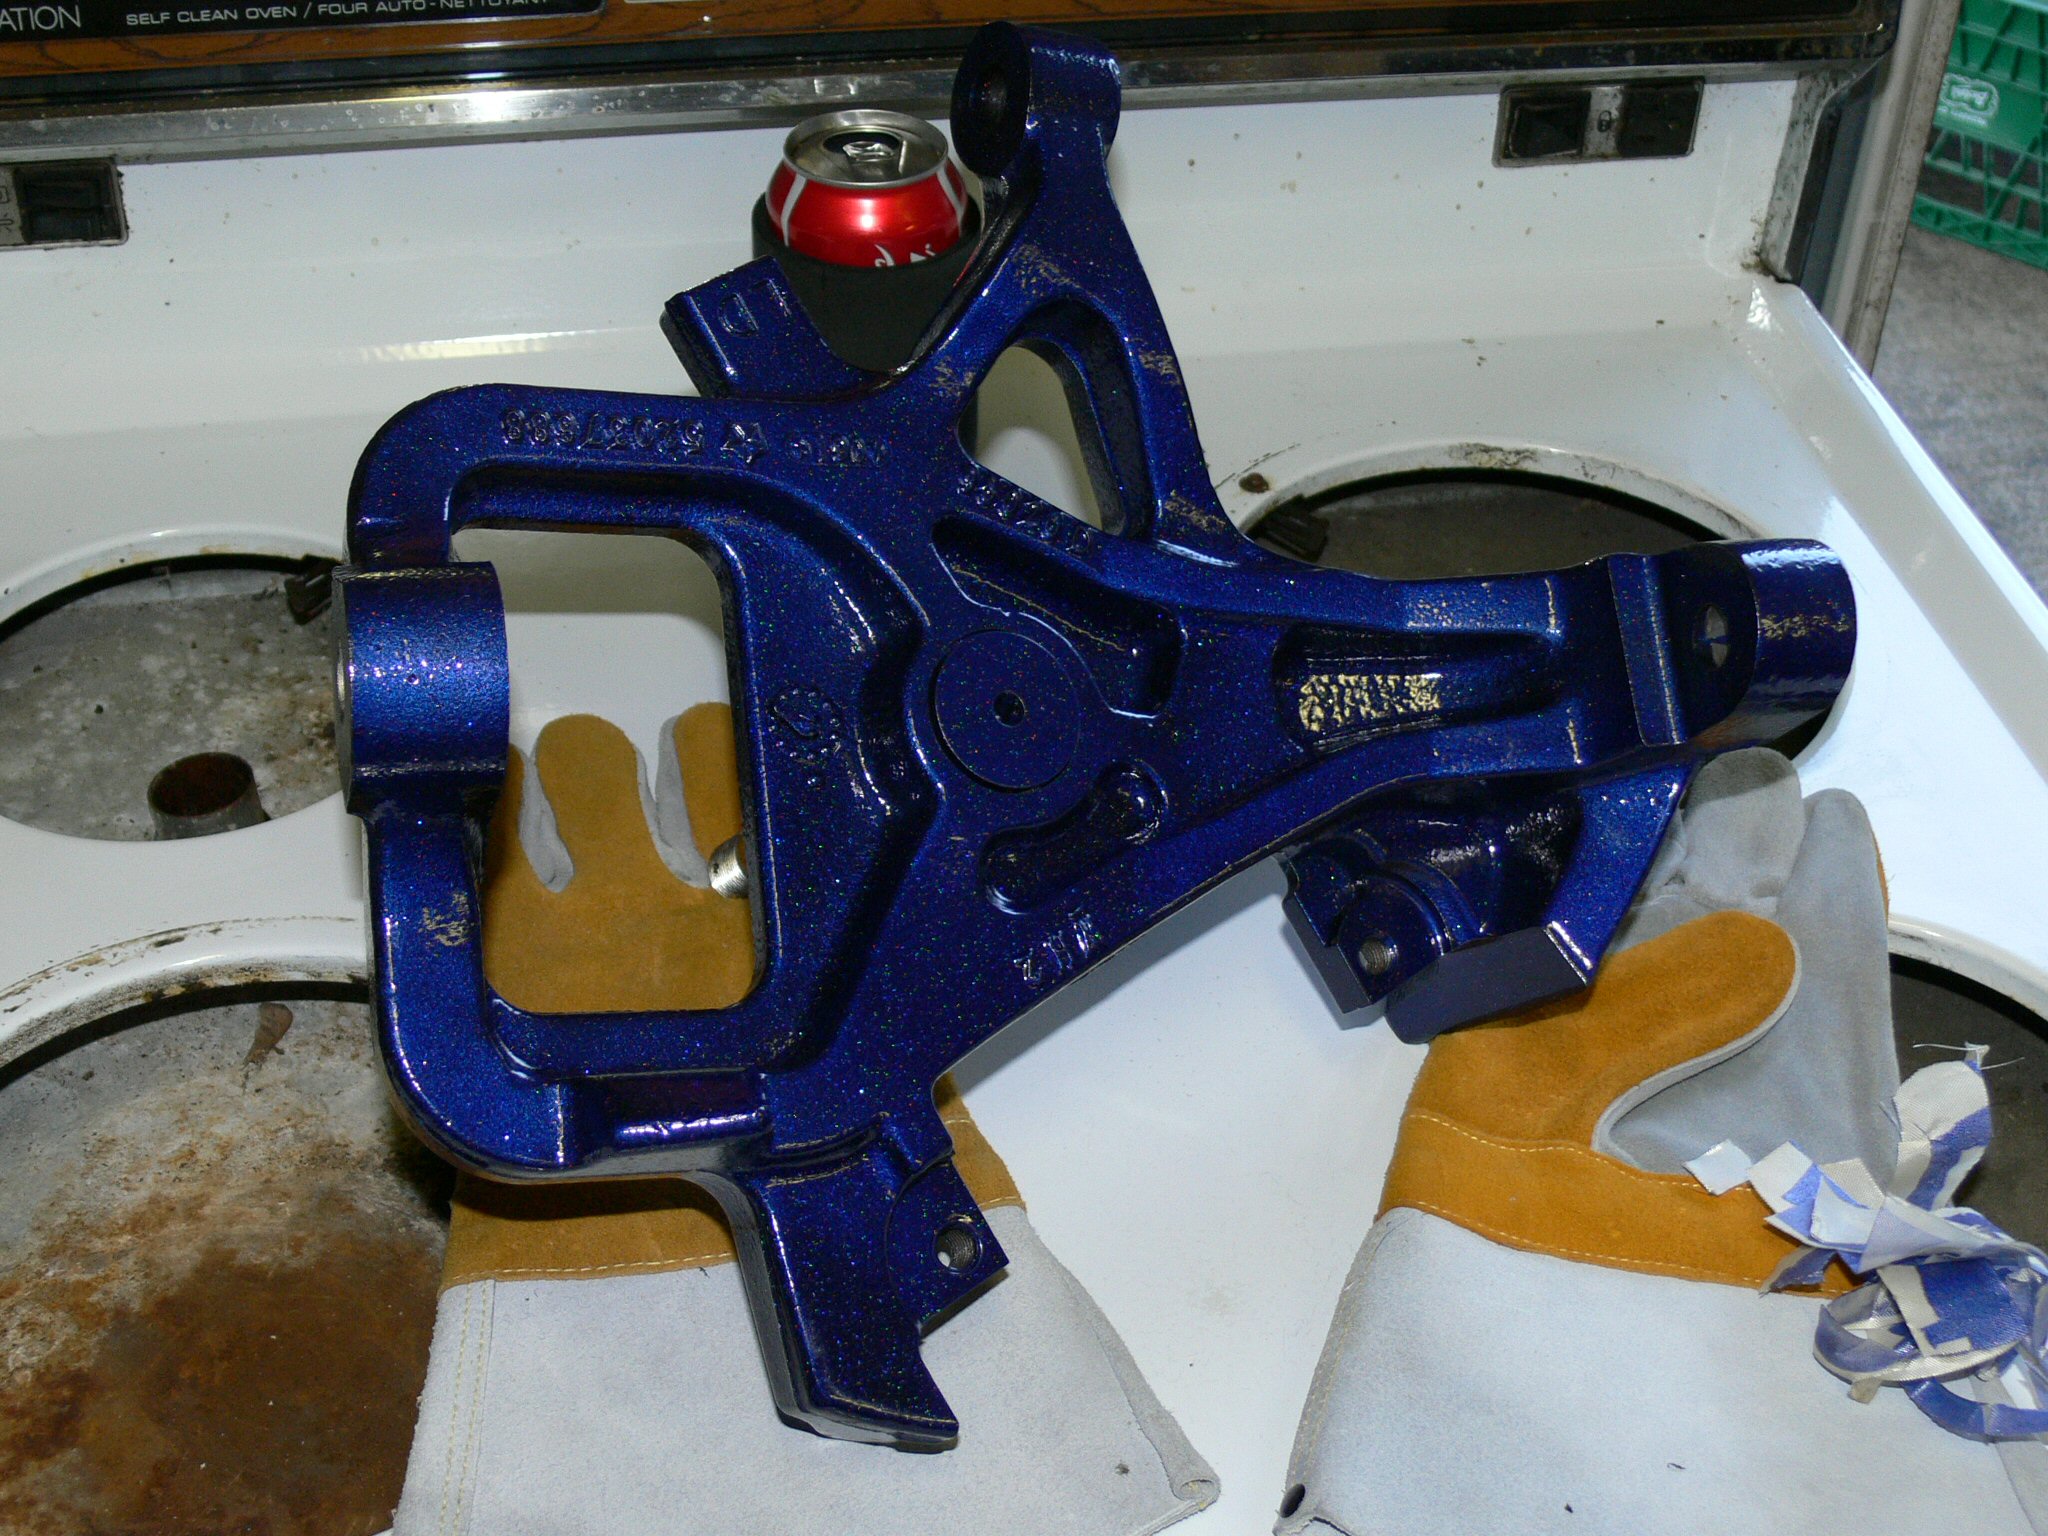
| Install Energy Suspension bushings in c arms | done |
| Blast, wire wheel, powder coat Belltech drop springs | done |
| Install ES bushings in leaf springs | done |
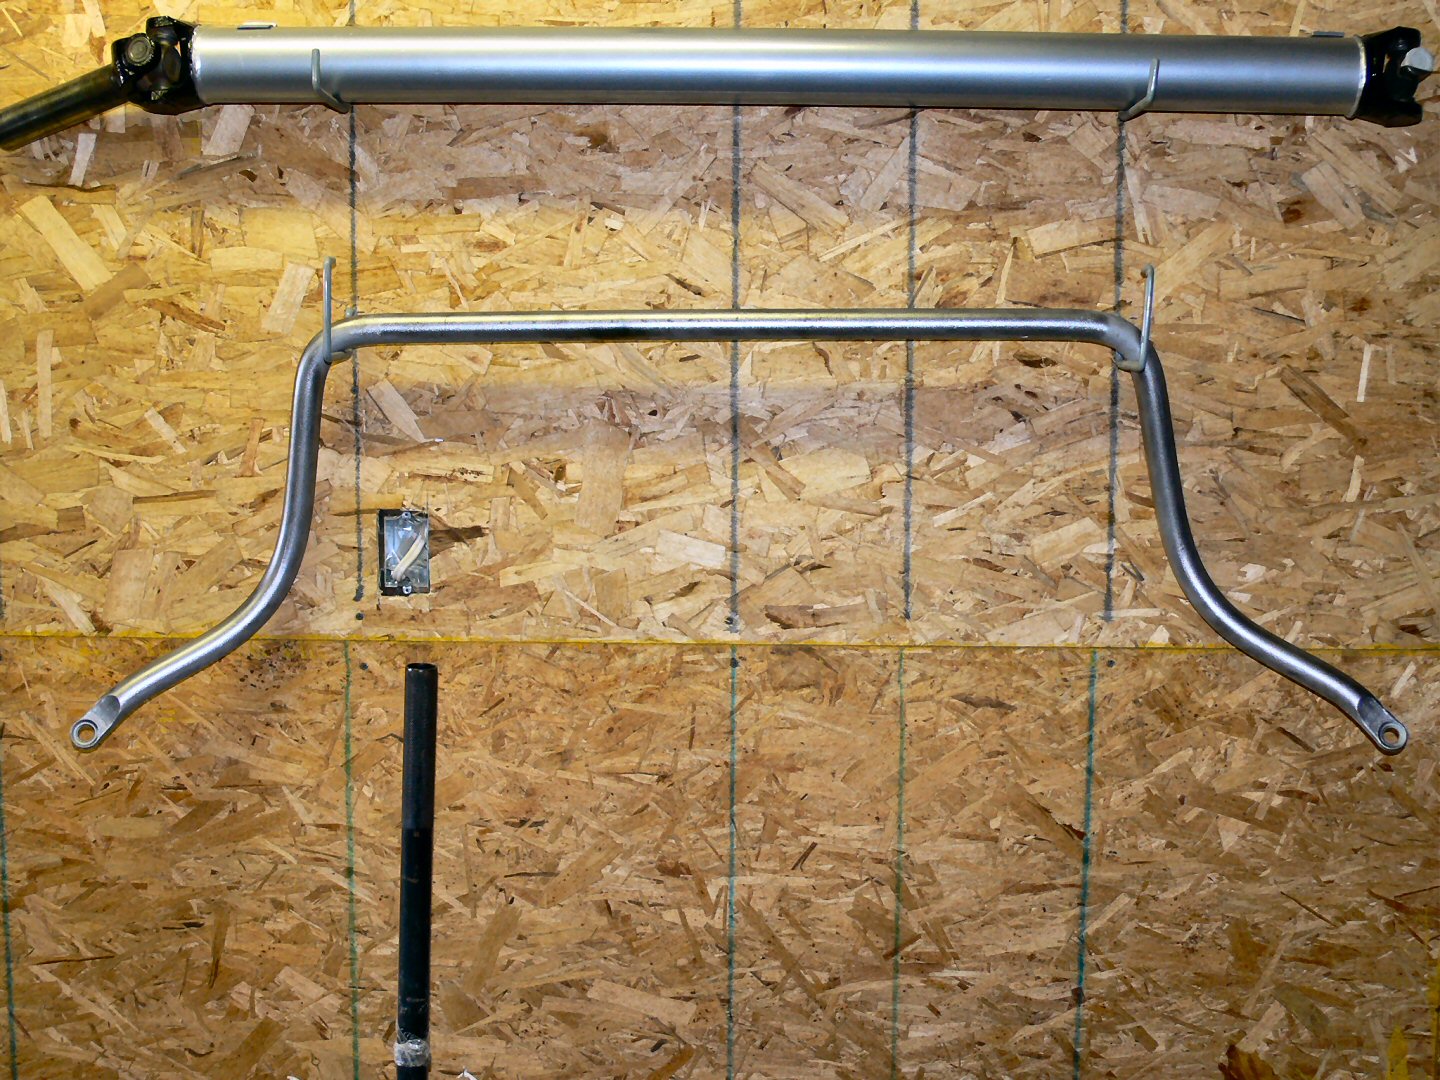
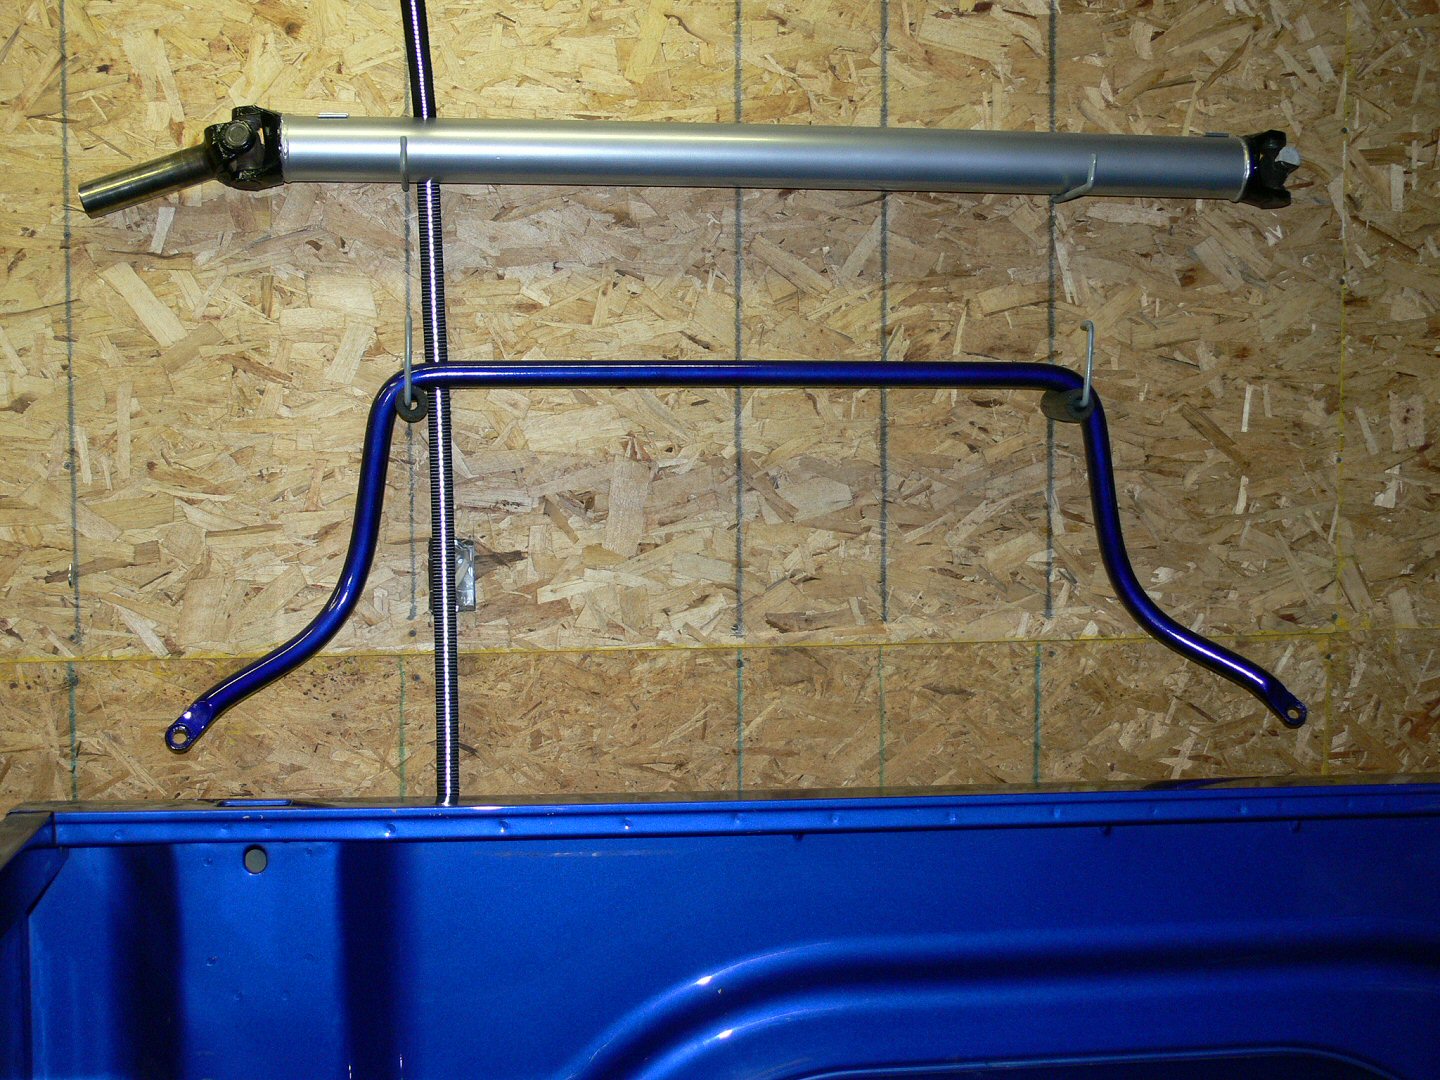
| Blast & powder coat front sway bar | done |
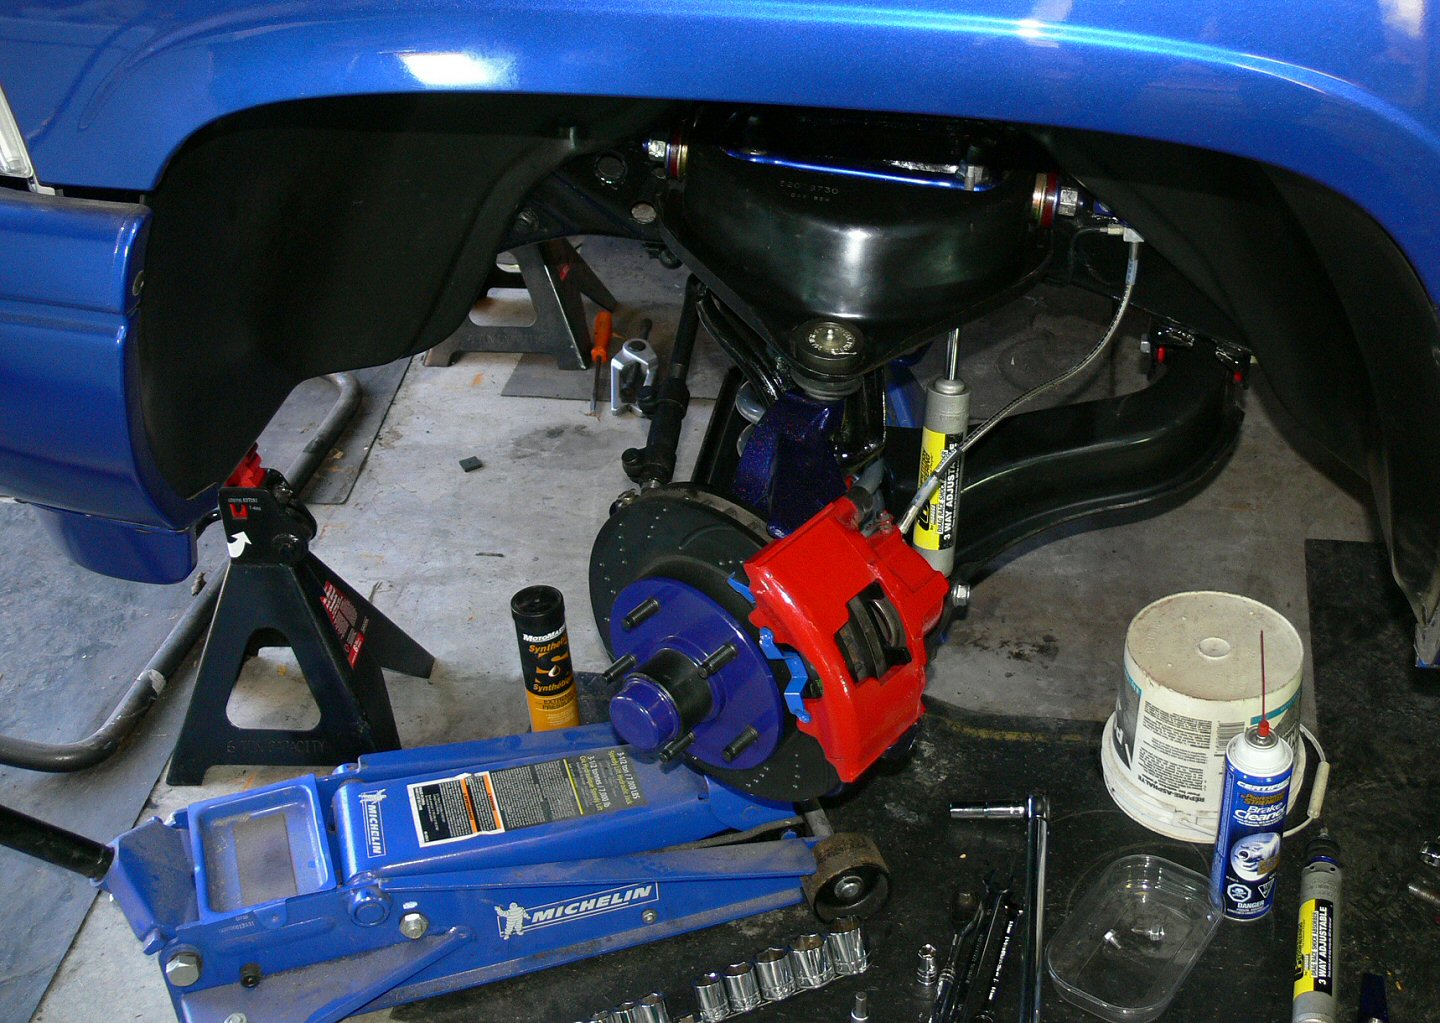
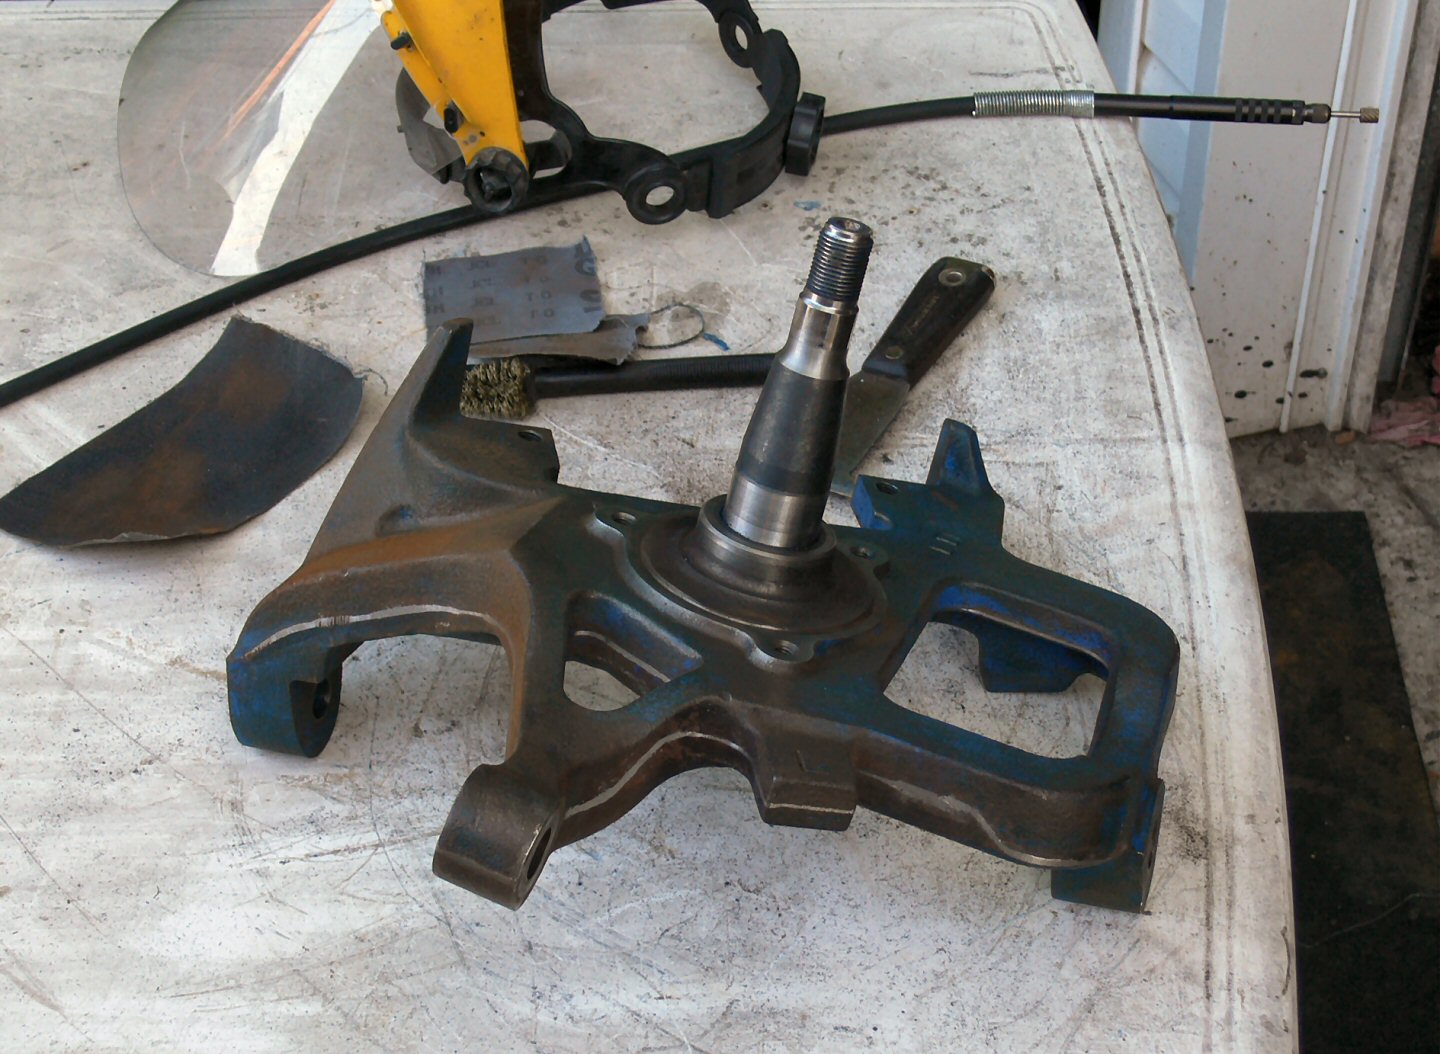
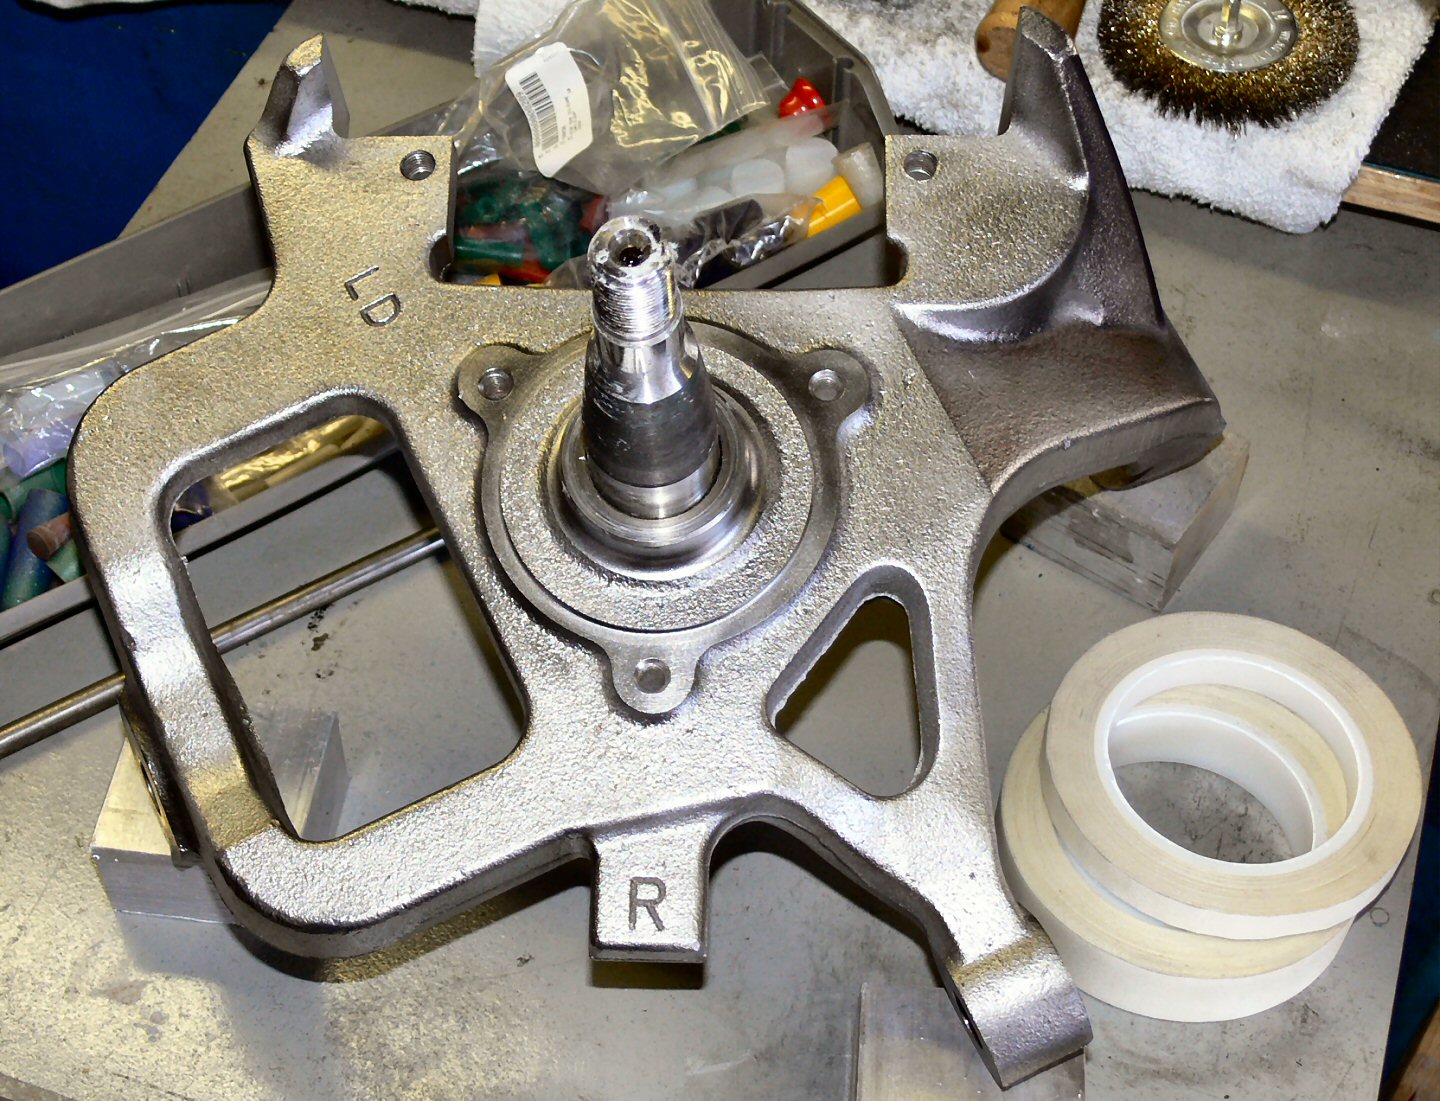
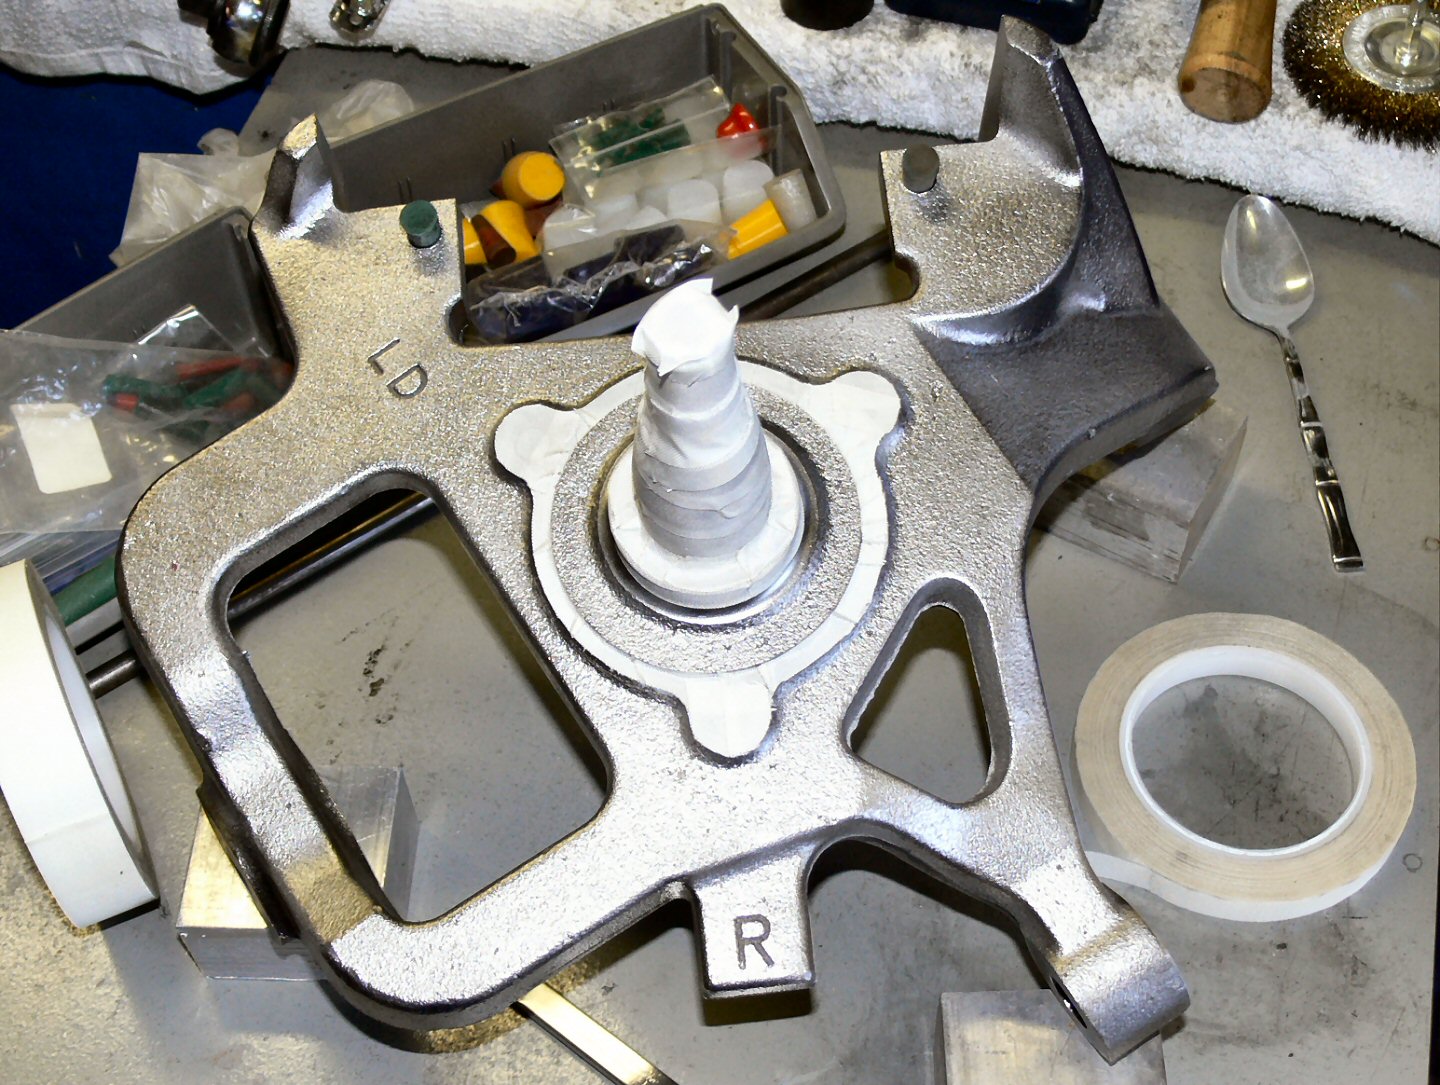
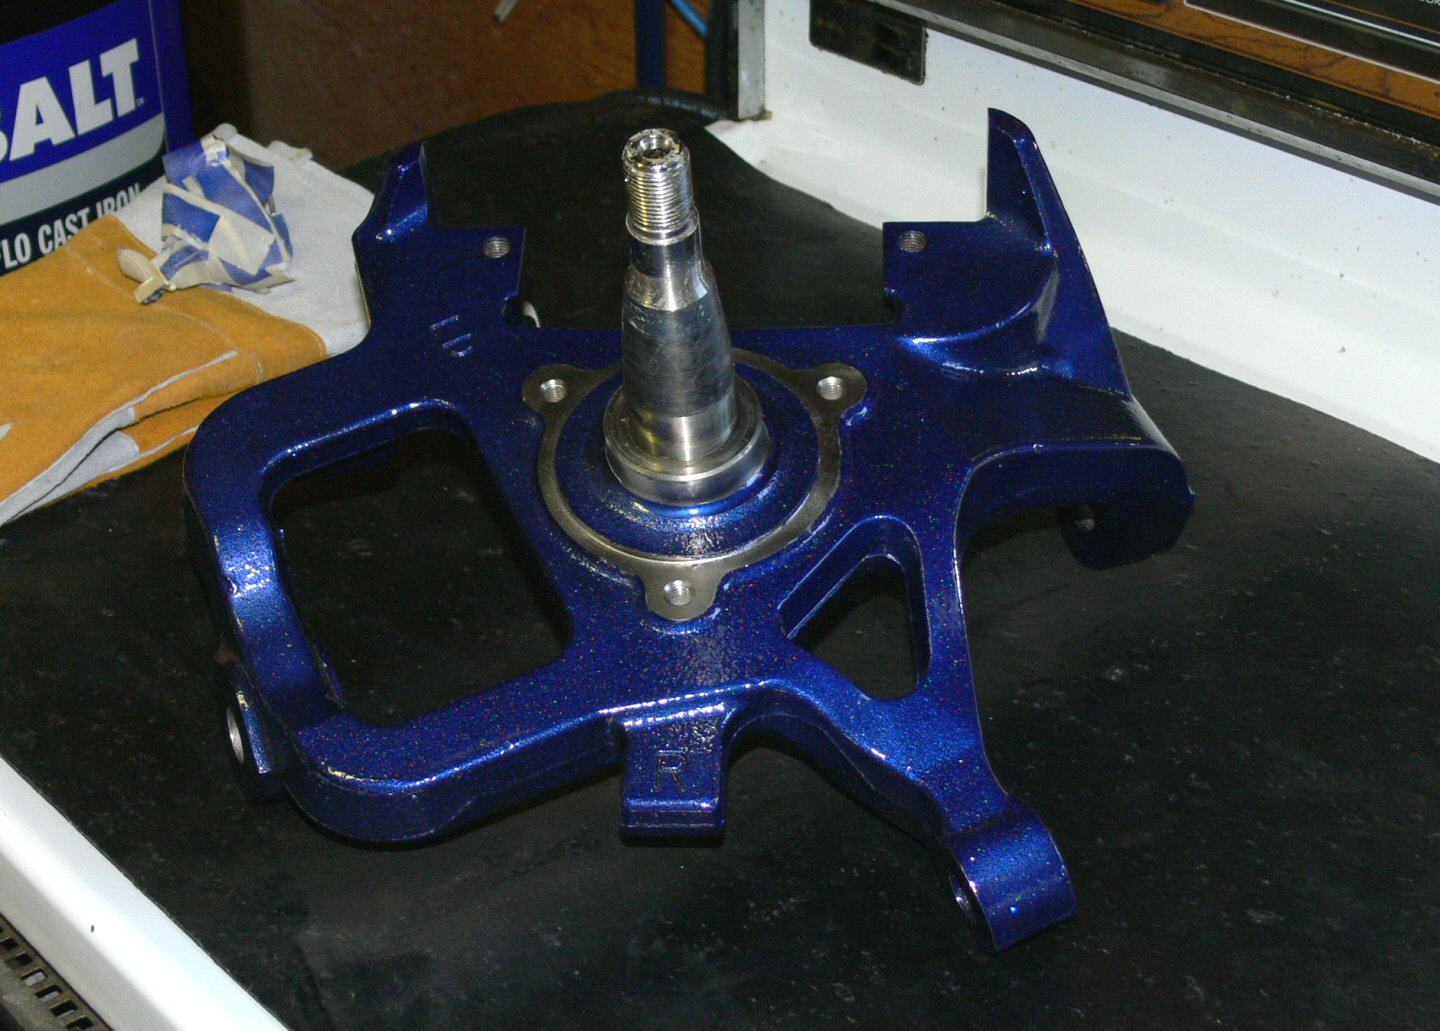
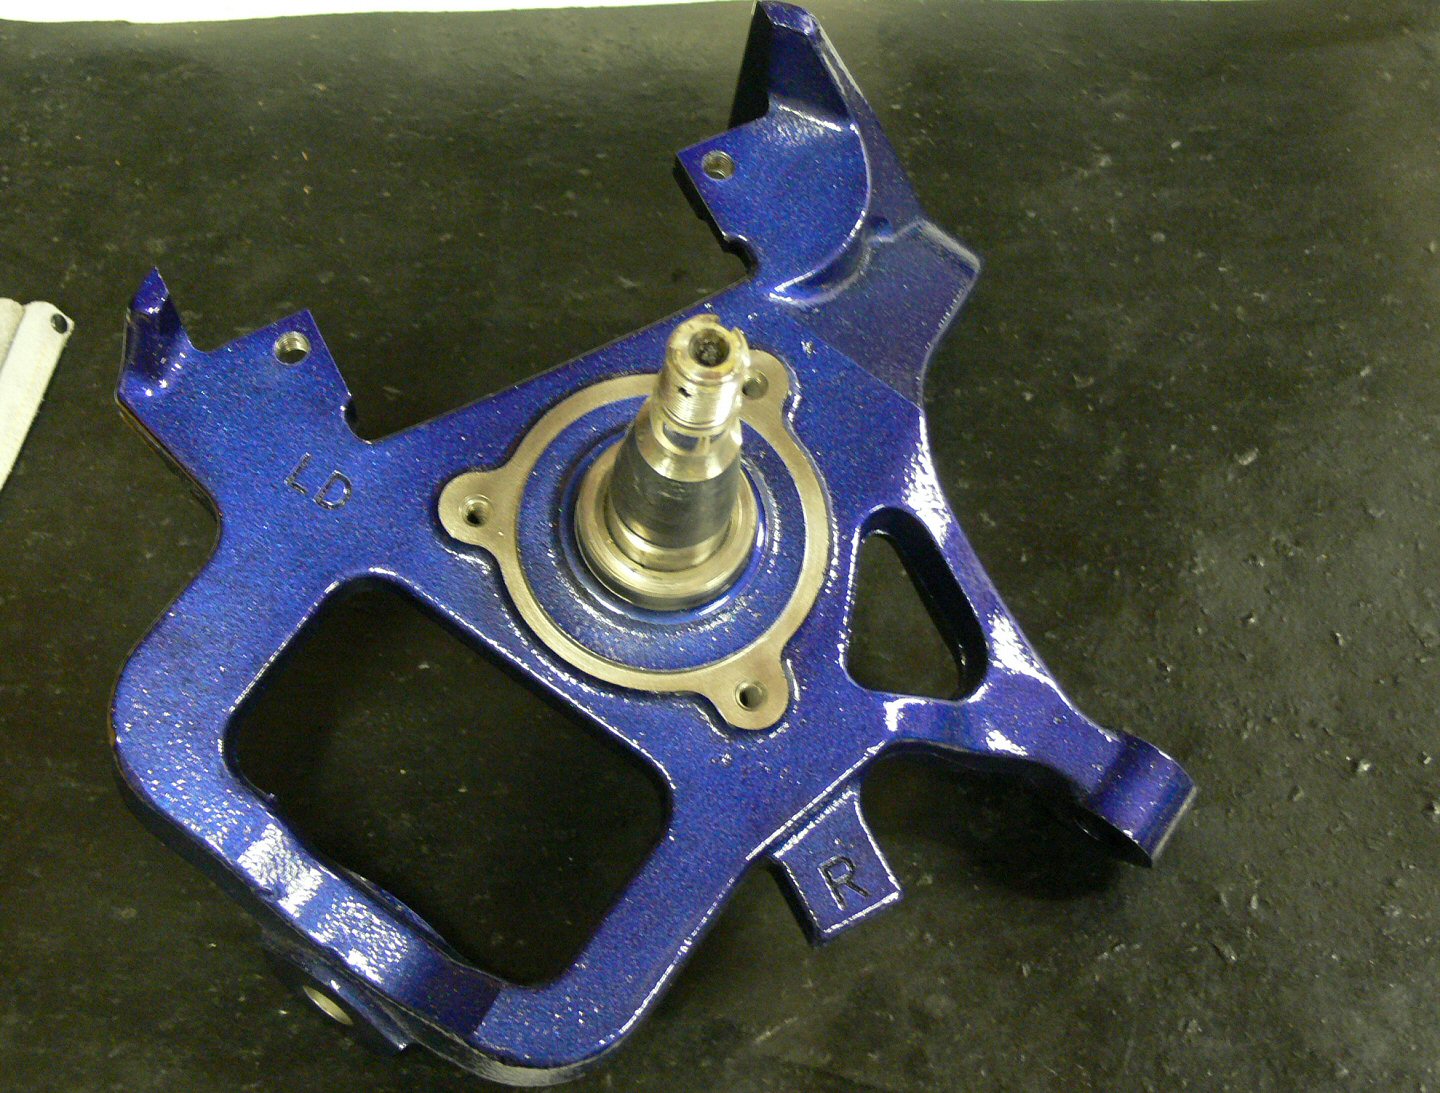
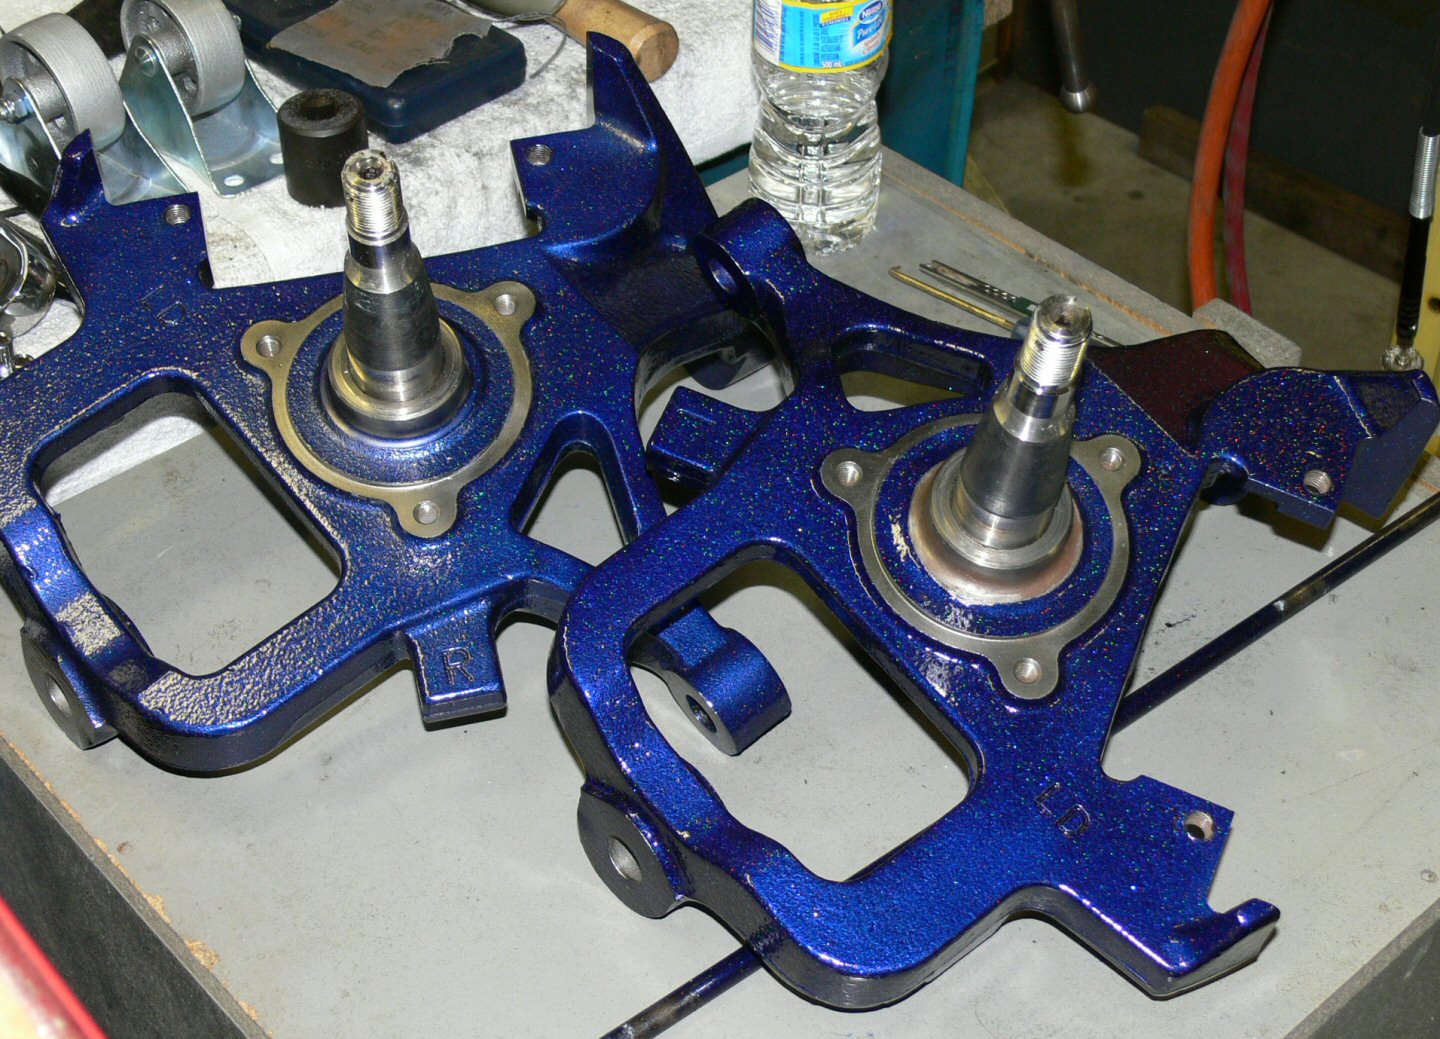
| Strip, blast, wire wheel & powder coat spindles | done |
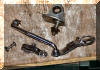
| Install Moog tie rods & sleeves | done |
| Make bracket to hold 2nd FAST box, blast & pwdrct it | working on it |
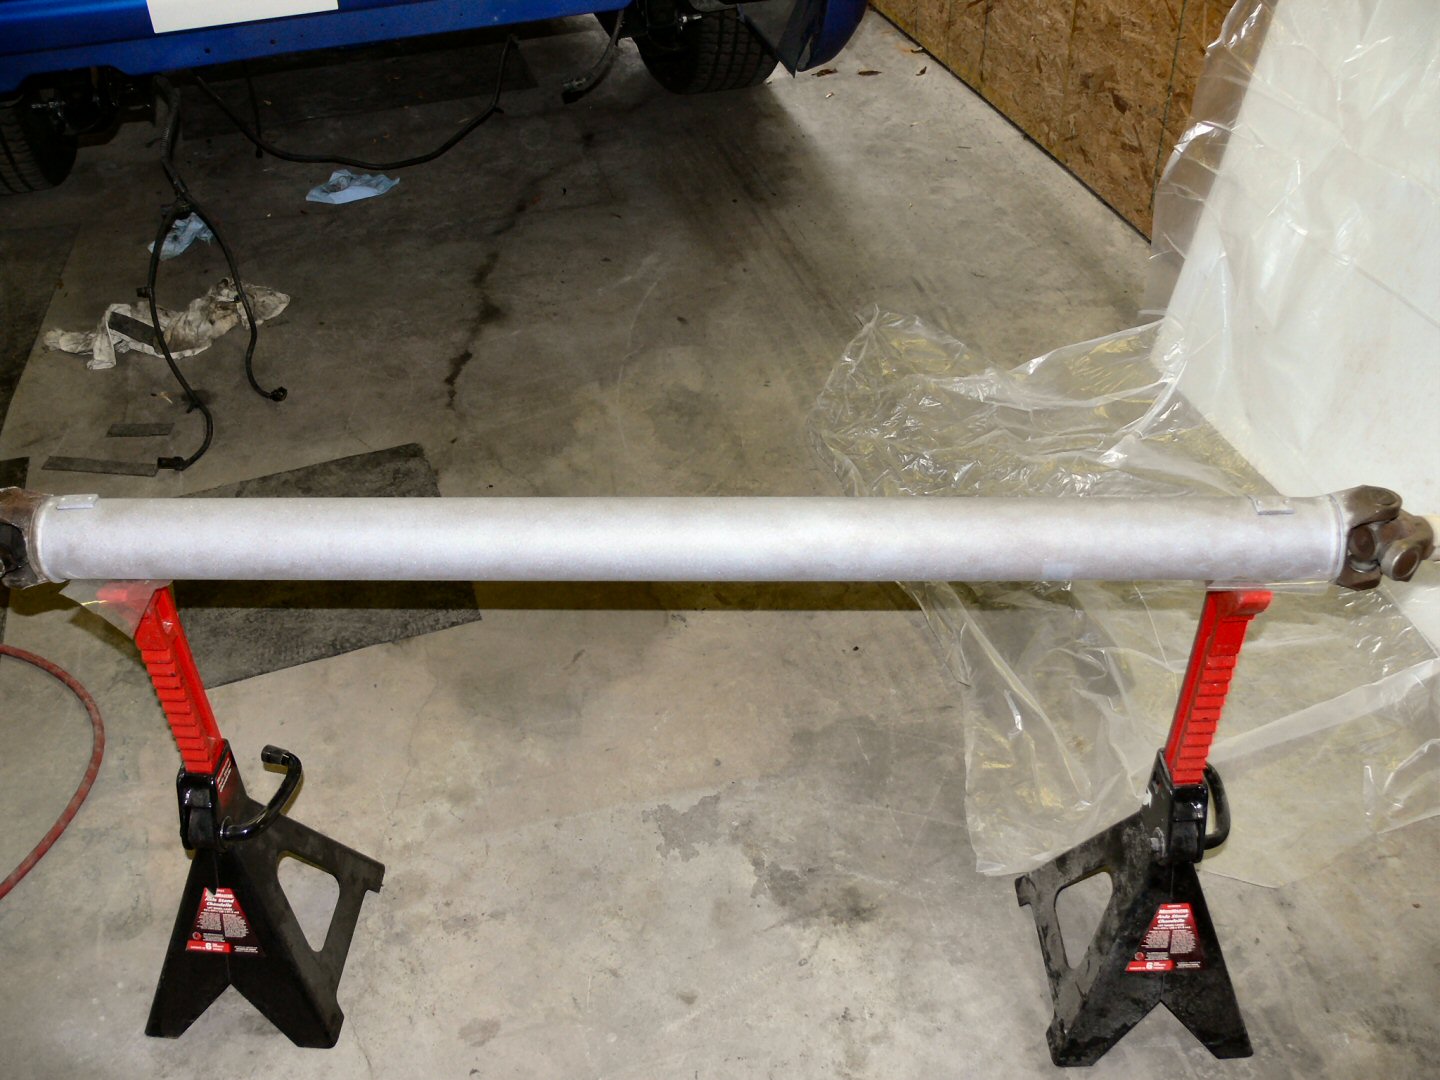
| Blast & powder coat driveshaft | done |
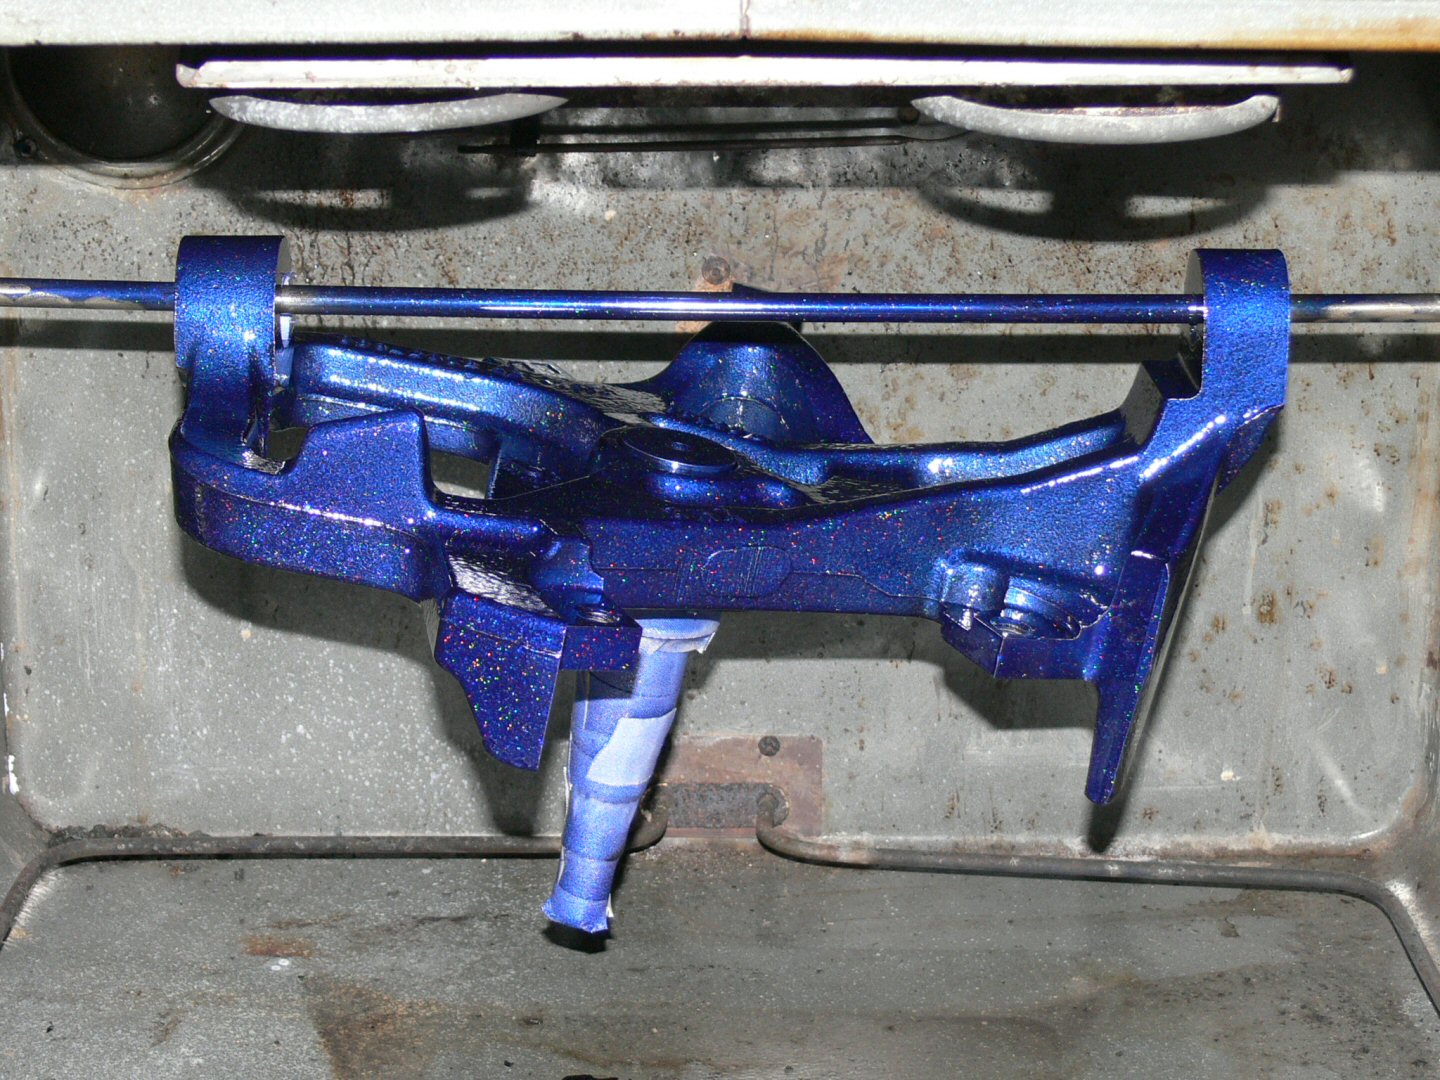
| Re-install front suspension | done |
| Make 2 backets for intercooler |
June 25-28,
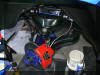
End of Aug last year my 11yr old compressor died (rebuilt it once) & decided it was time for some real power in the garage (extension chord city) & a real compressor (5.5cfm/120v) that could handle the work I was trying to do. After the compressor died it was a never ending list of other items that died at the house, including my main pc hard drive, furnace & ac, playstation 3, over range microwave, etc etc etc. Finally all caught up & able to carry on in the garage now.
I got the house switched over to 200amp breakers & power run out to the garage for 60amp 240V. Friday had 2 electricians changing things over (930am-1130pm) Master electrician returned following day for 2hrs & Monday for 2hrs. Now have 2-120v circuits (for now/add more when Indy assembled) & 2-240v circuits. I can now run both the compressor & a full size oven at the same time as well as lights & music (turned up real loud lol)
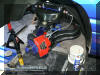
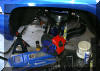
June 29, Ran the compressor with no load (valve open) for 1/2hr to start break in. Of coarse I can't leave things as is! Compressor air filters covers (3cylinder) were a bit dinged up (same flat black as pump) so I pulled them & sandblasted them & wire wheeled them one at a time. While I had one off needed something to use for the filter so the Procharger TB hat seemed appropriate lol.. Powder coated them Indy blue to get back in the swing of things & practise my technique. Look better now :)
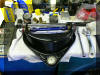
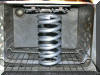
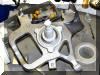
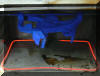
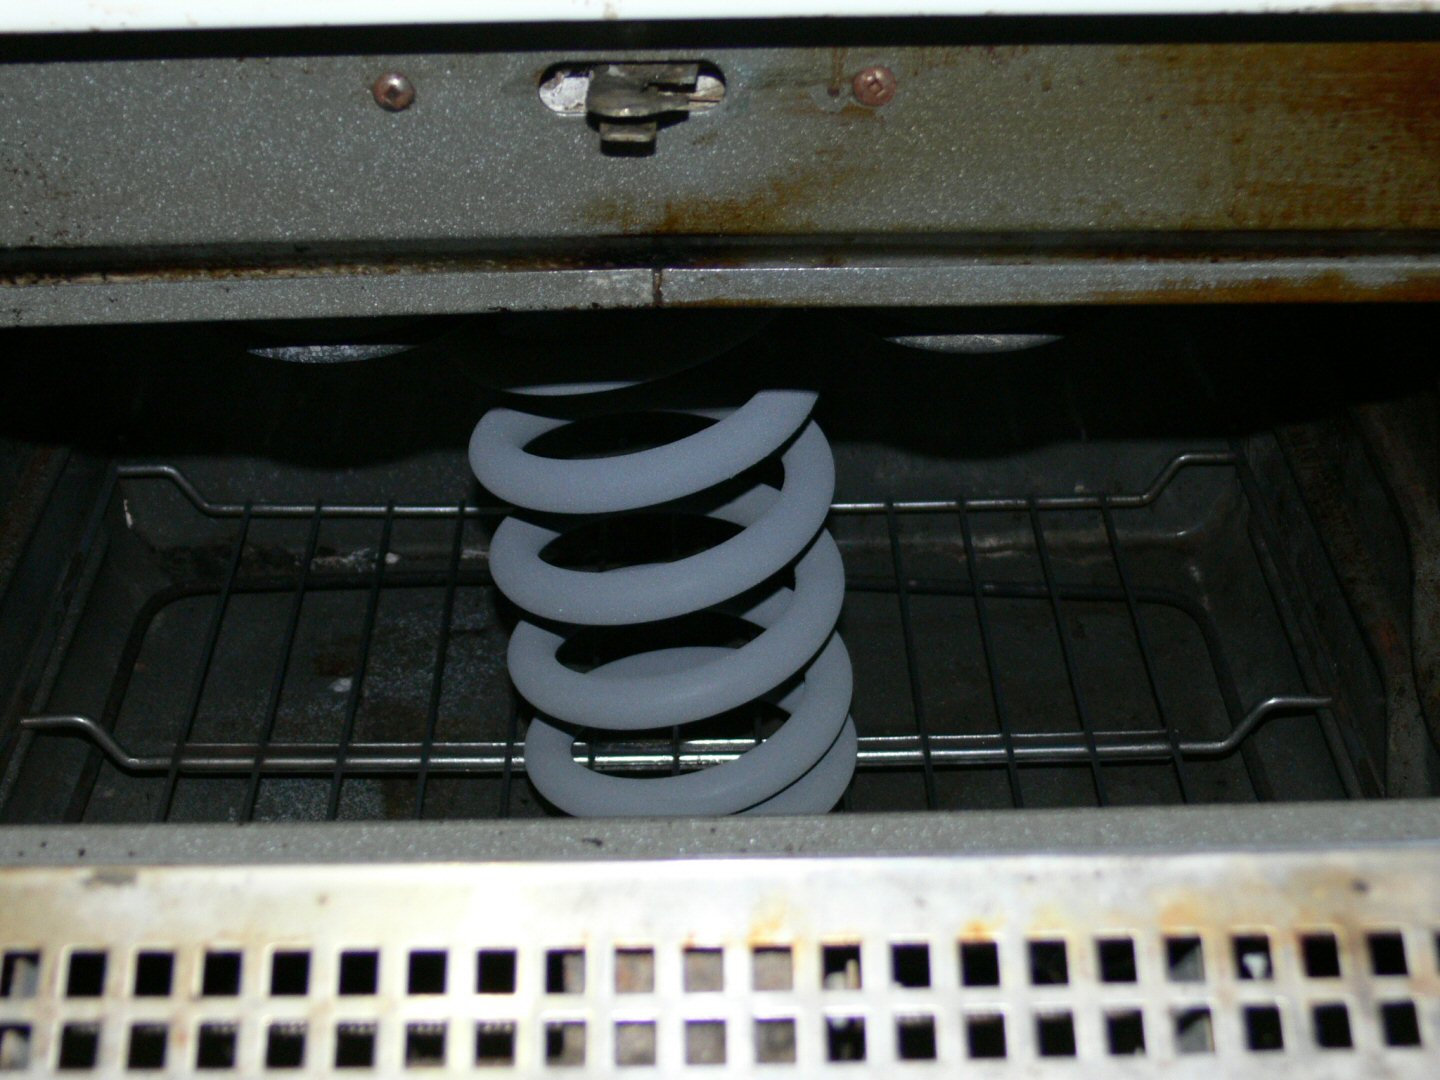
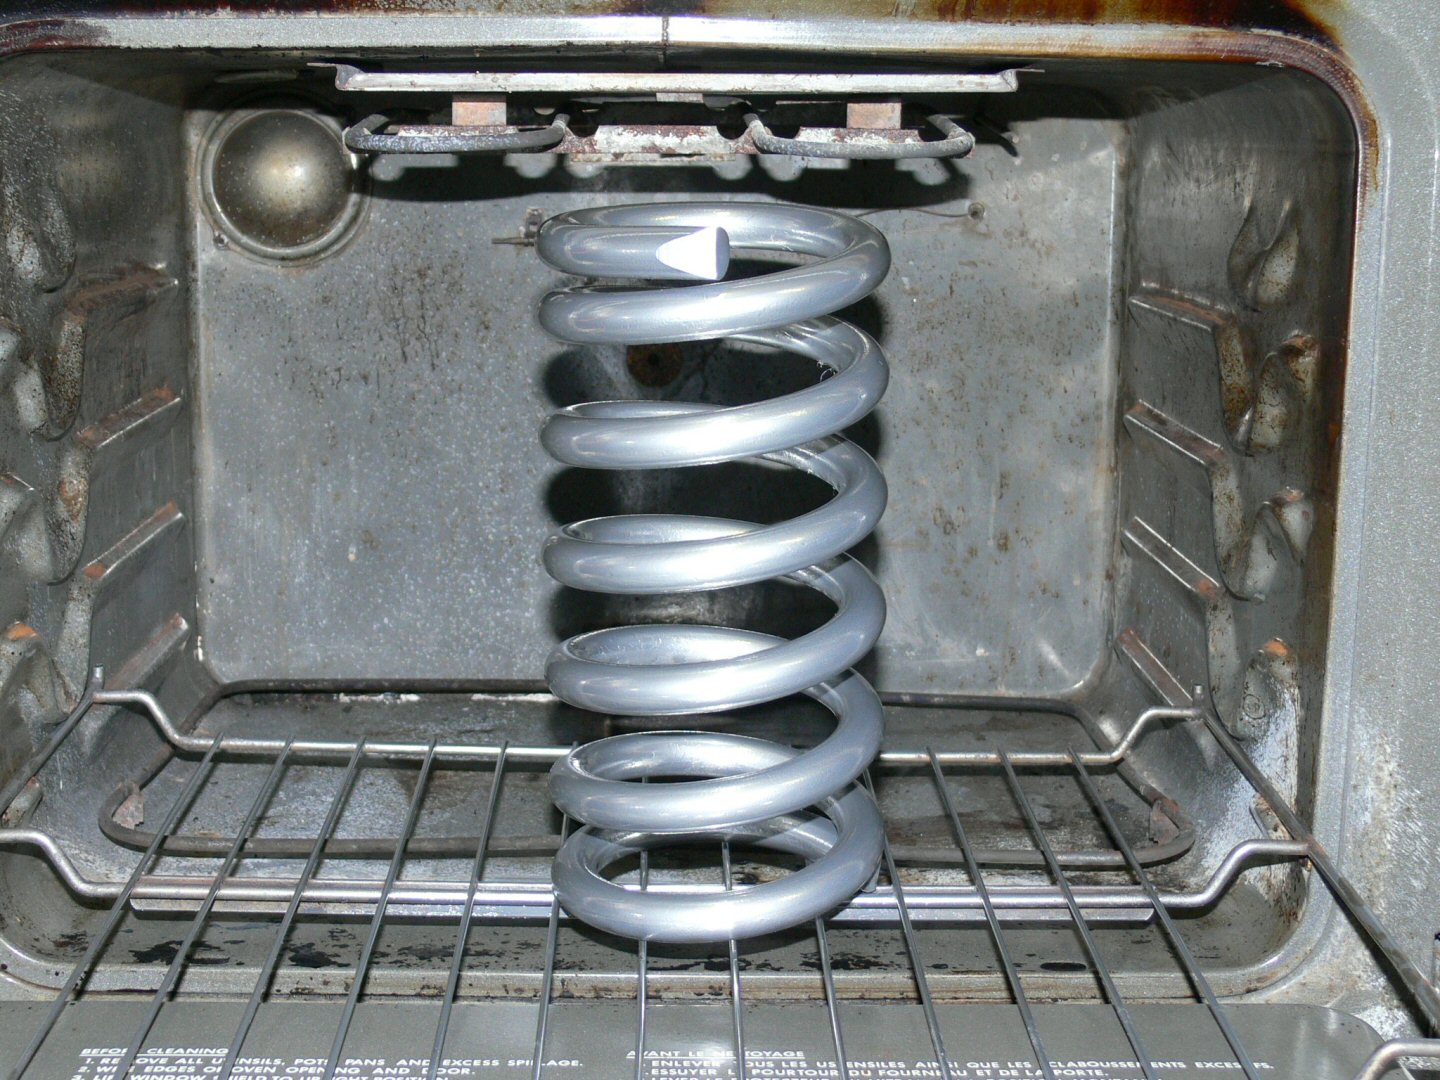
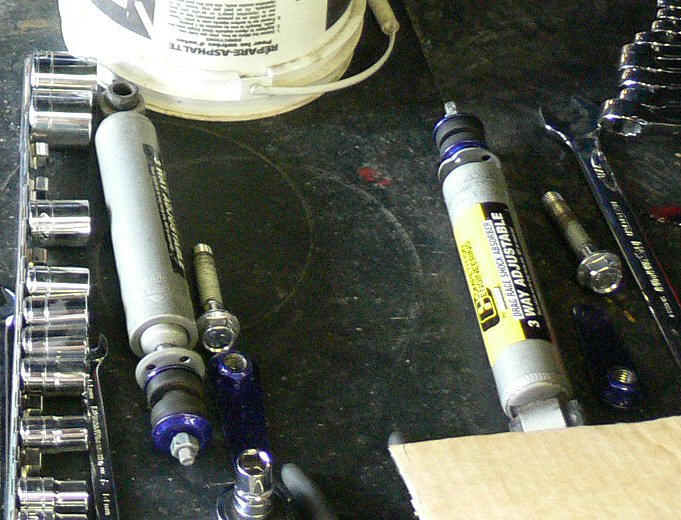
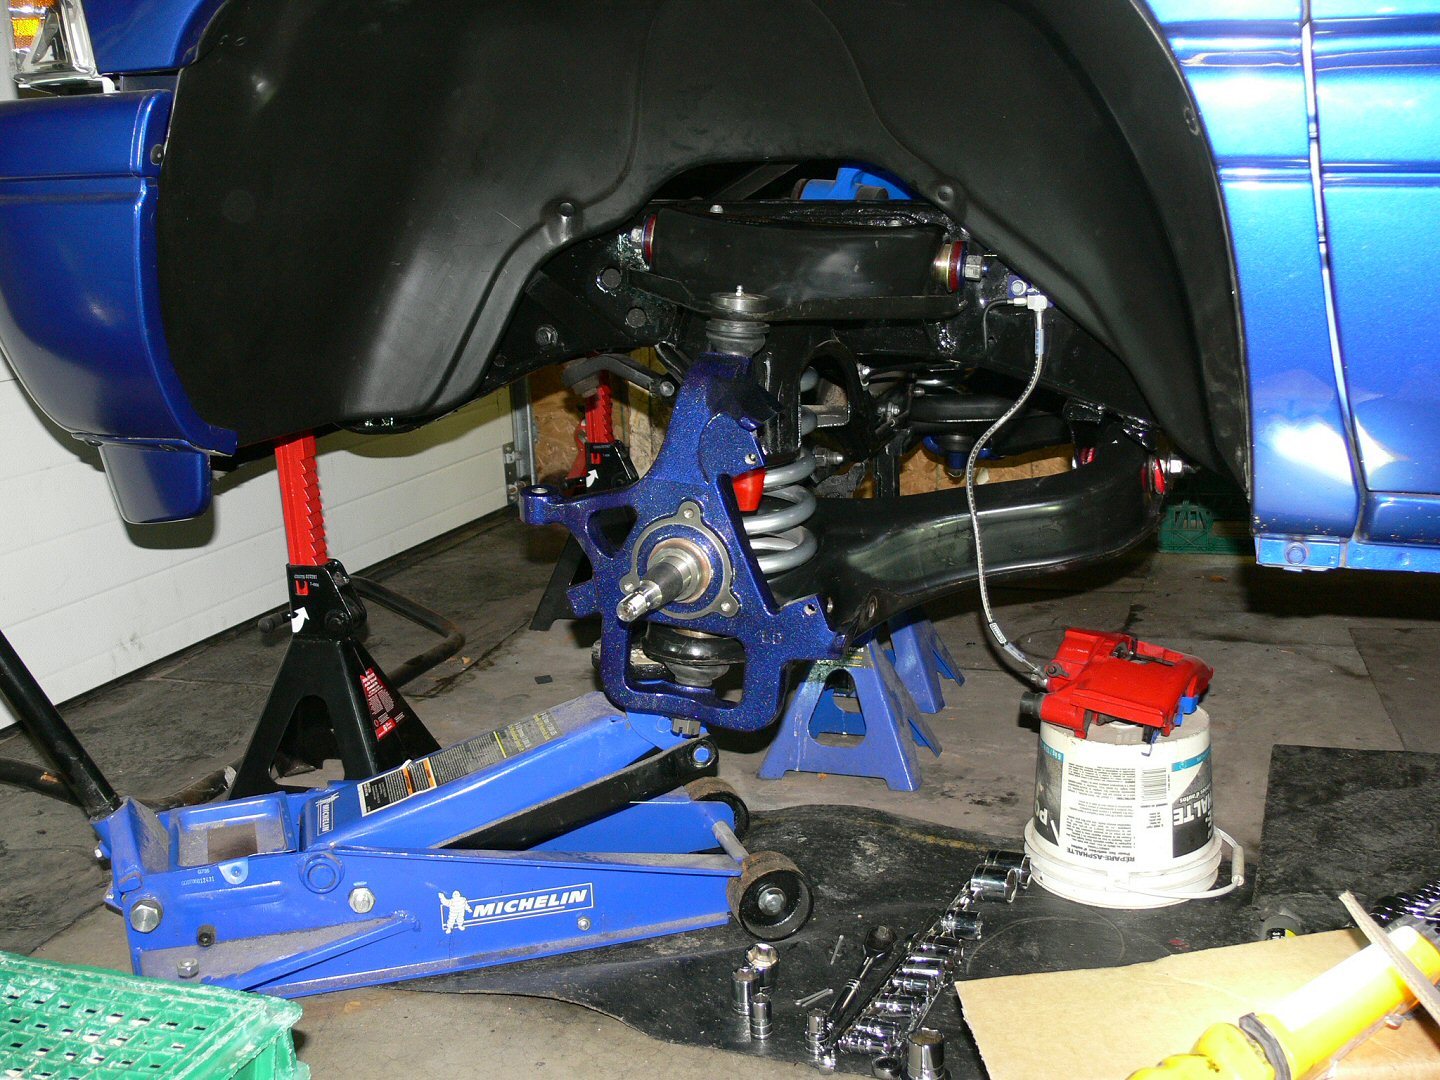
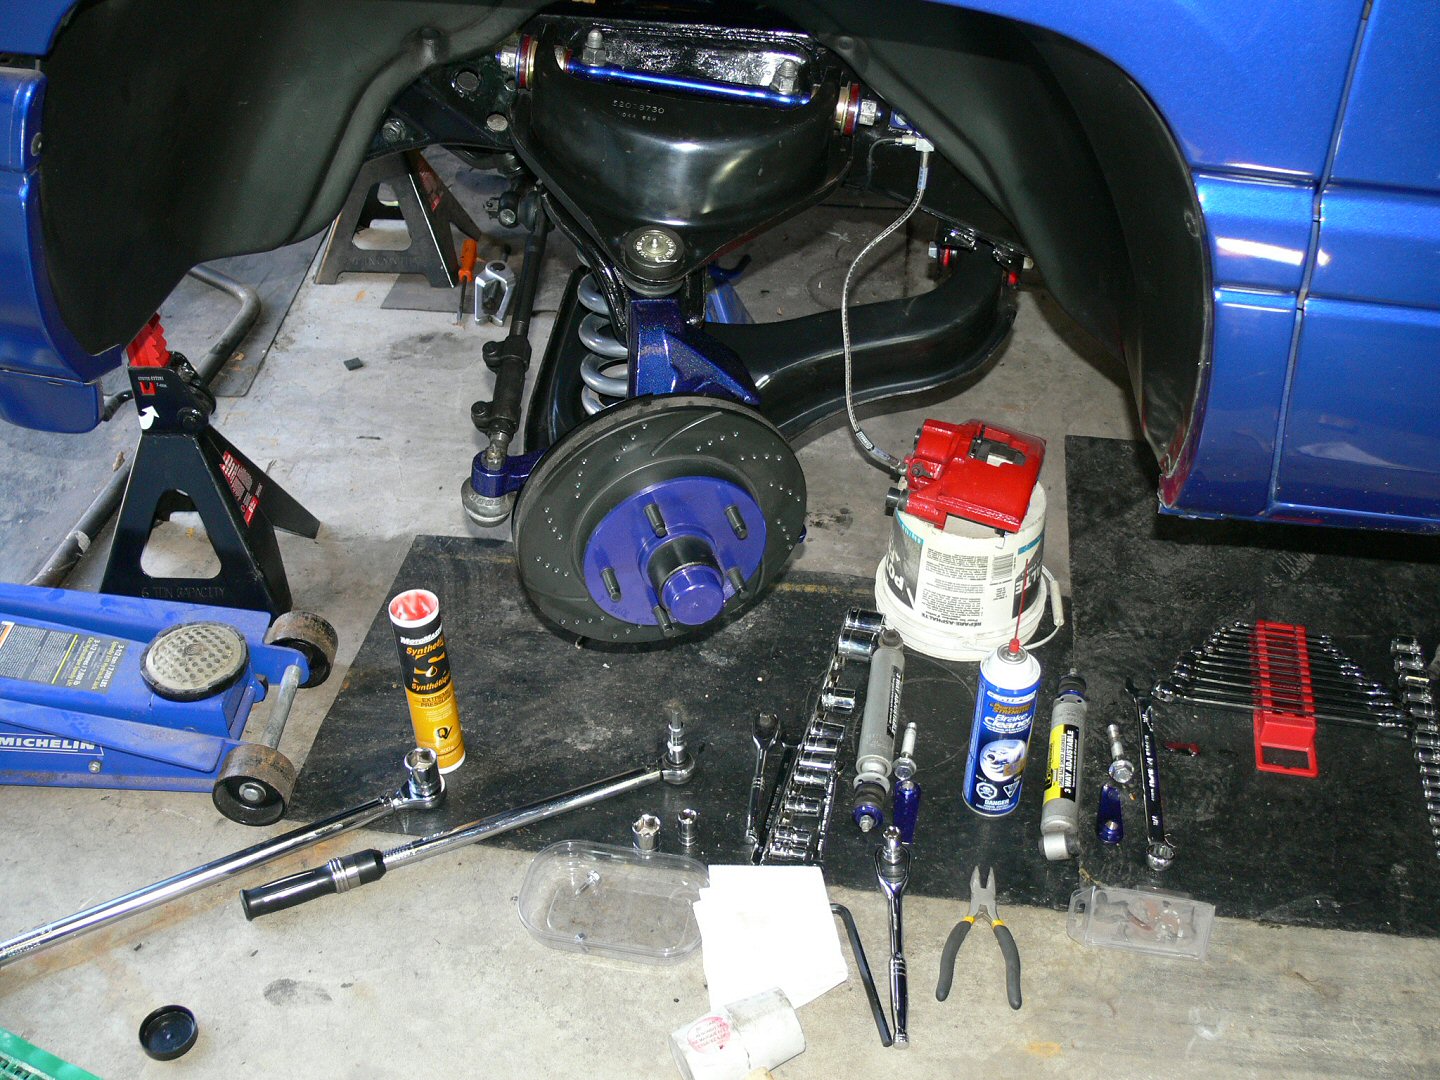
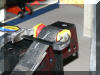
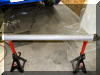
July 1-2, got the c arm bushings in both the upper & lower arms. Oh & I painted the garage door I should of obviously painted years ago lmao. I spent about 4hrs blasting & wire wheeling all the coating off my drivers side Belltech spring. Pic of spring below can see one blasted the other I just started with wire wheel first (ugly grey w/rust spots) Not quite done, hope to finish it tomorrow & then put it in the oven for 2hrs before coating it. Going with chrome finish on it.
July 3, finished off prepping the drivers side spring, another 2hrs work on the pass. side & Ill be ready to coat them both. Played with the oven a bit, tweaking element & one of the racks so I can get the spring in. Real tight fit & be a balancing act, as long as I don't drop it be fine LOL. Wire wheeled all the lower c arm bolts, coated them with reflective chrome powder. Installed upper/lower arms on drivers side. Want to coat them but the lower arms are too big for the oven. They don't look too bad & didn't feel like removing the new bjoints or making an extension for the oven..
July 4-5, cleaned up the garage again & reorganized things, bit tight with the new compressor & stove. Cleaned up the inside of the Procharger tb hat. Finished prepping both springs & coated them with chrome pwdrct, turned out great. End of last summer when my compressor died I had redone the Duplicolor blue on the spindles. Now that I have a real compressor & bigger oven I already want to strip the spindle down & blast, sand & coat it with my Indy blue. Doesn't match close enough for my liking, probably get some paint stripper today to let them soak. (flash makes it look farther off than it actually is btw)

July 6, first major heat wave of the year (last few days), with the humidex it has been between 100-112*. (Canada/not use to this heat) Compressor & oven not helping any in that respect so work has really slowed to a crawl at best lol. Got the passenger side control arms back on, the lower was a real PITA cause the ES bushing & metal sleeve kept wanting to pop out before I could get it in position. Haven't pulled the rotors/dust shields off the spindles yet, will do that later today & get the paint stripping started.
July 7, still plugging away on the first spindle, stripped the paint off, probably need about one hour more blasting it. Have to dump the media(80grit glassbead) in the blast cabinet, its done (going to dust). Should go a bit faster with fresh media & eliminate a lot of the dust.
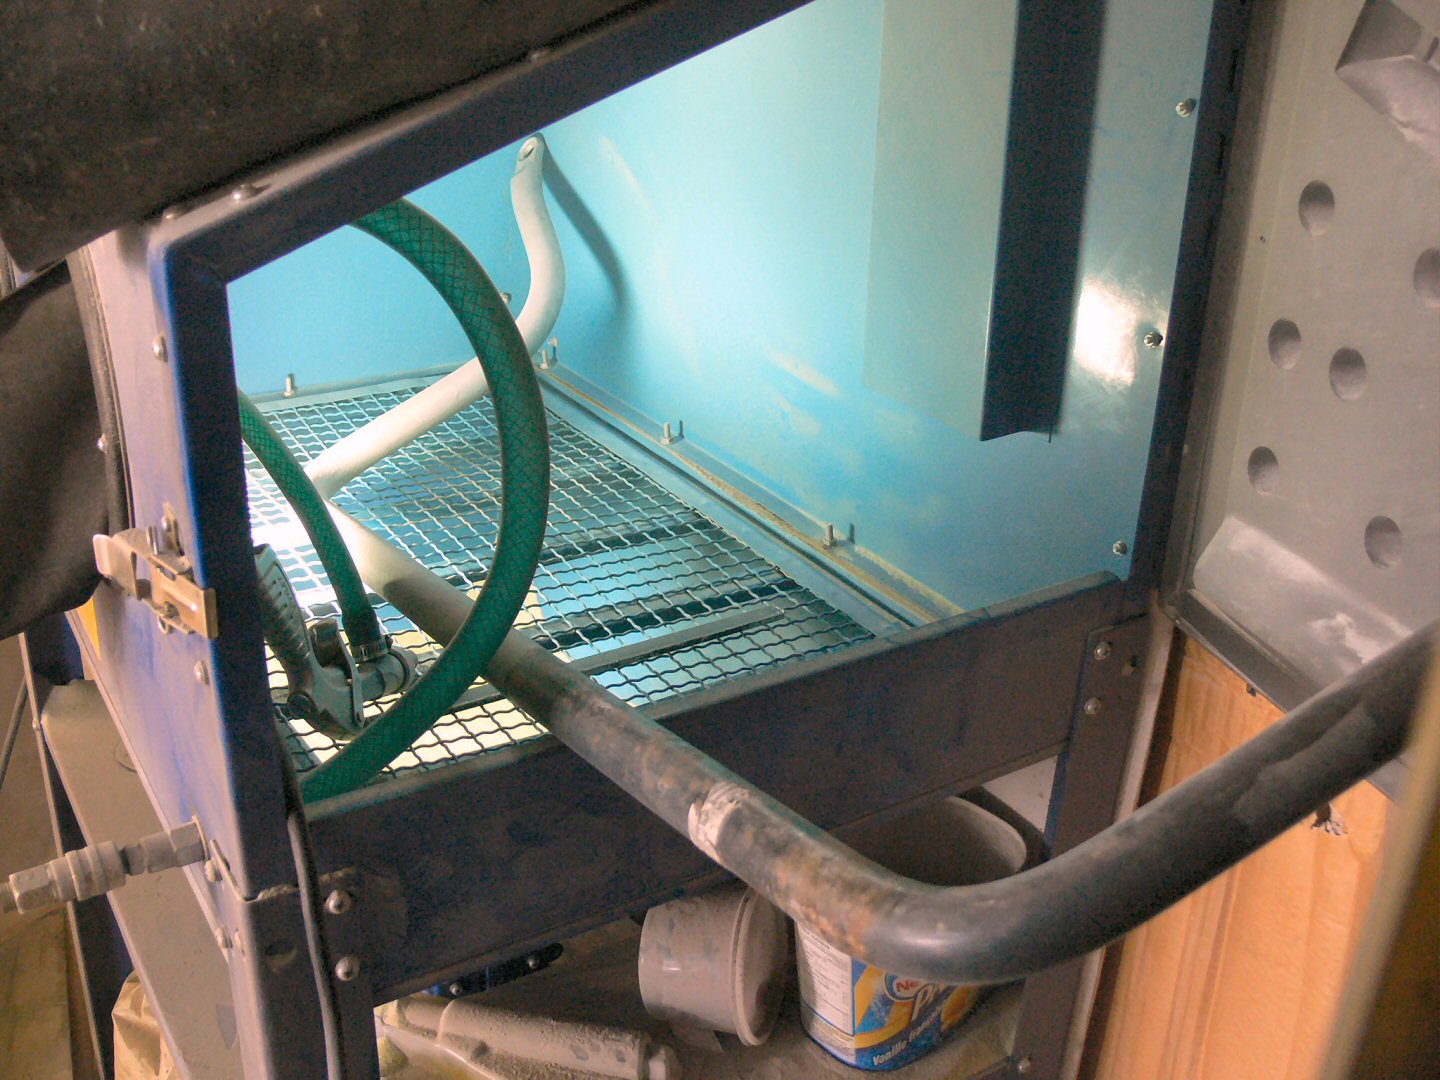
July 8, didnt get anything done today. Power was off most of the day till about 6pm. Went out did some running around (Princess Auto). Got something I can use for feet for the compressor, few air fittings so I wont keep blowing the line off the blast gun as well as another 150lbs of glass bead media for the cabinet. Replaced the mylar film inside the cabinet (protects the window) as well. Also got 3/8" steel rod to use for hanging the spindles (one at a time) inside the oven.
July 9, Blasted the last of the first spindle, but too damp out (90-100% humidity) to powder something of this size & complexity (shape). Stripped the paint off the 2nd spindle. Lifted the compressor with some ratchet straps & got the feet on it. Will work for now but need to find some 3.5" washers to go on top of the rubber feet. Also levelled the oven & got a small piece of plywood up on the wall along with a shelf.
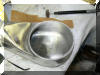
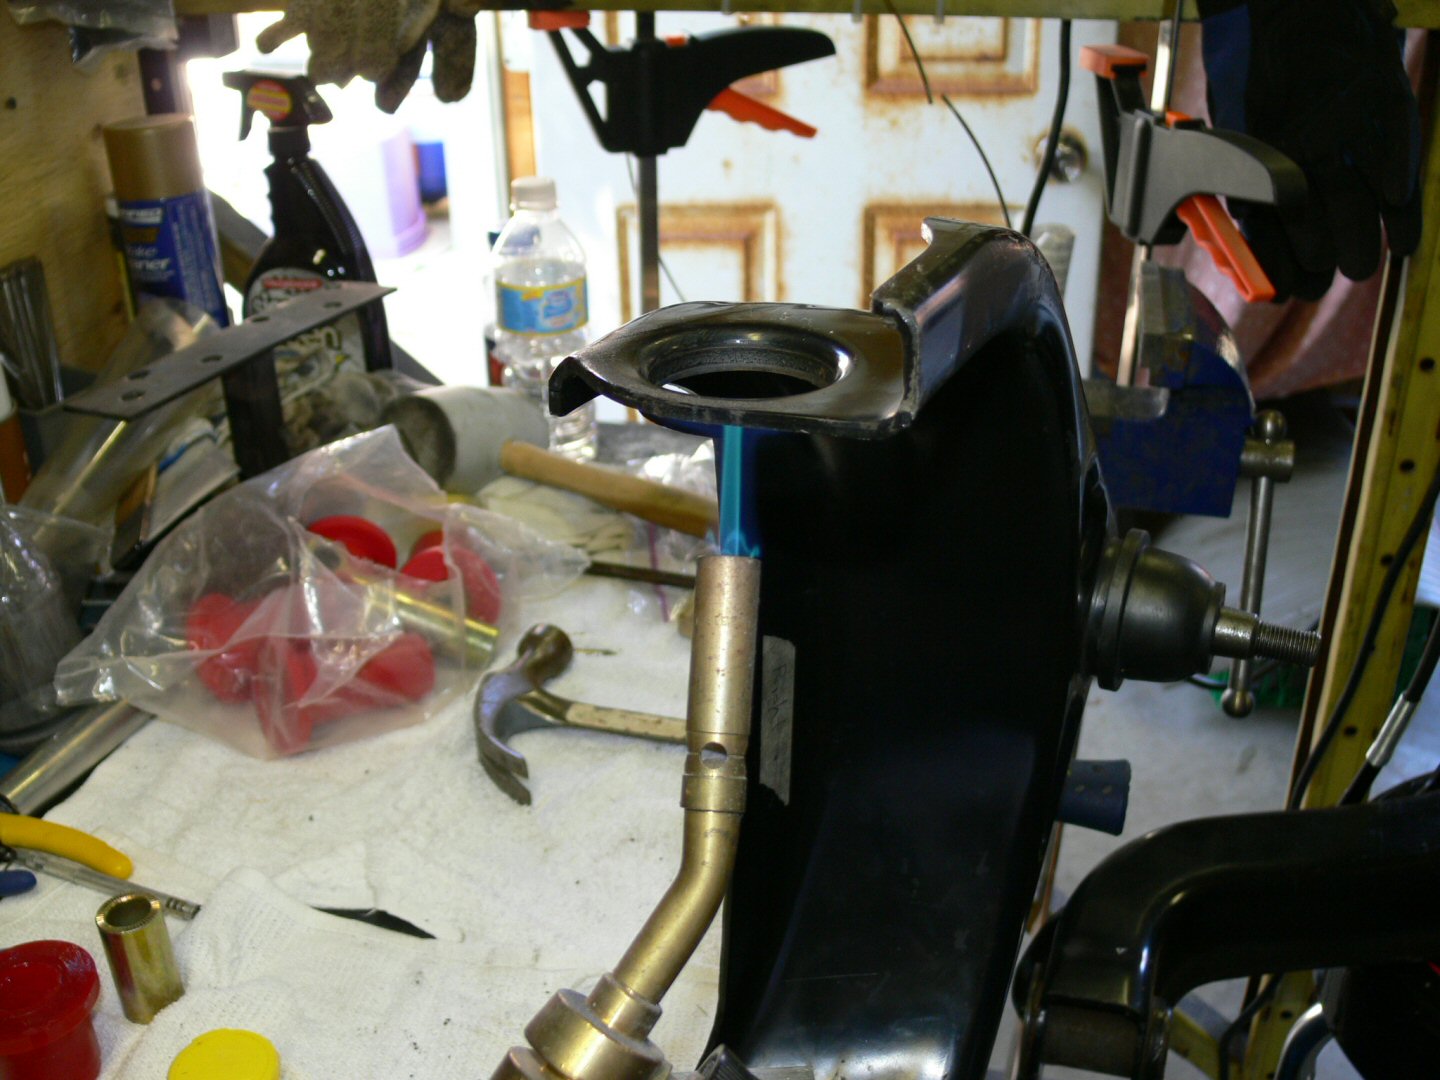
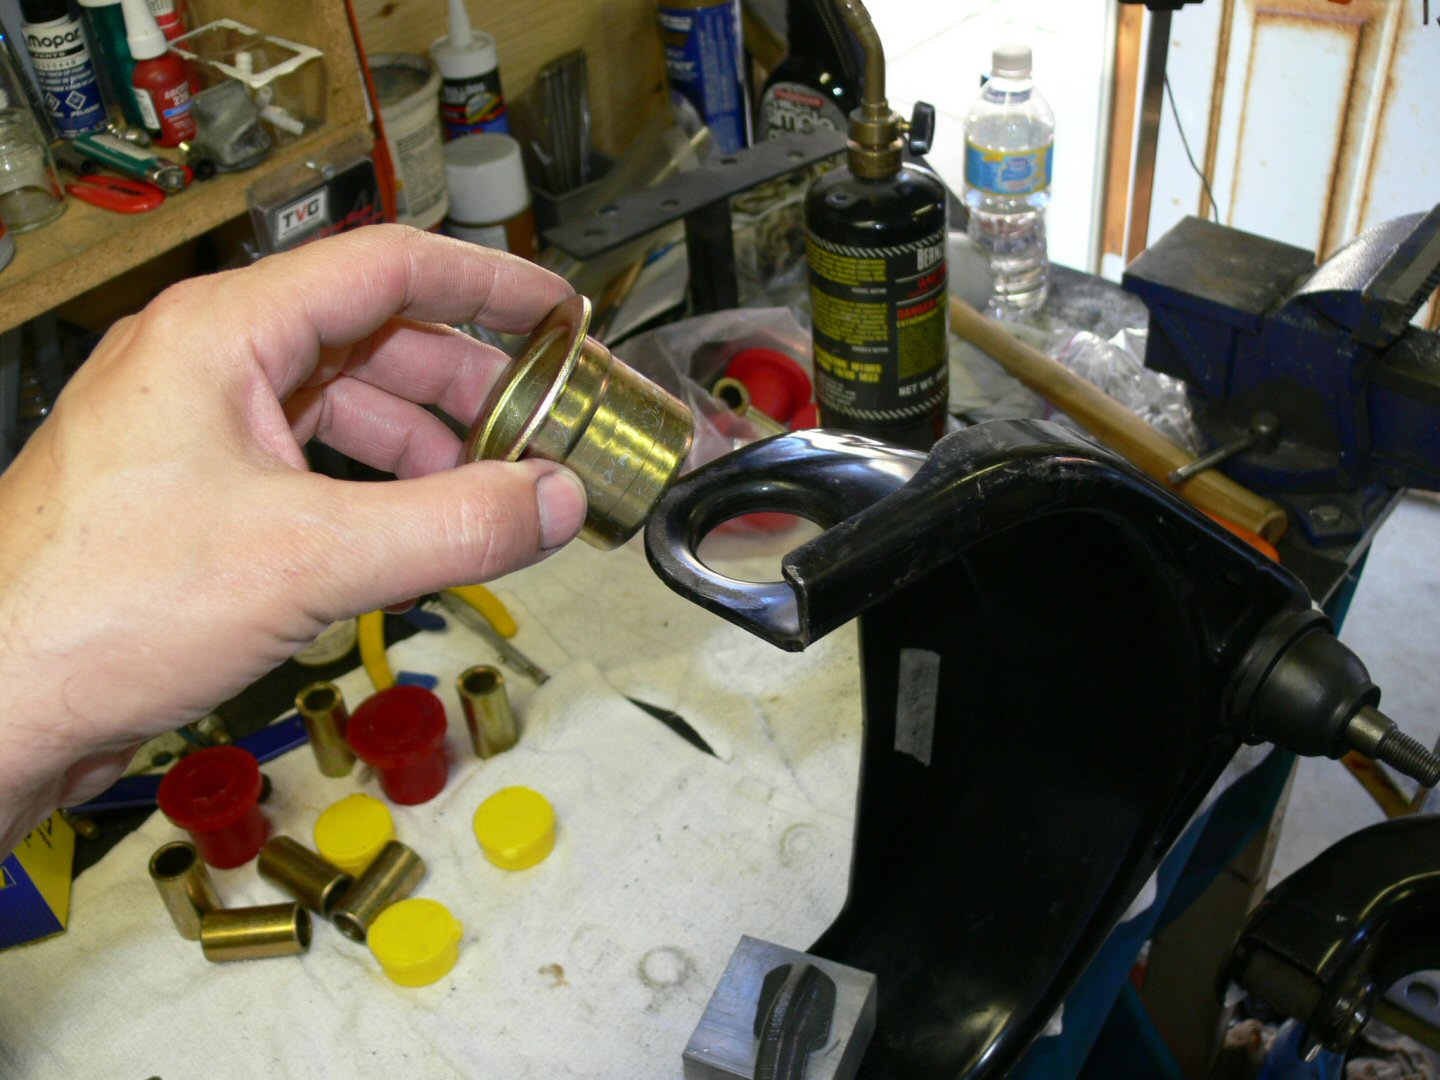
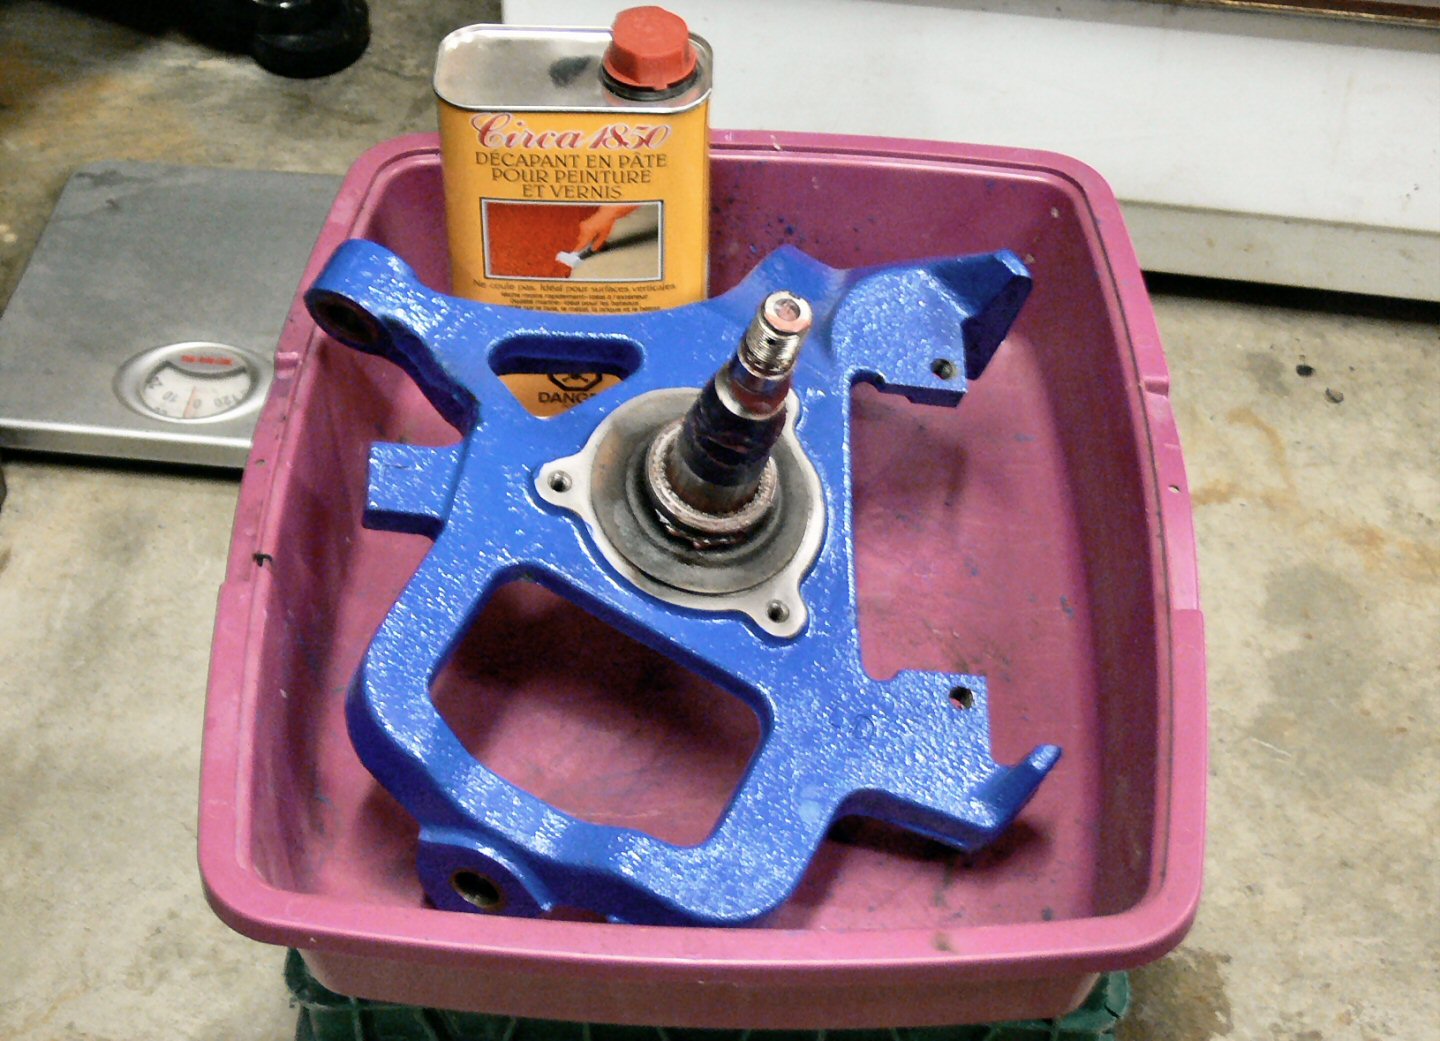
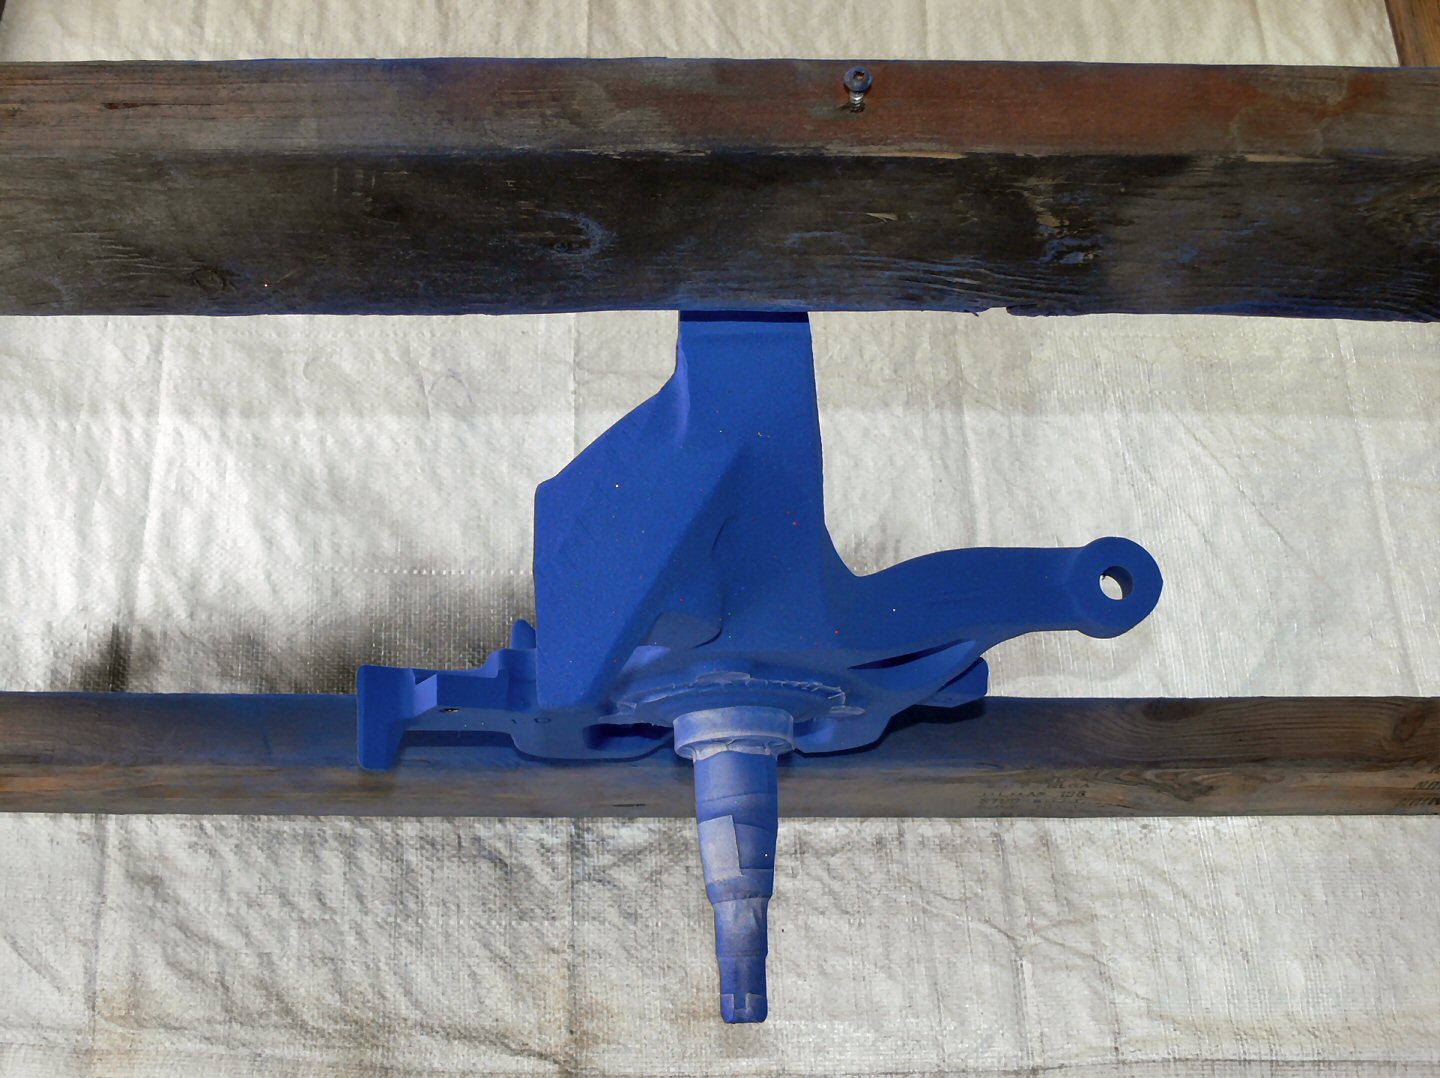
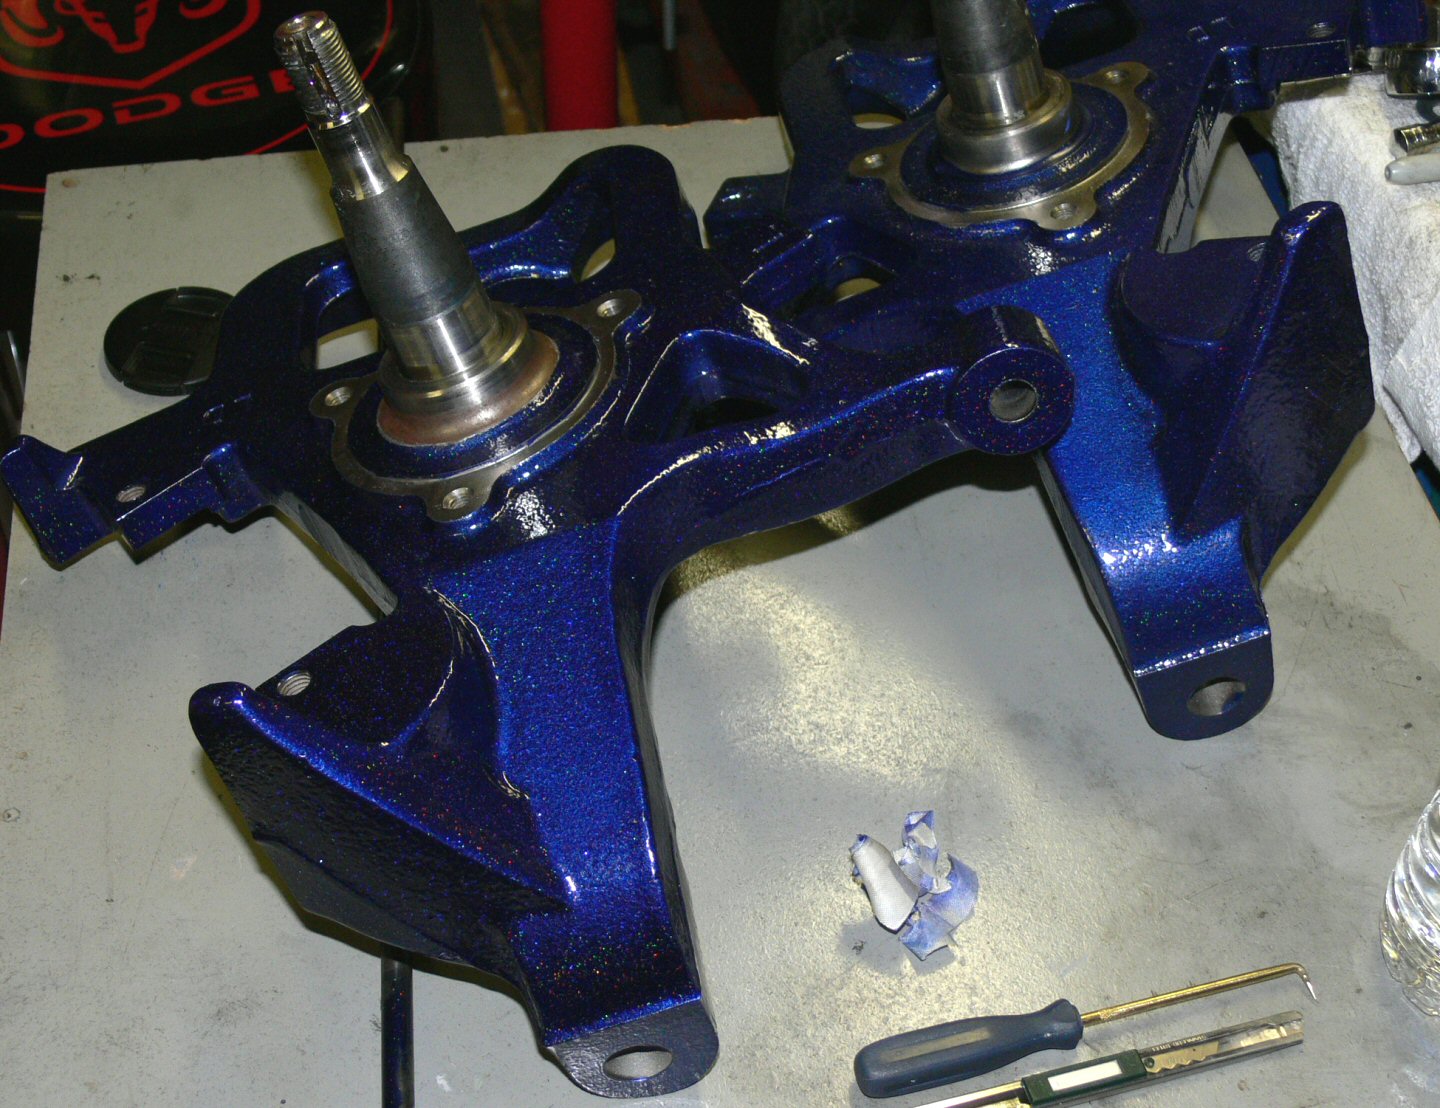
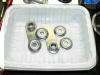
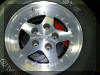
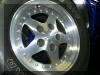
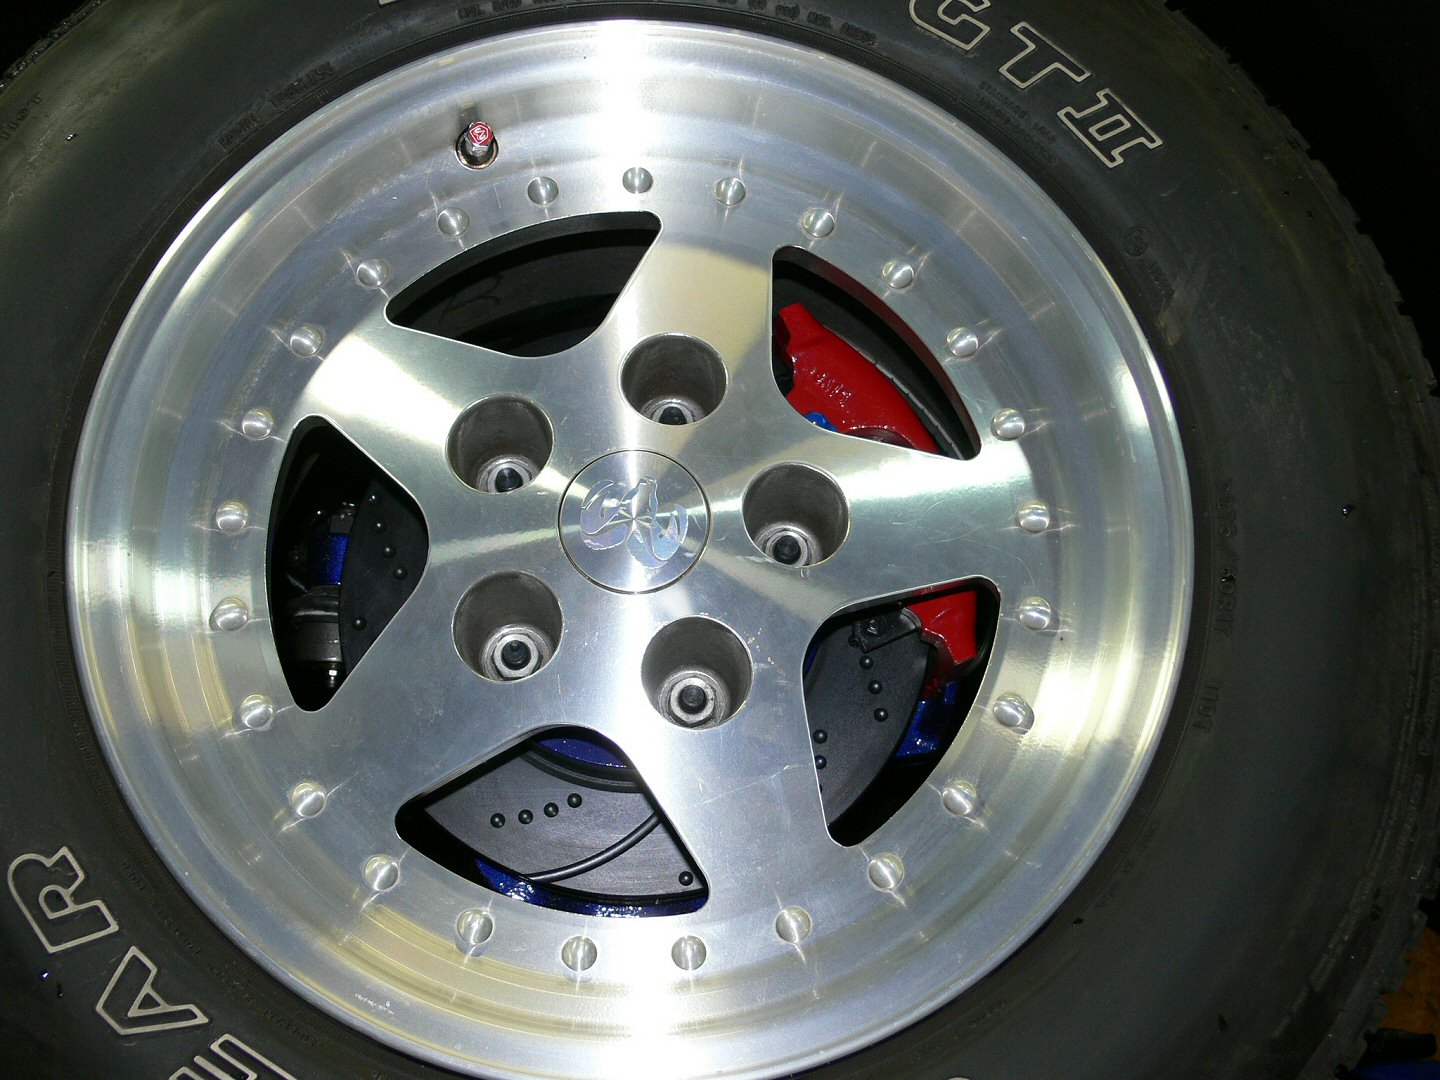
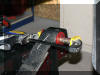
July 10, great weather, blasted the pass. spindle, wiire wheeled it, cleaned it, taped & pwdrct it. Drivers side spindle I stripped, grinded/sanded & blasted. Will need another 1hr blasting tomorrow & then coat it as well. Pics of both spindles at various stages below.
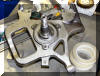
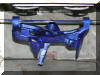
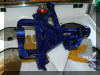
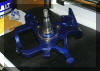
July 11, drivers spindle needed a bit more work than I thought. Almost 2hrs of blasting, another hour with the wire wheel (8" & 4"), then cleaning & taping. Spent another hour mixing powder & prepping everything. Spindle turned out great. Made sure I got the bearing races completely covered. The passenger side spindle I didnt do as good a job tapping it so I spent some time using pwdrct remover. Got 1/2 of it off, will probably go over it again on Tuesday (no time Monday). Can see the difference in the pic below of both spindles together.
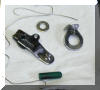
July 15, working on bracket for FAST CEL box to sit on. I cut piece of steel to size with angle grinder, drilled the holes to mount it to the passenger side fender. Bead blasted one side, still need to add holes for hold downs. Going to try using a pair of rubber bungee to hold it in position. Off to pick up some Moog tie rods & sleeves for the steering.
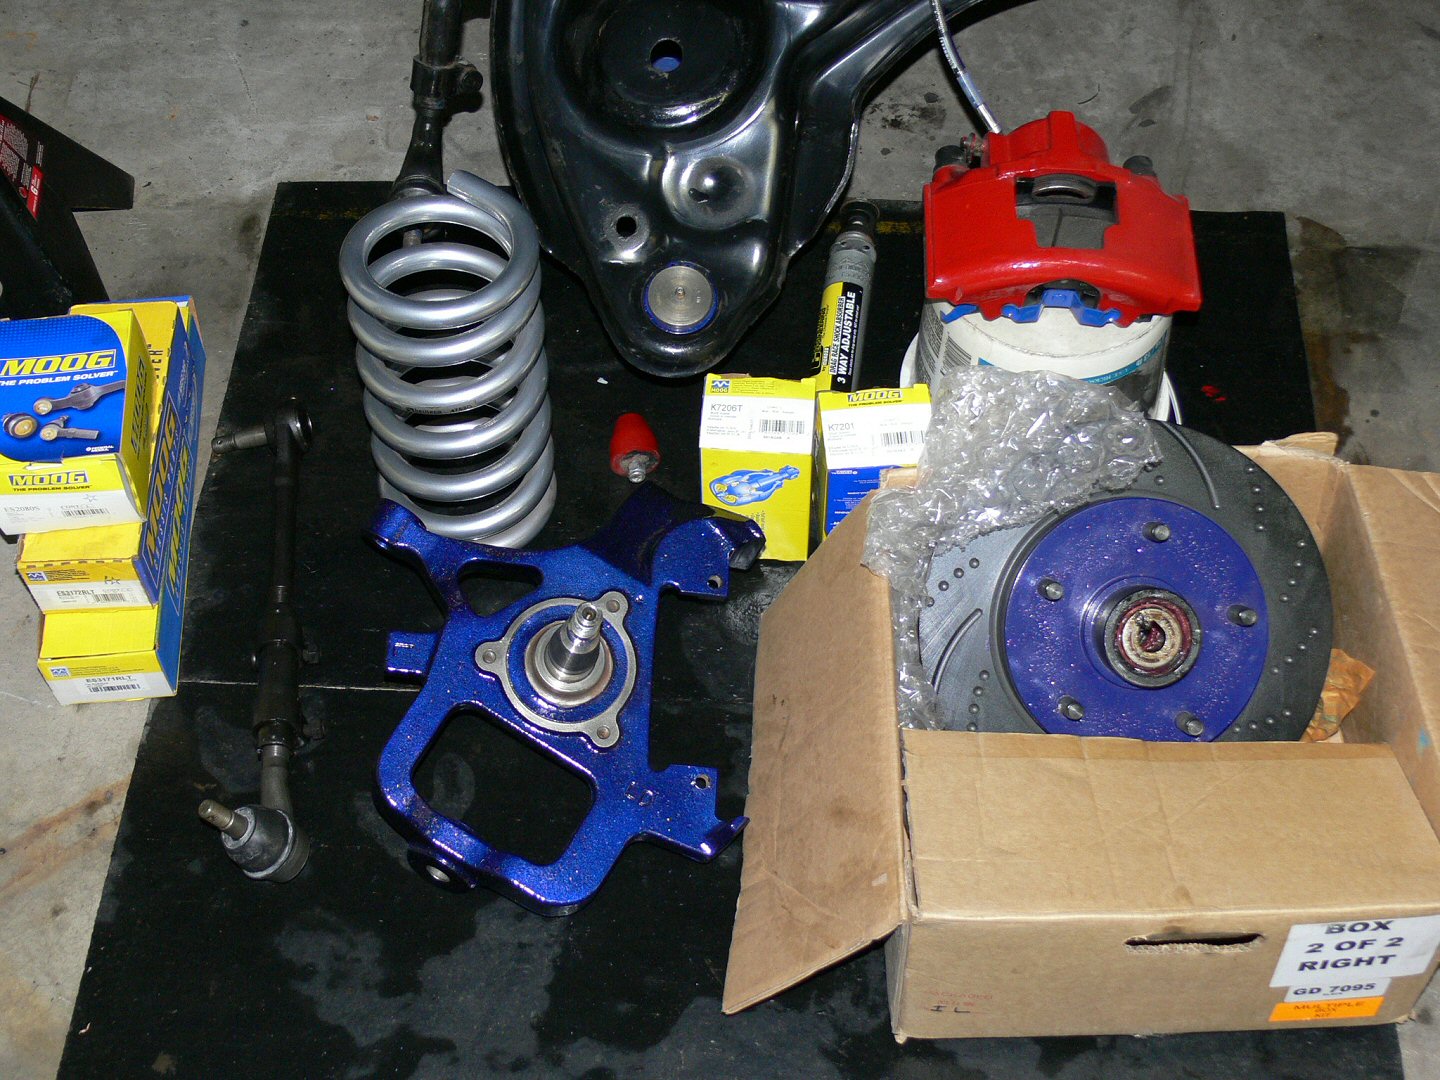
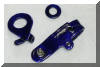
July 18, thought I could pwdrct the tire rod sleeves but don't see any way to do it right. Will swap the oem tie rods for moog rods & sleeves. Have the Moog balljoints as well as Energy Suspensioin poly bushings now. EBC dimpled slotted rotors & Hawk extreme pads & Russel SS lines front & rear.


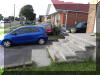
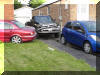
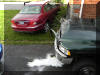
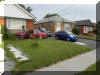
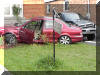
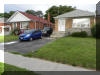
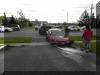
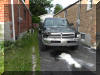
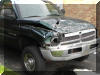
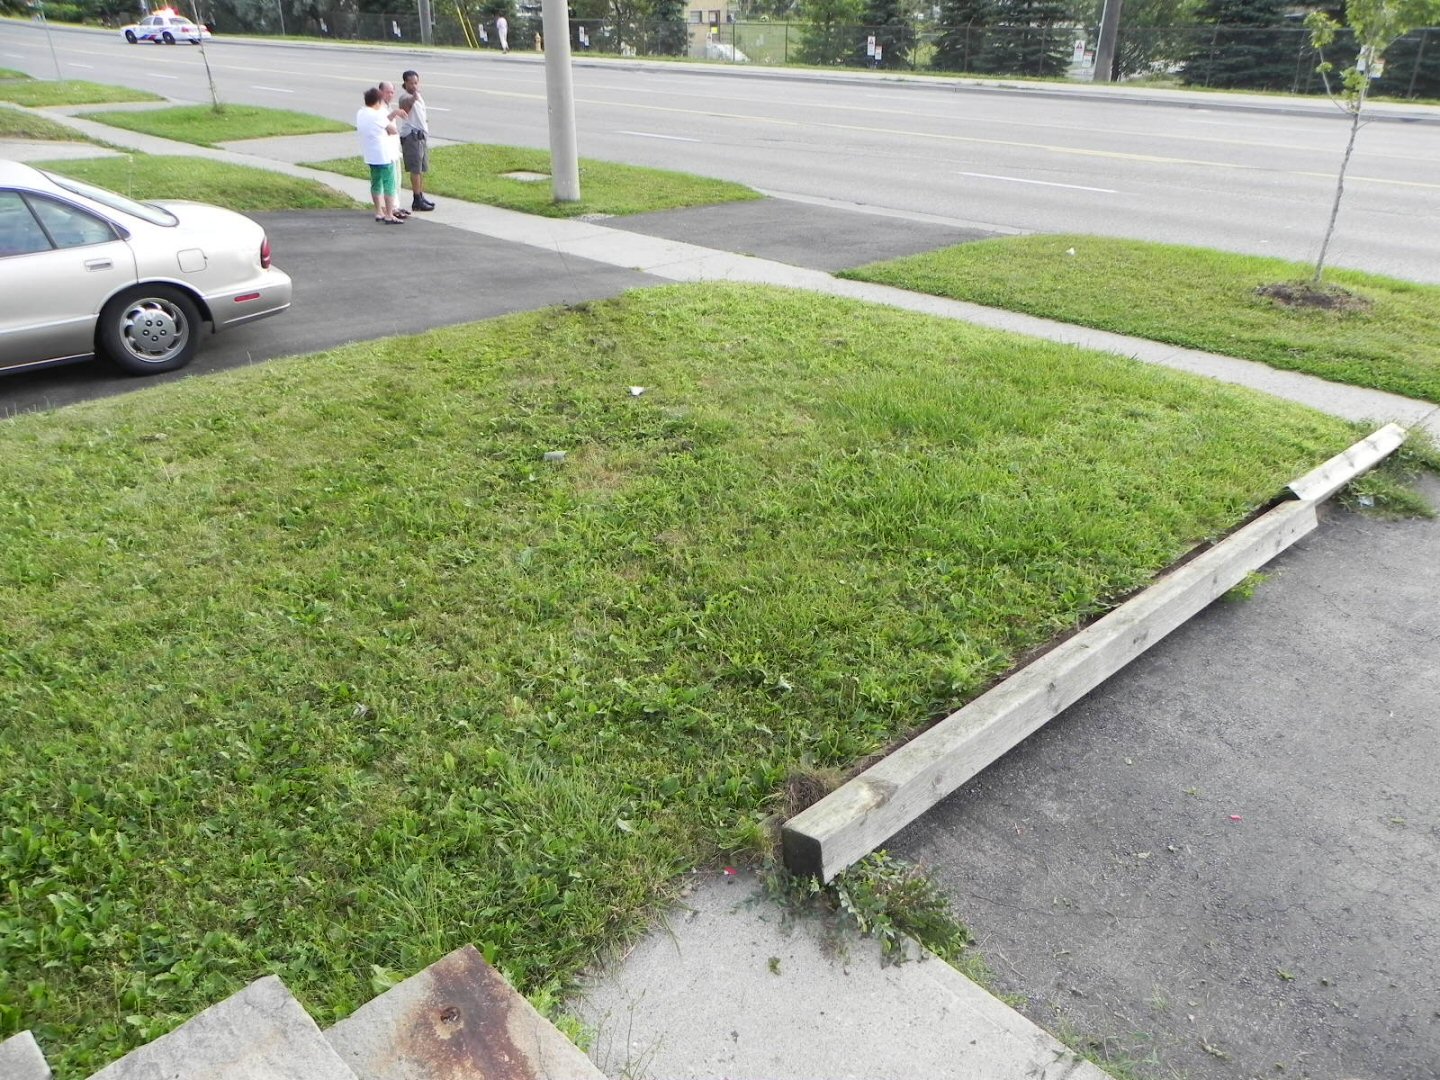
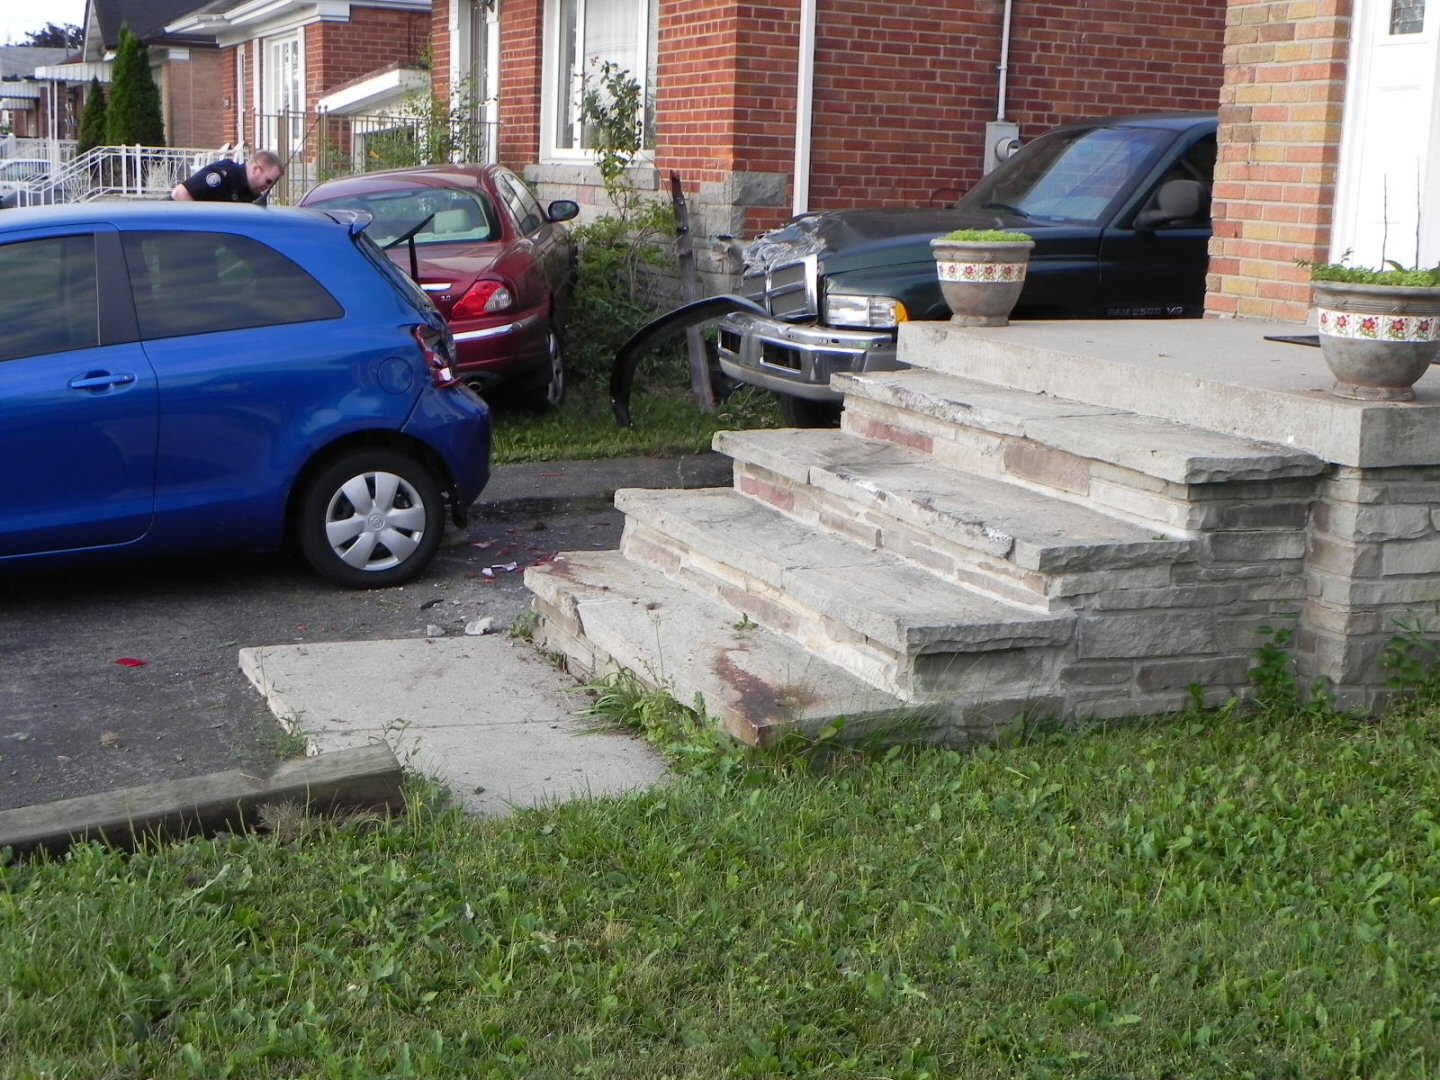
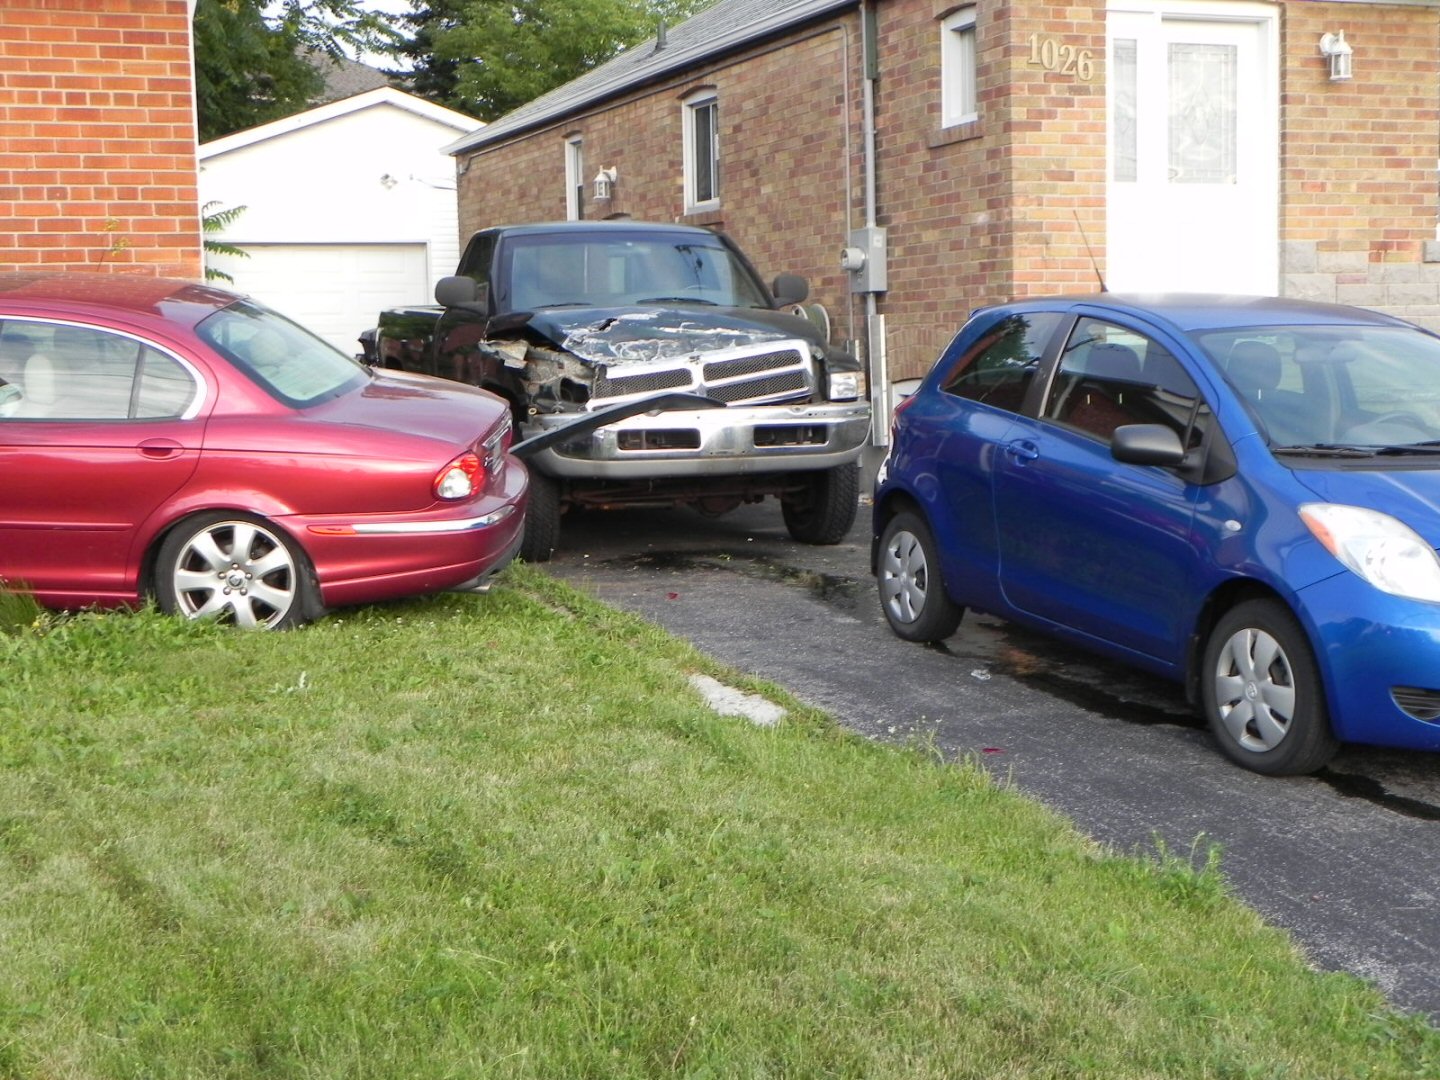
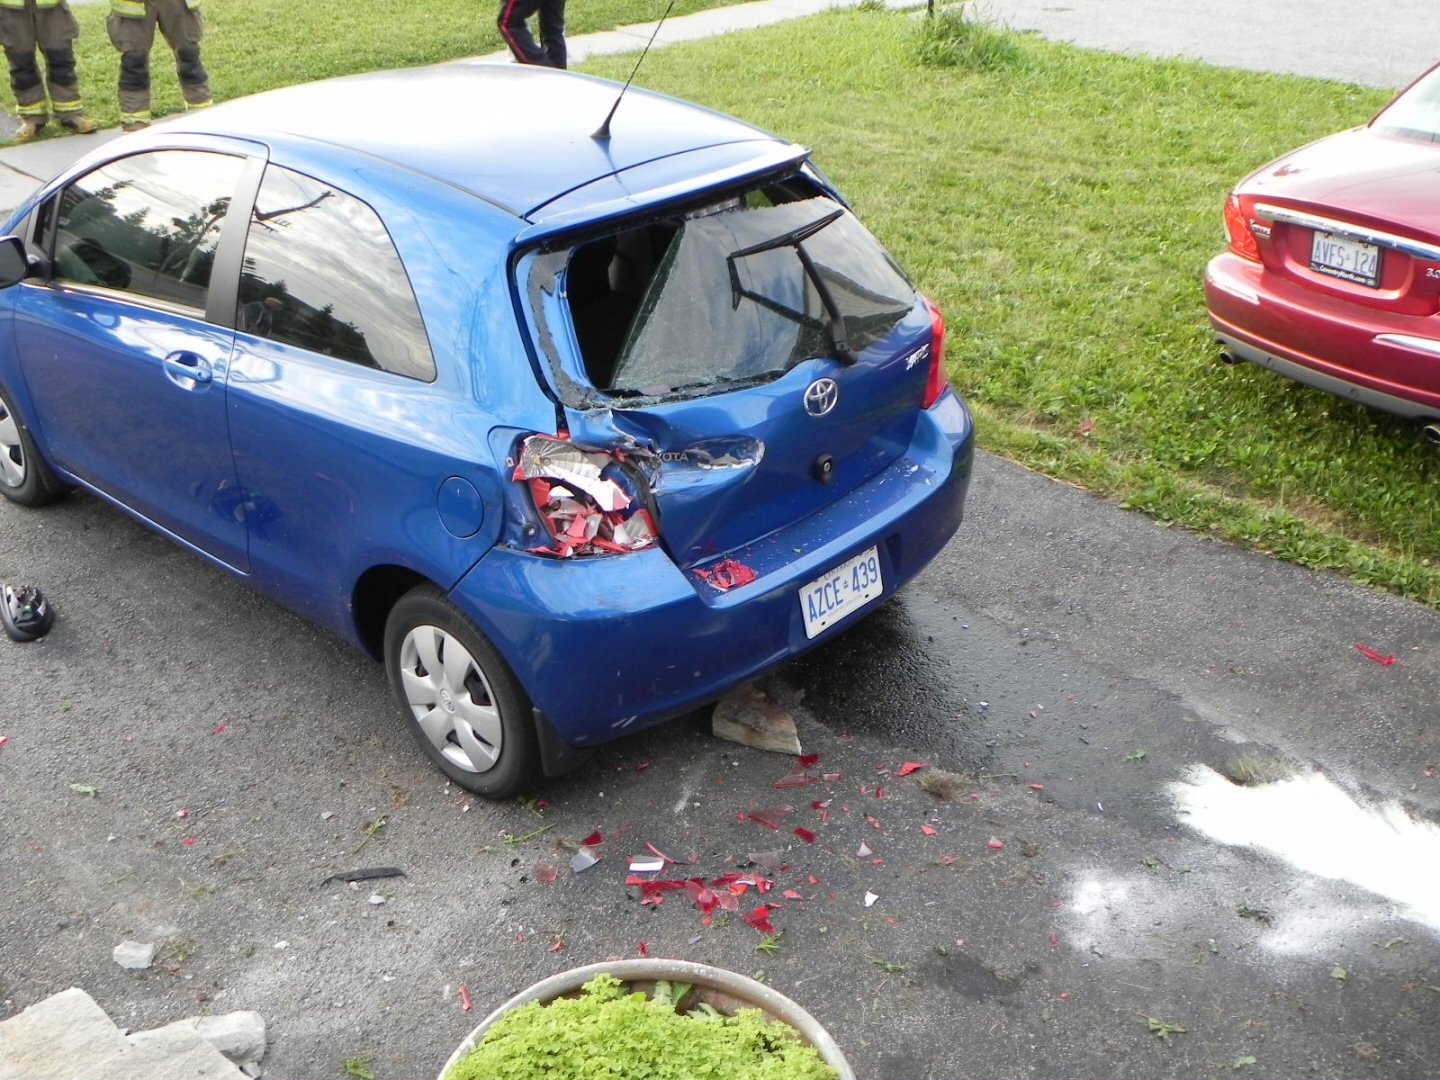
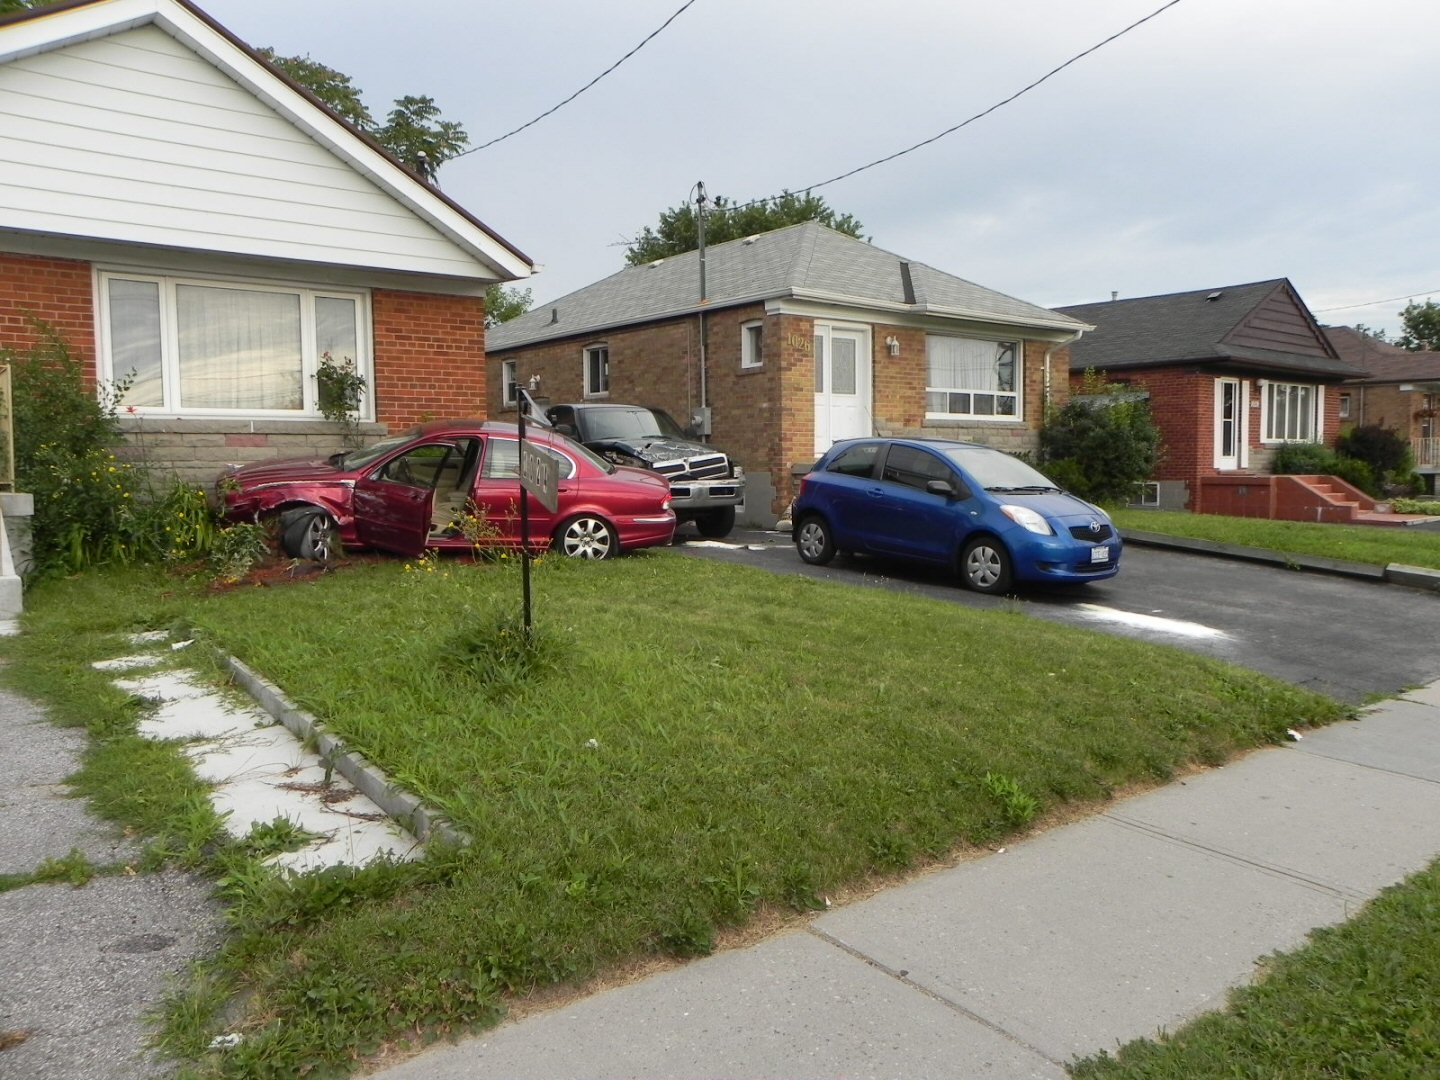
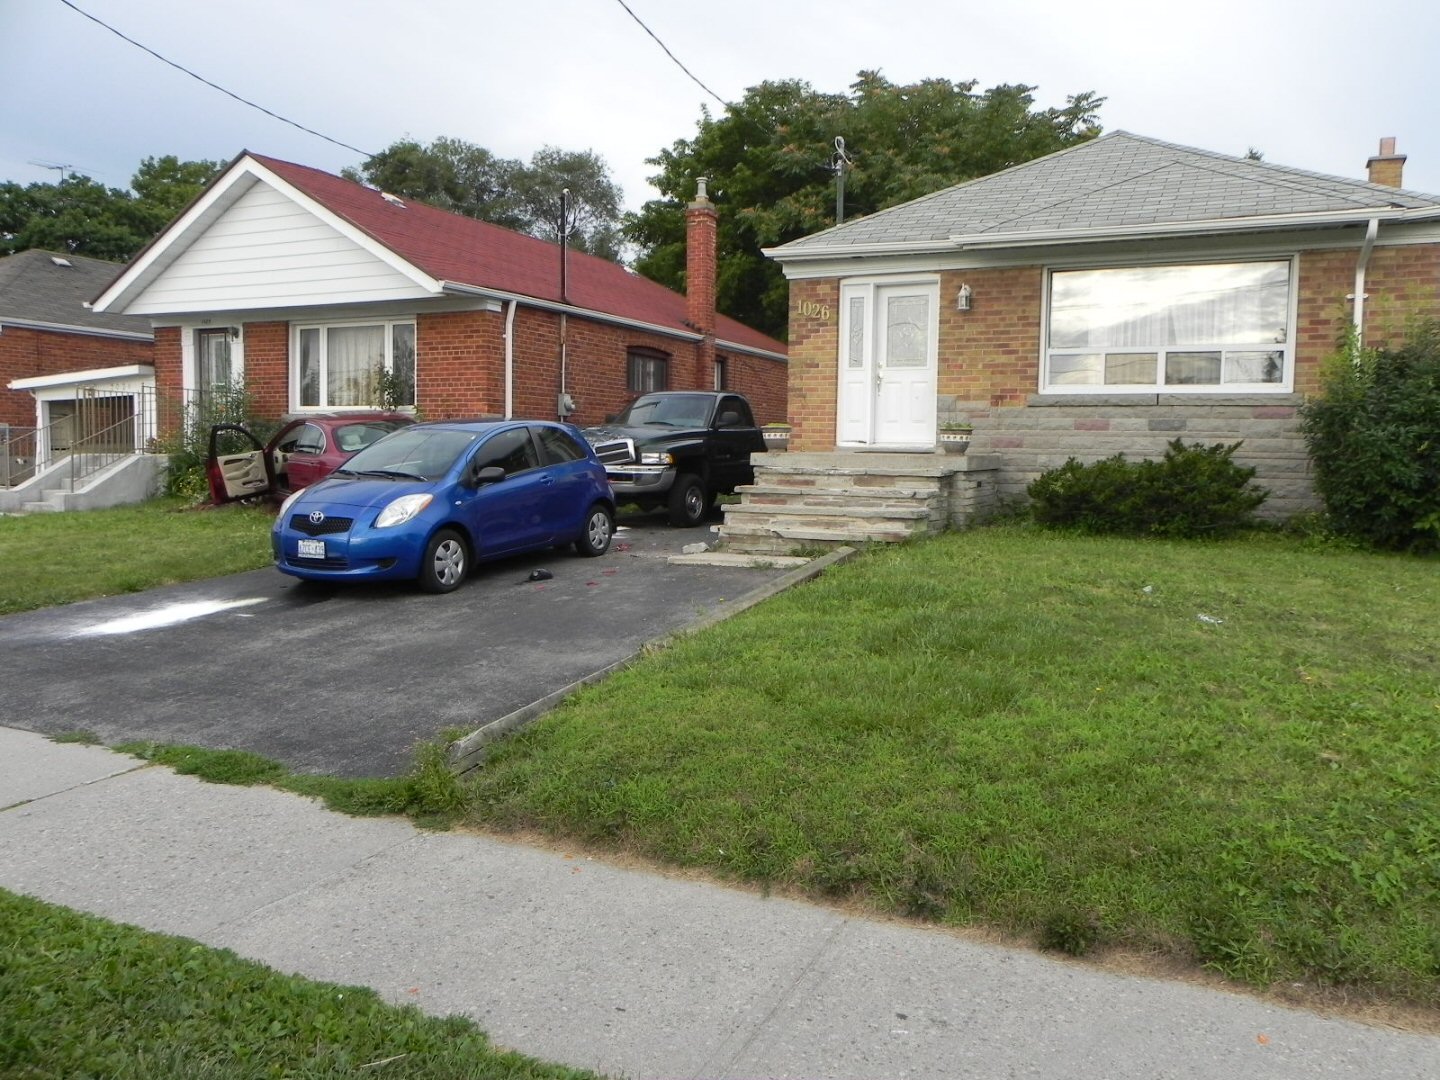
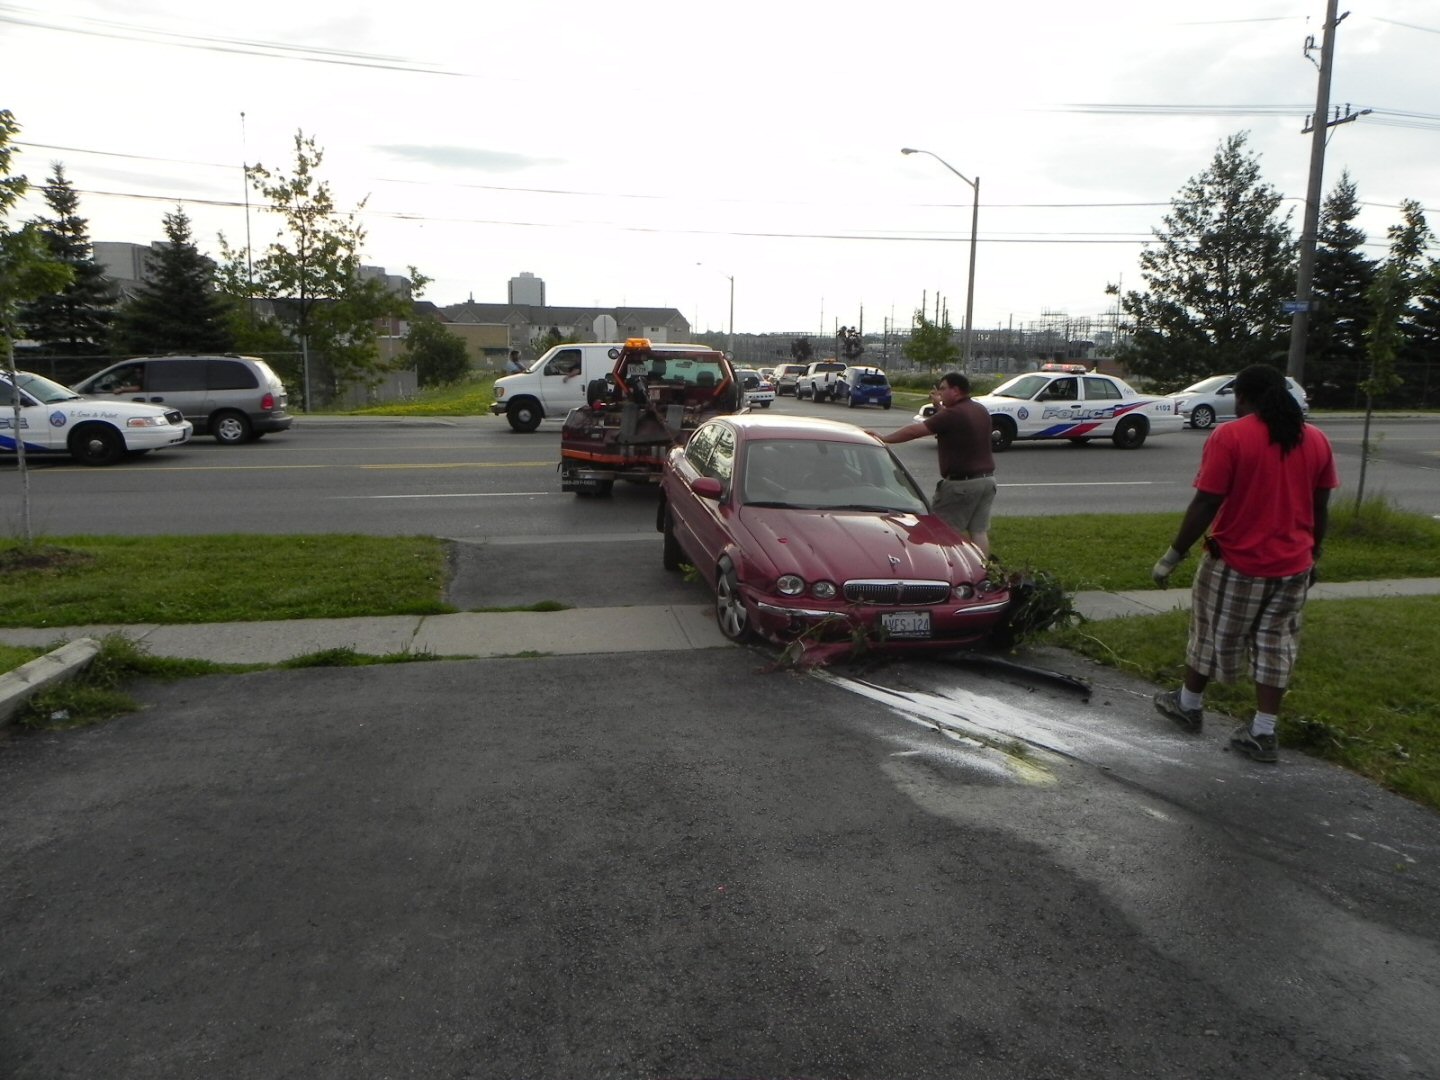
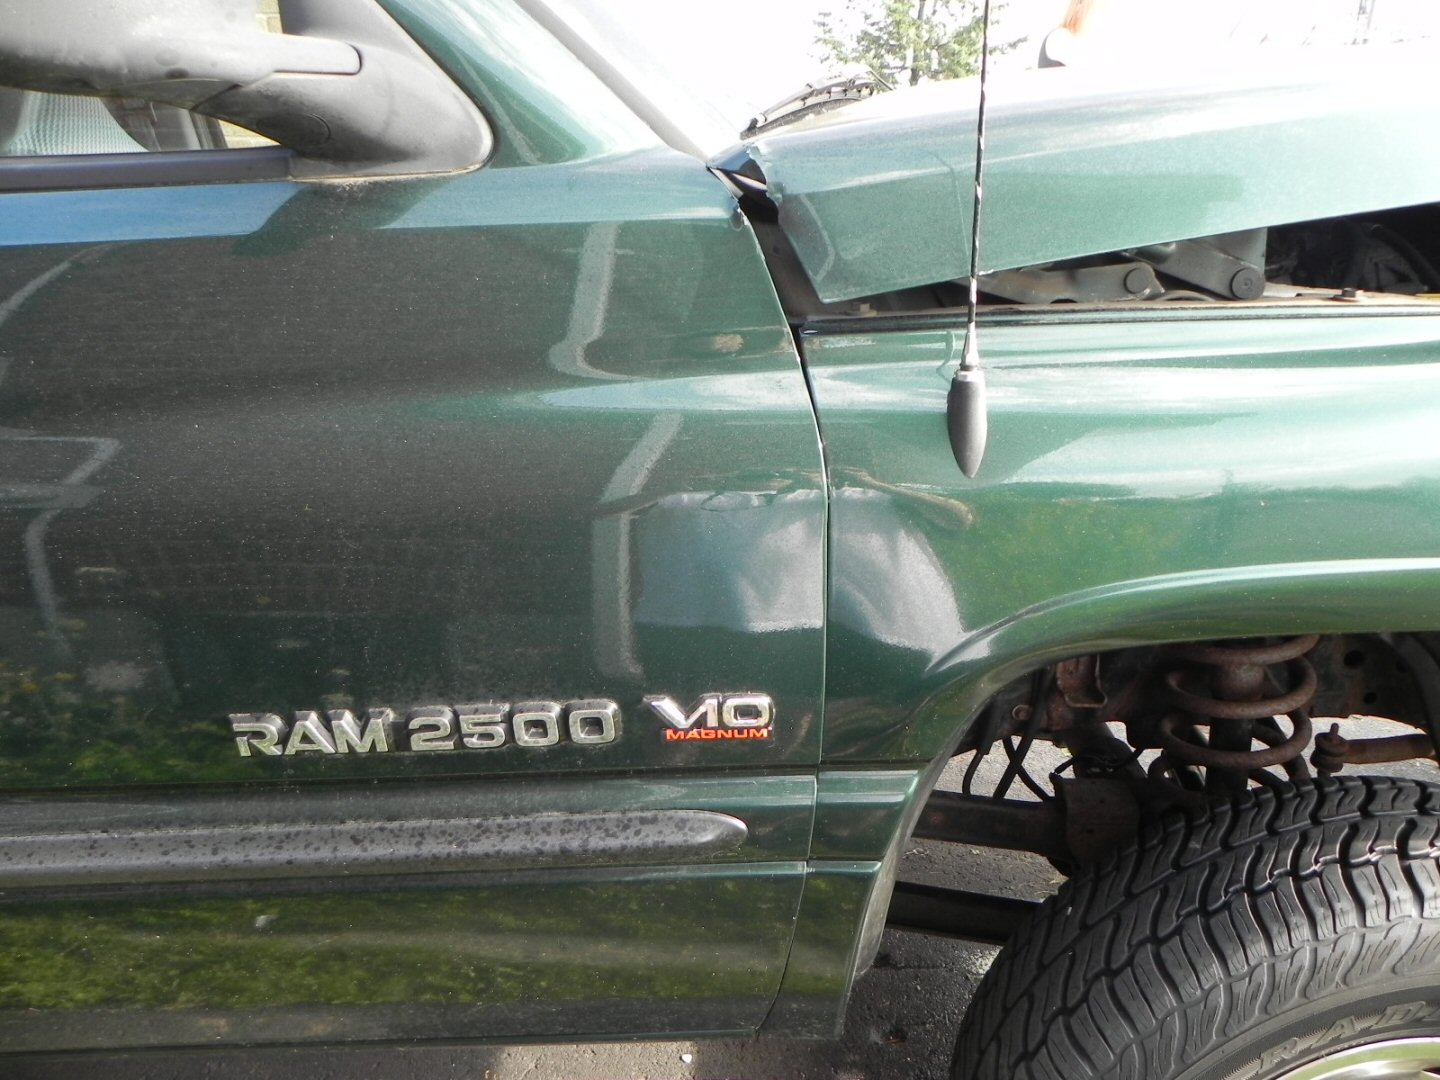
July 20, got startled out of bed at 640am after a car hit our house, the wifes Yaris & my 2500 V10 in the driveway. V10 maybe a write off, Yaris is repairable & will probably be getting new front steps for the porch as well.
Case of road rage. Woman driver got cut off by the guy in the black Caddy (in pic #8) earlier while heading south & then tried to pass him in the center turn lane. He saw her trying to pass so accelerated. She cut back in & tagged his rear end spinning him 360* and then proceeded over 2nd neigbhors driveway, across the boulevard, glancing off the pole. As she went across neigbhor driveway she just missed hitting him in his car (having smoke before heading out) by about 1'.
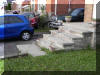
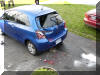
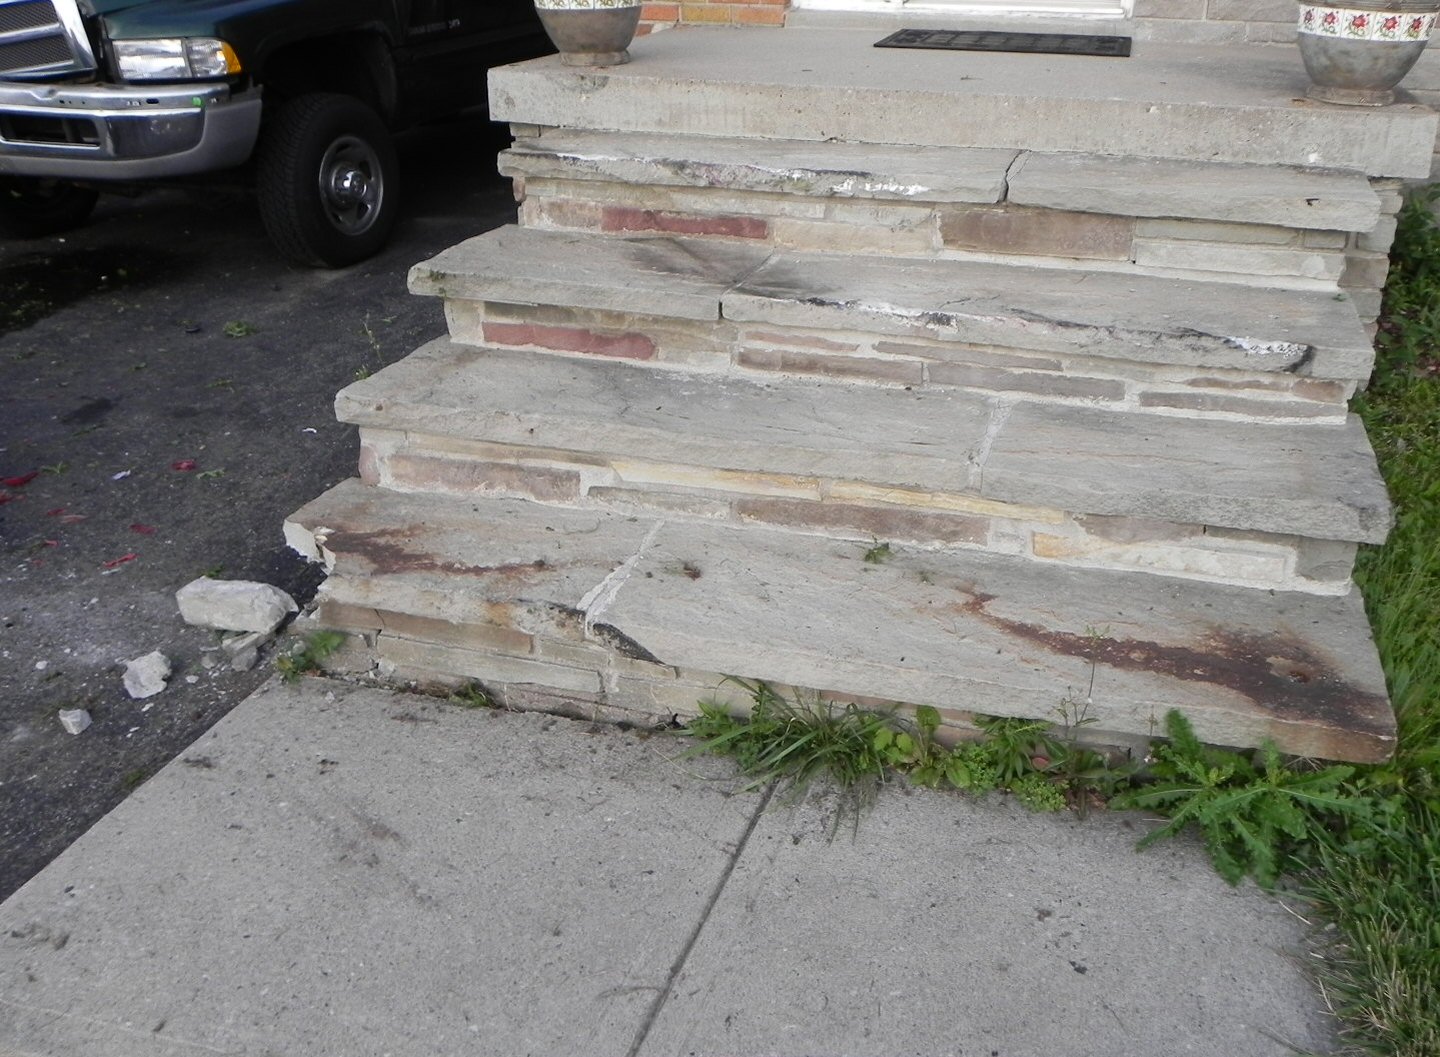
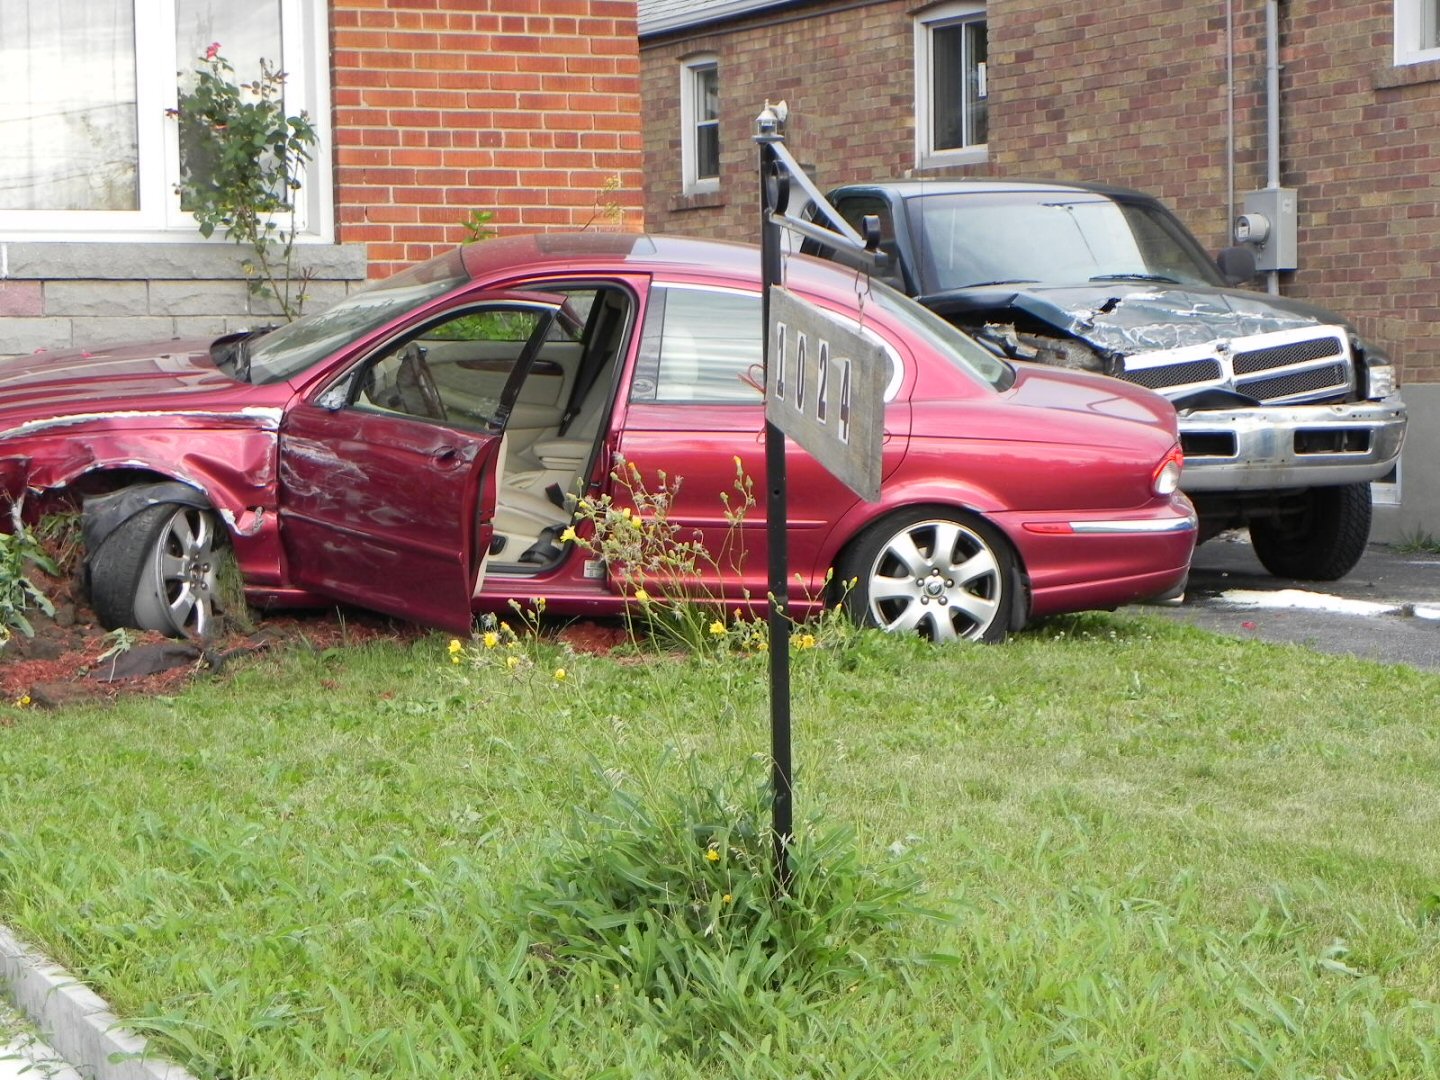
The concrete light standard deflected her trajectory, so instead of T boning the Yaris it sent her up our 4 steps with the top step deflecting her away from the house. She got airborne & tagged the back of the Yaris & landed on the passenger side of the V10 (pushing it back 2' & sideways 1/2'). The corner of the neighbors house to the south pretty well stopped her car (hit 5' off ground) & it dropped down into their bushes.
Fluke no one got injured or killed by this. The Jags airbags didn't even go off & she only had minor bumps/bruises. Could clearly see the marks from the Caddy doing a 360 on the road but no brake marks at all from the Jag except after hitting the pole (collapsed fender locked up tire).
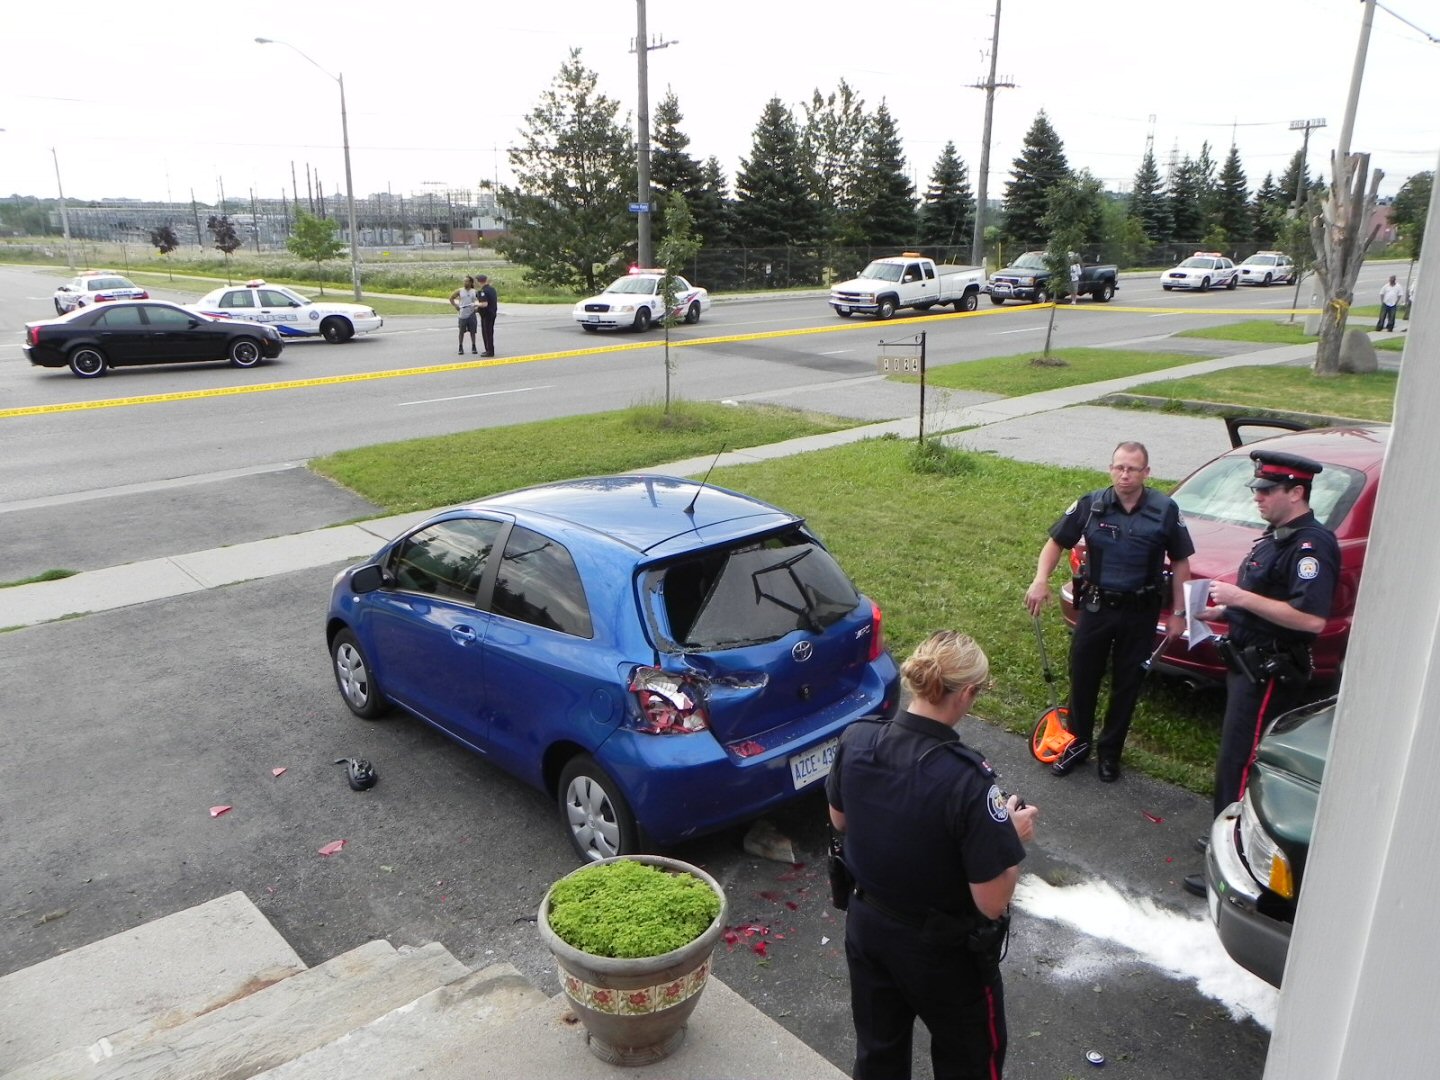
Here is some pics of the carnage.

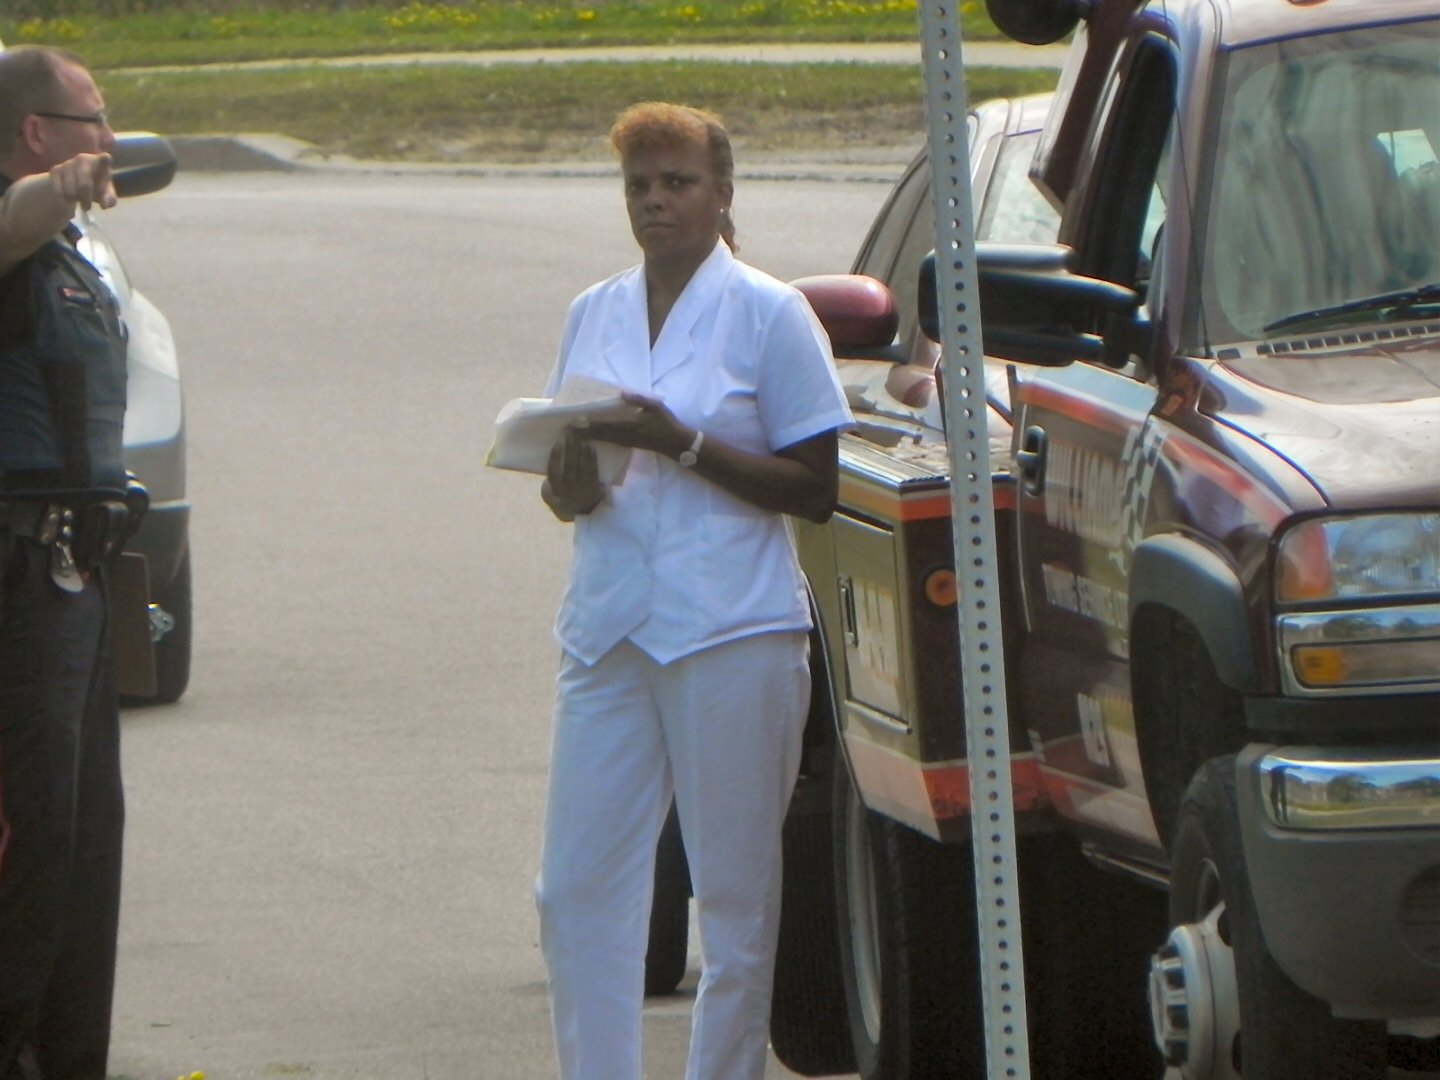
This is the woman that was driving the Jag


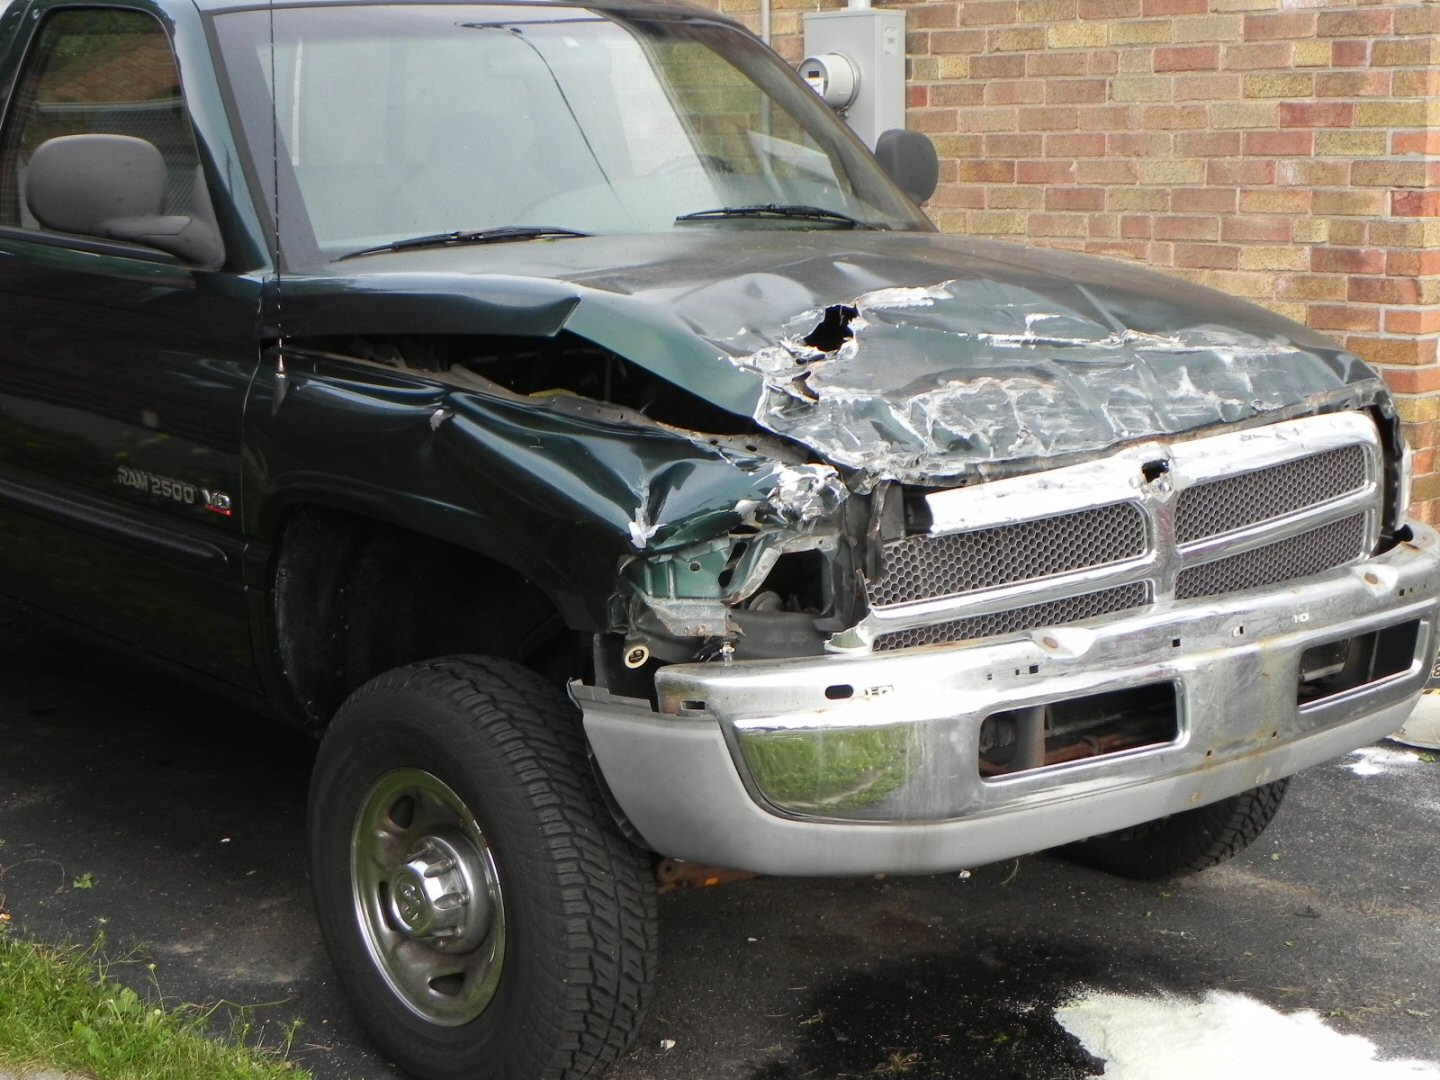
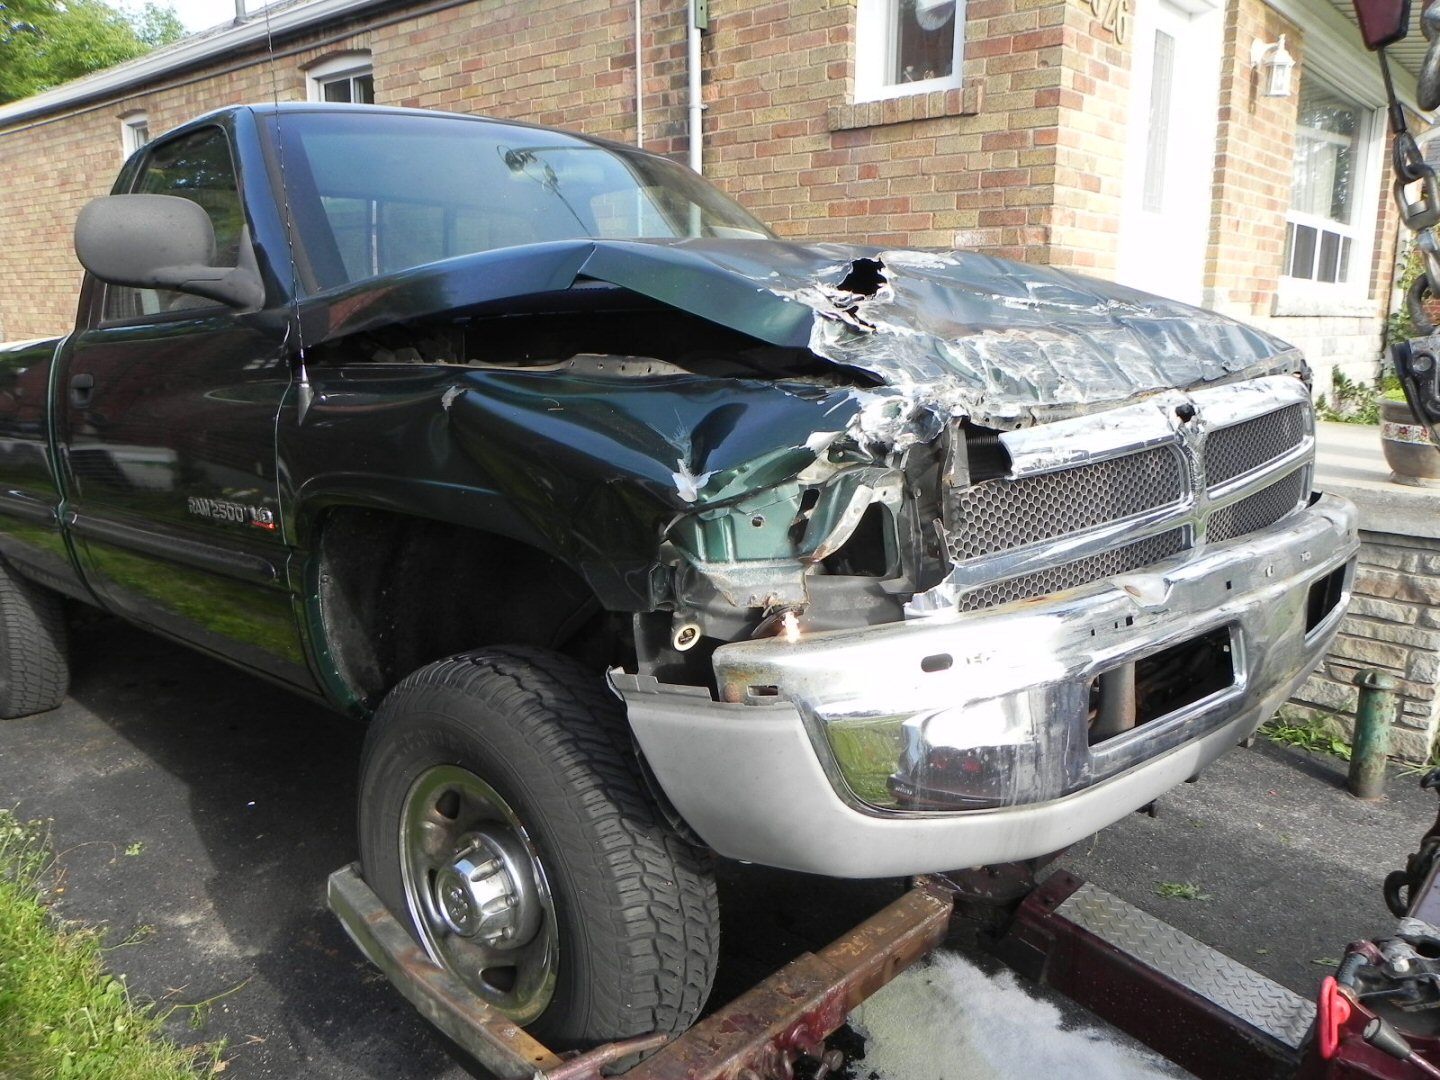
July 23, finally got a hold of the appraiser, V10 is getting fixed so no new truck for me. (7800damage & 1000 in towing)
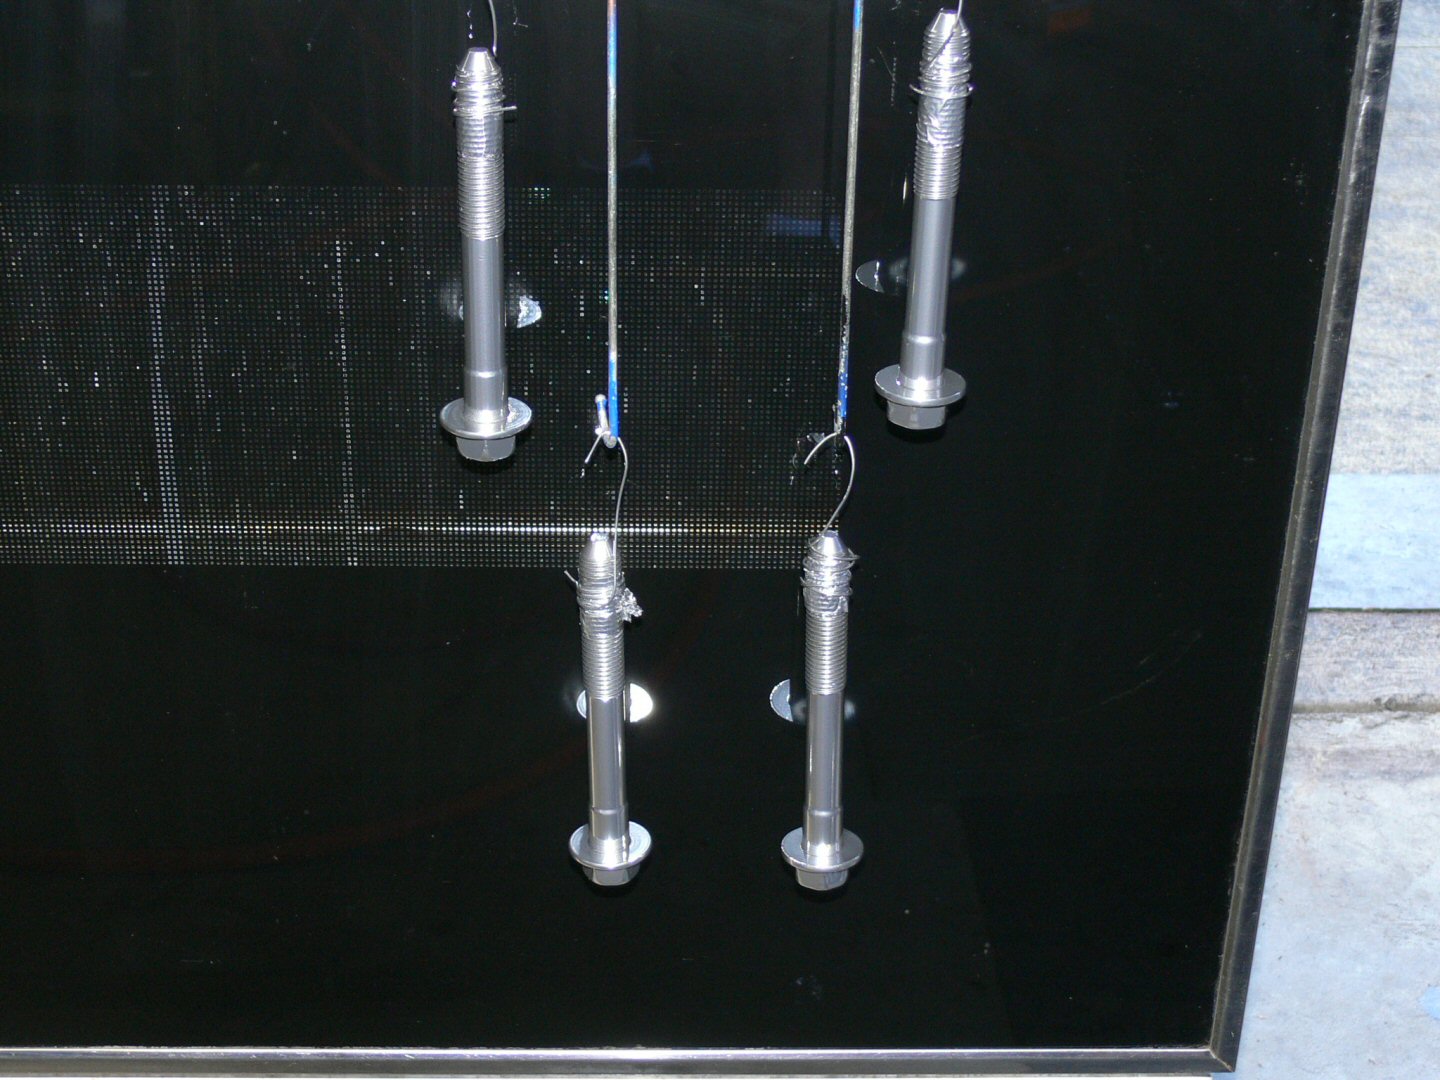
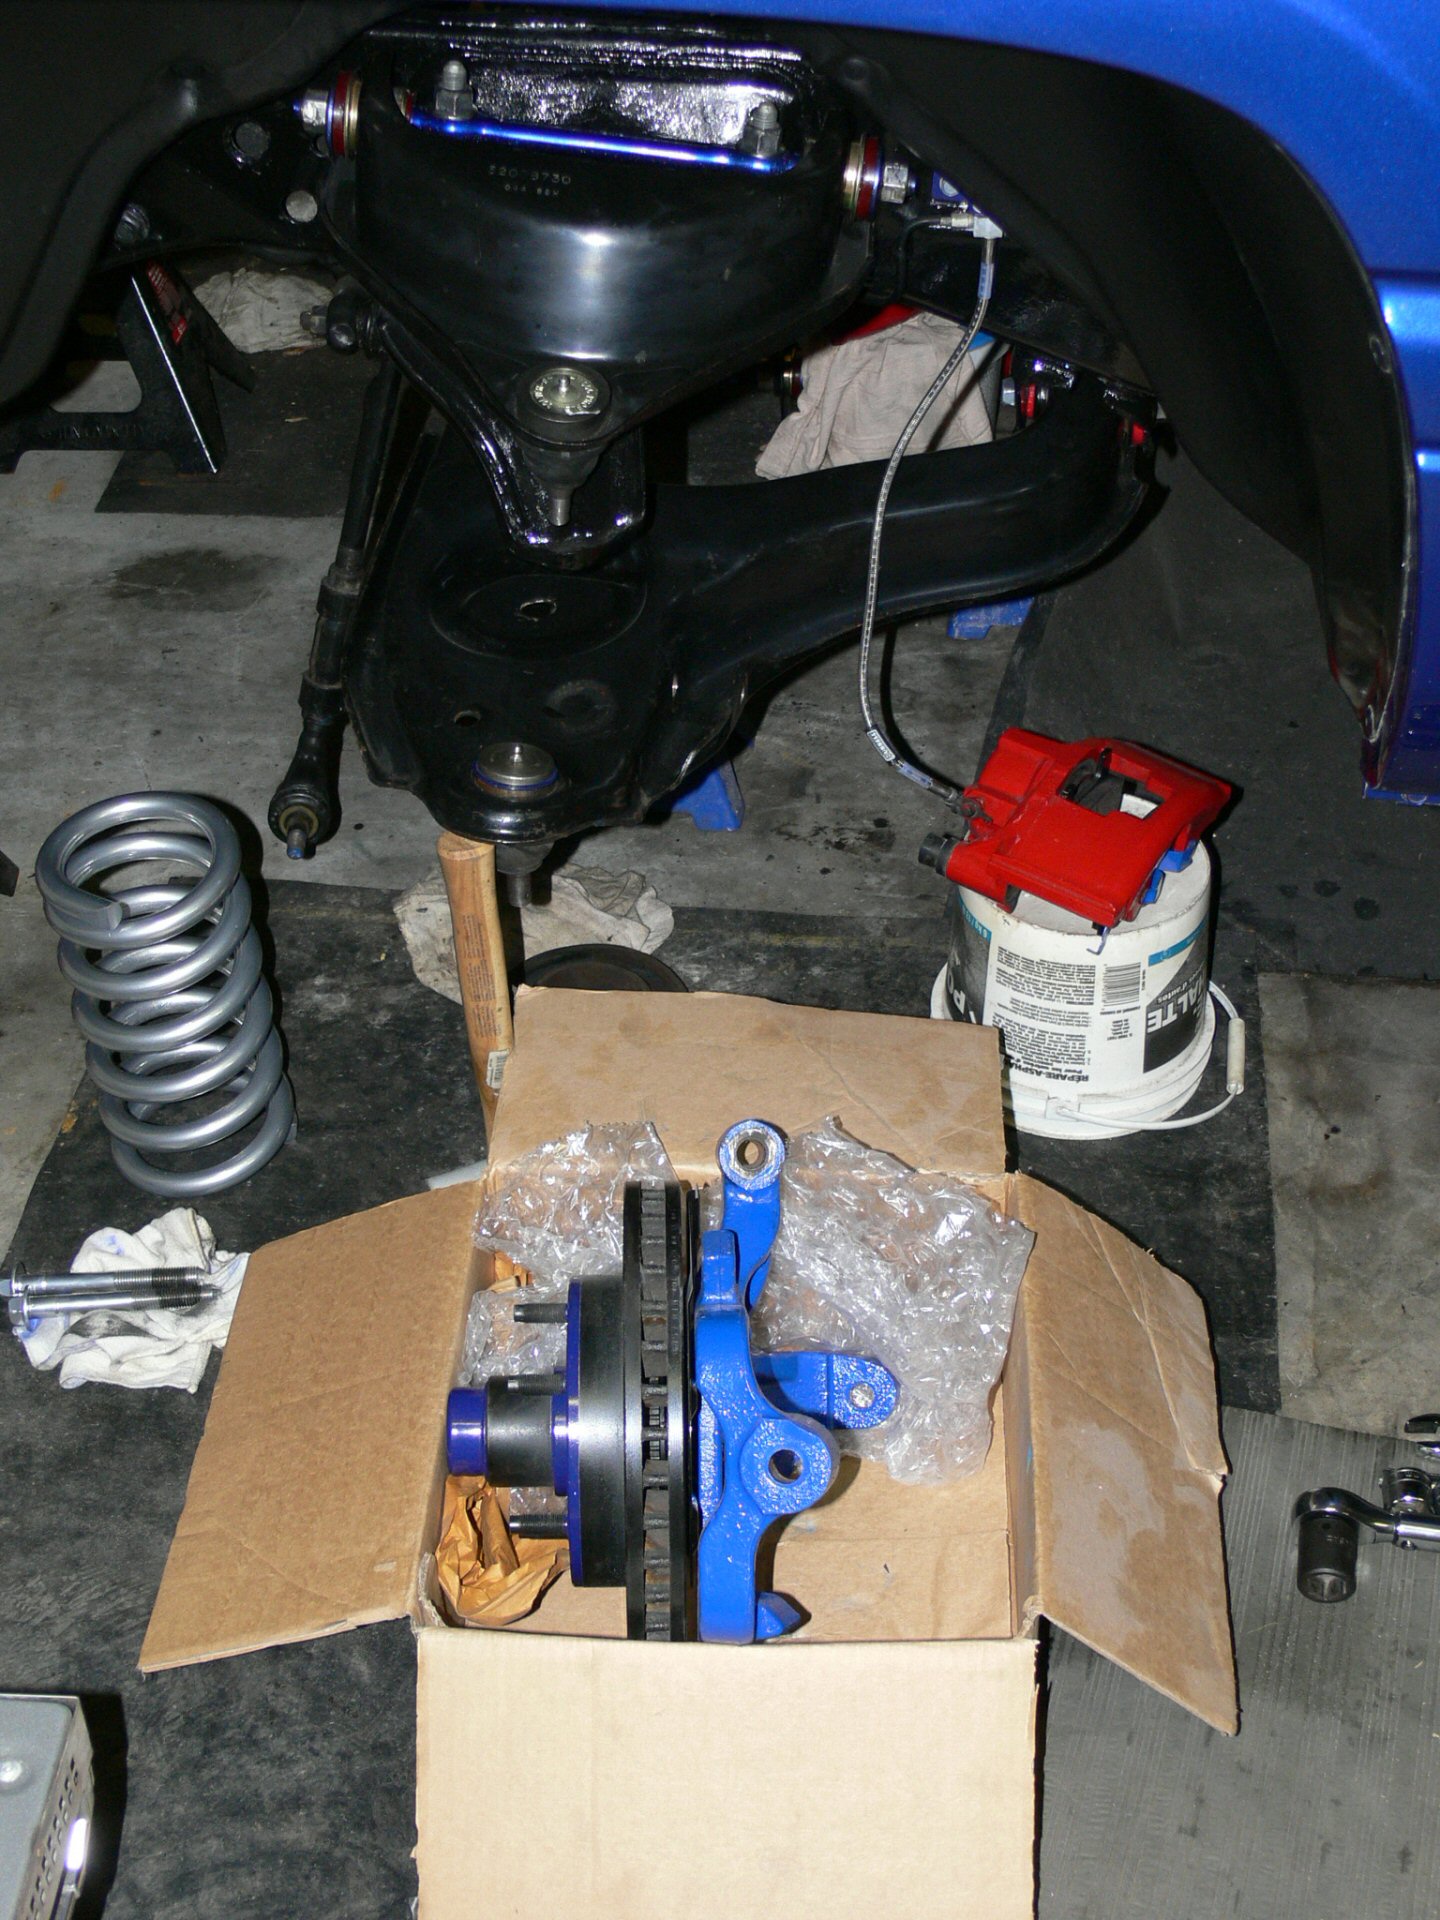
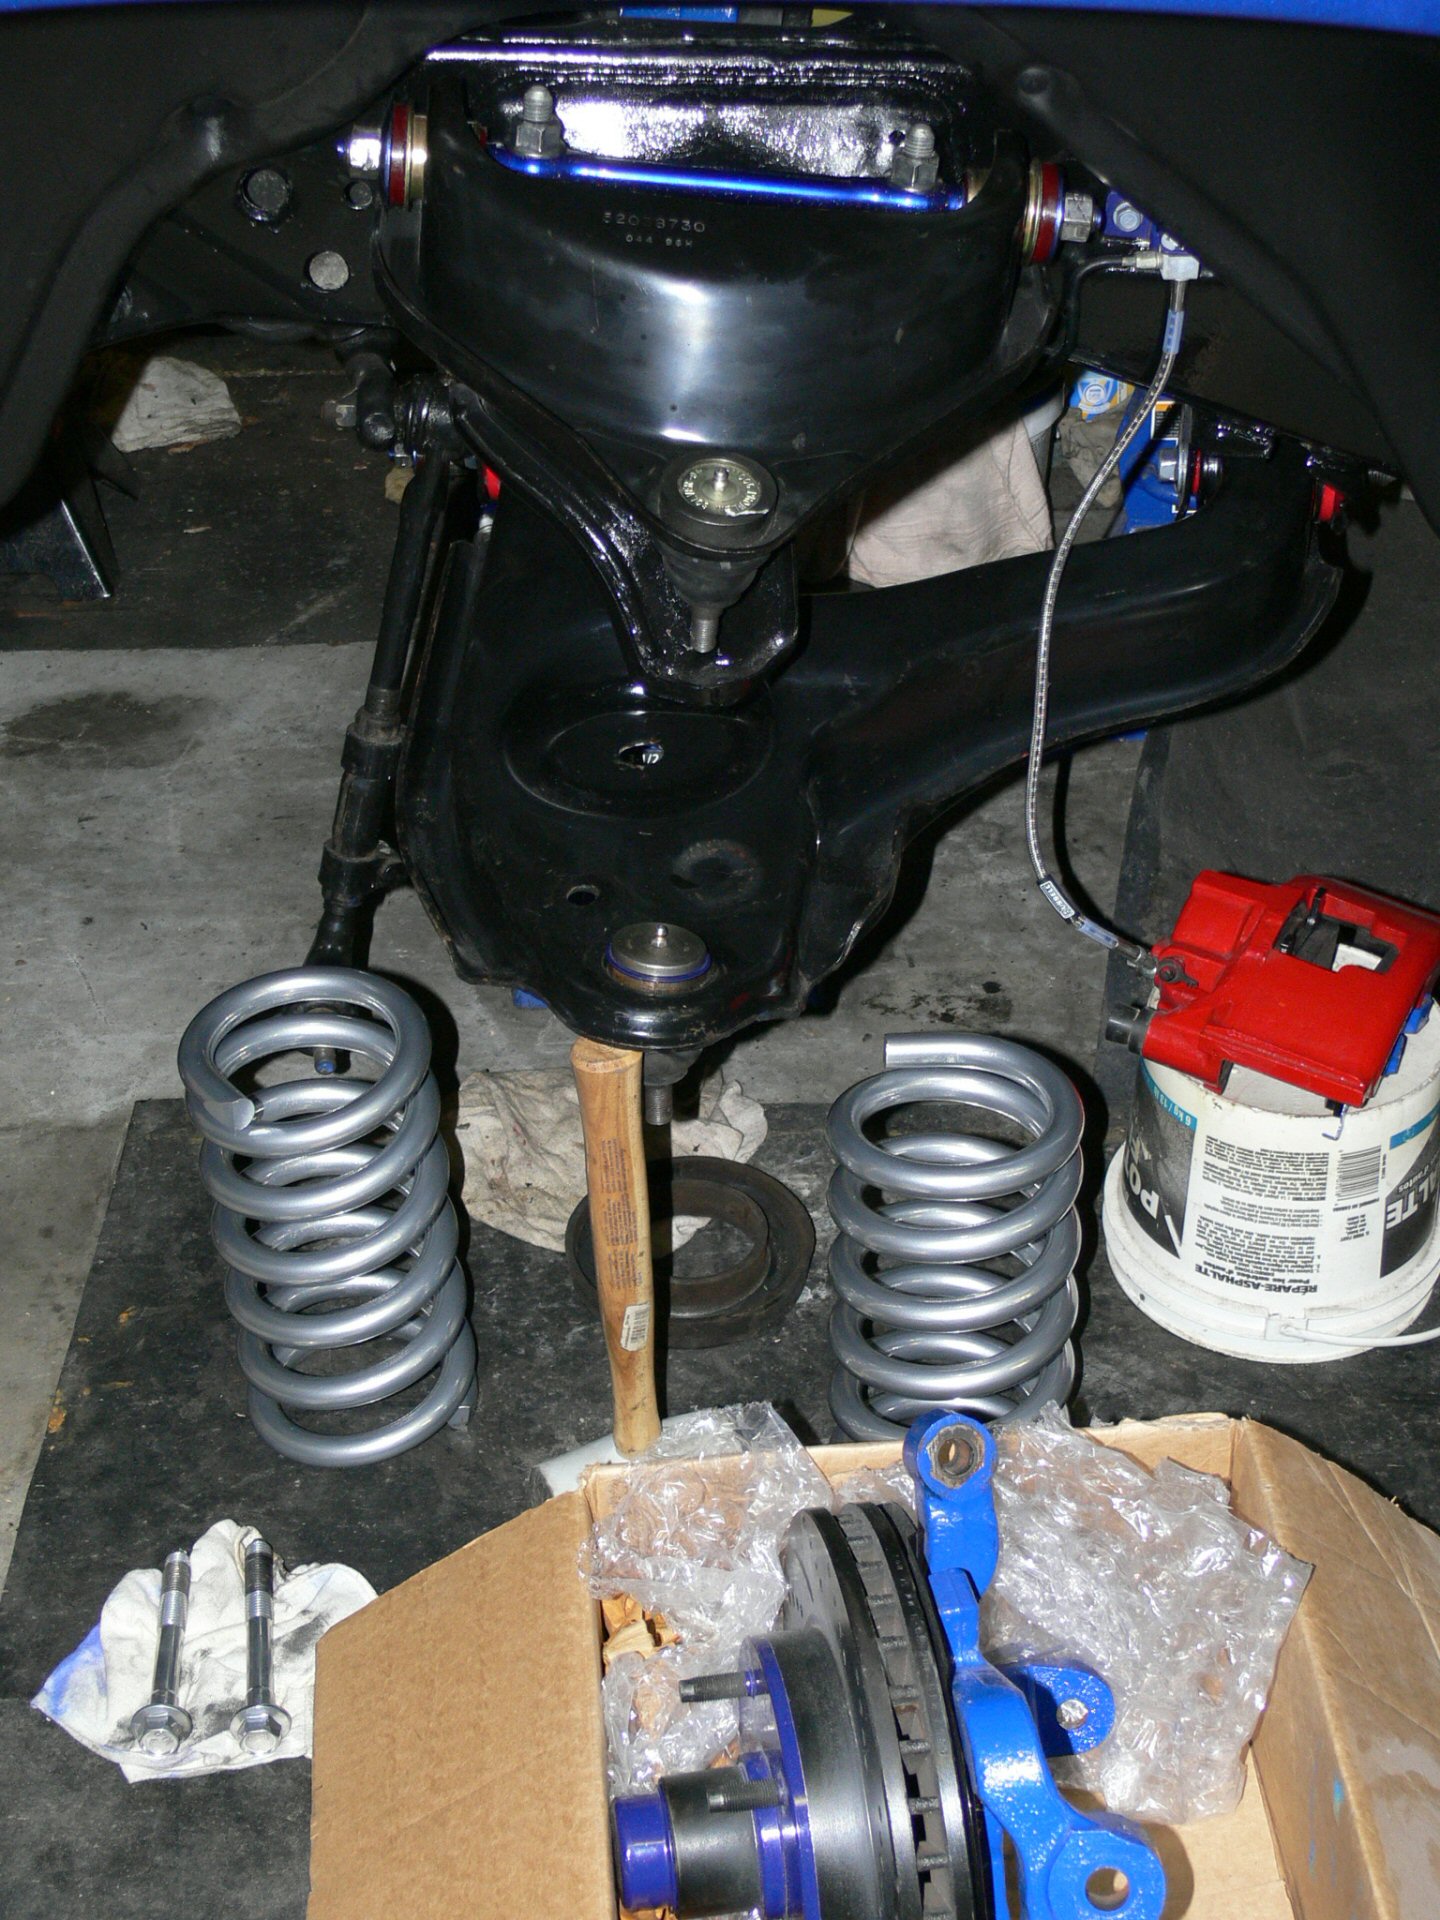
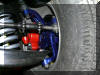
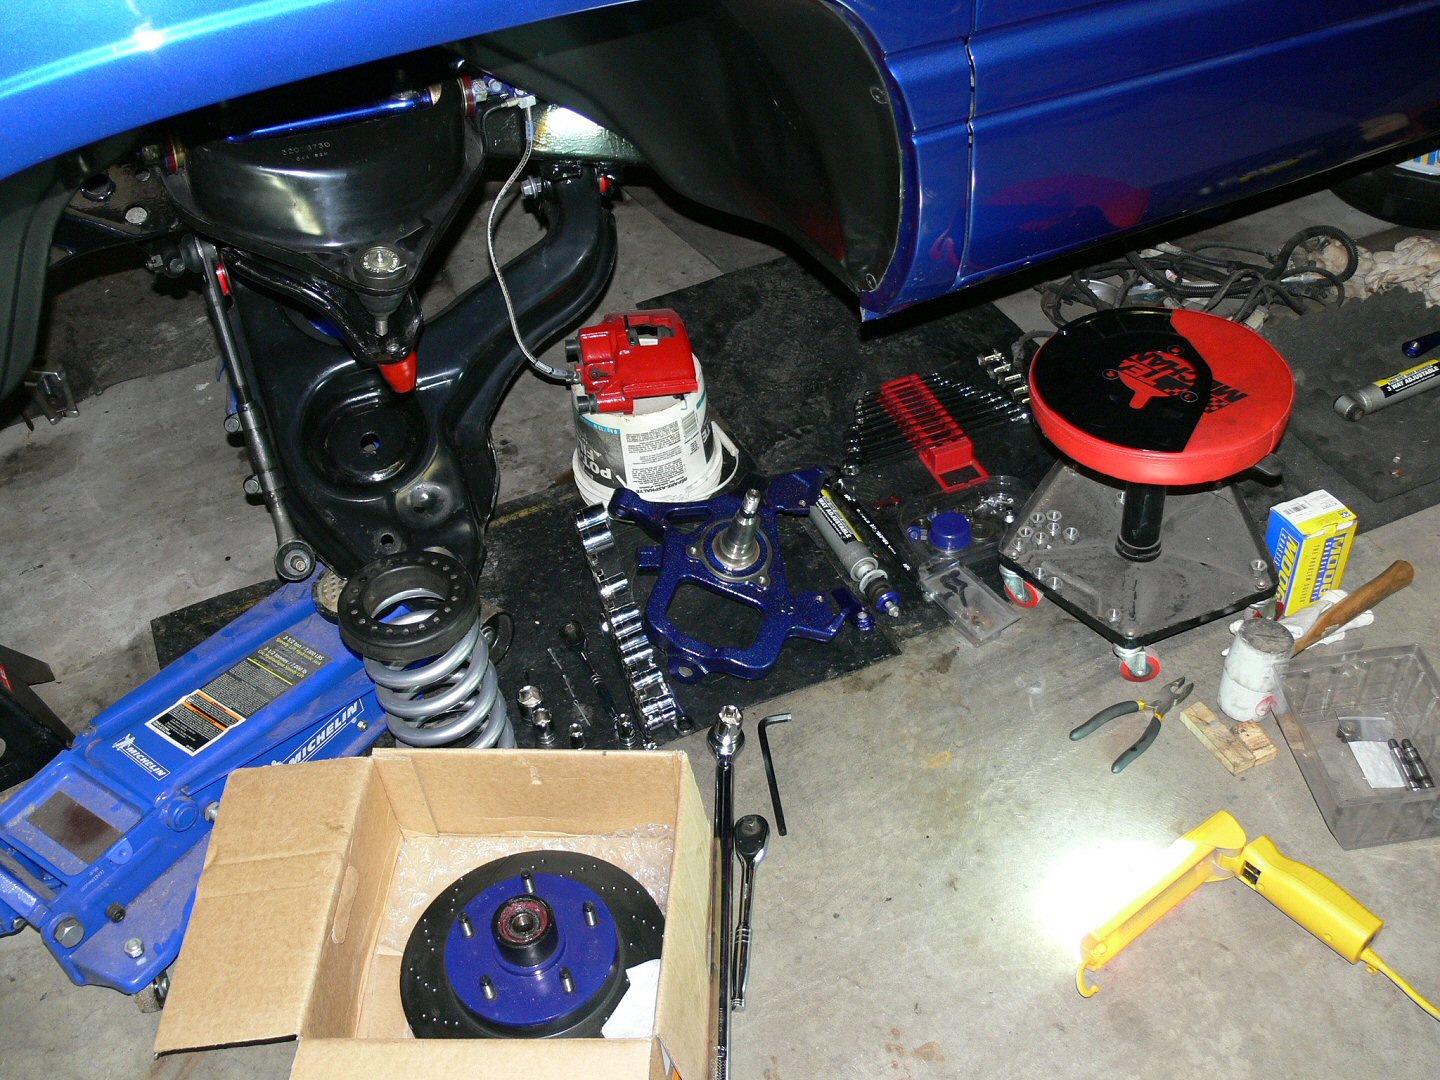
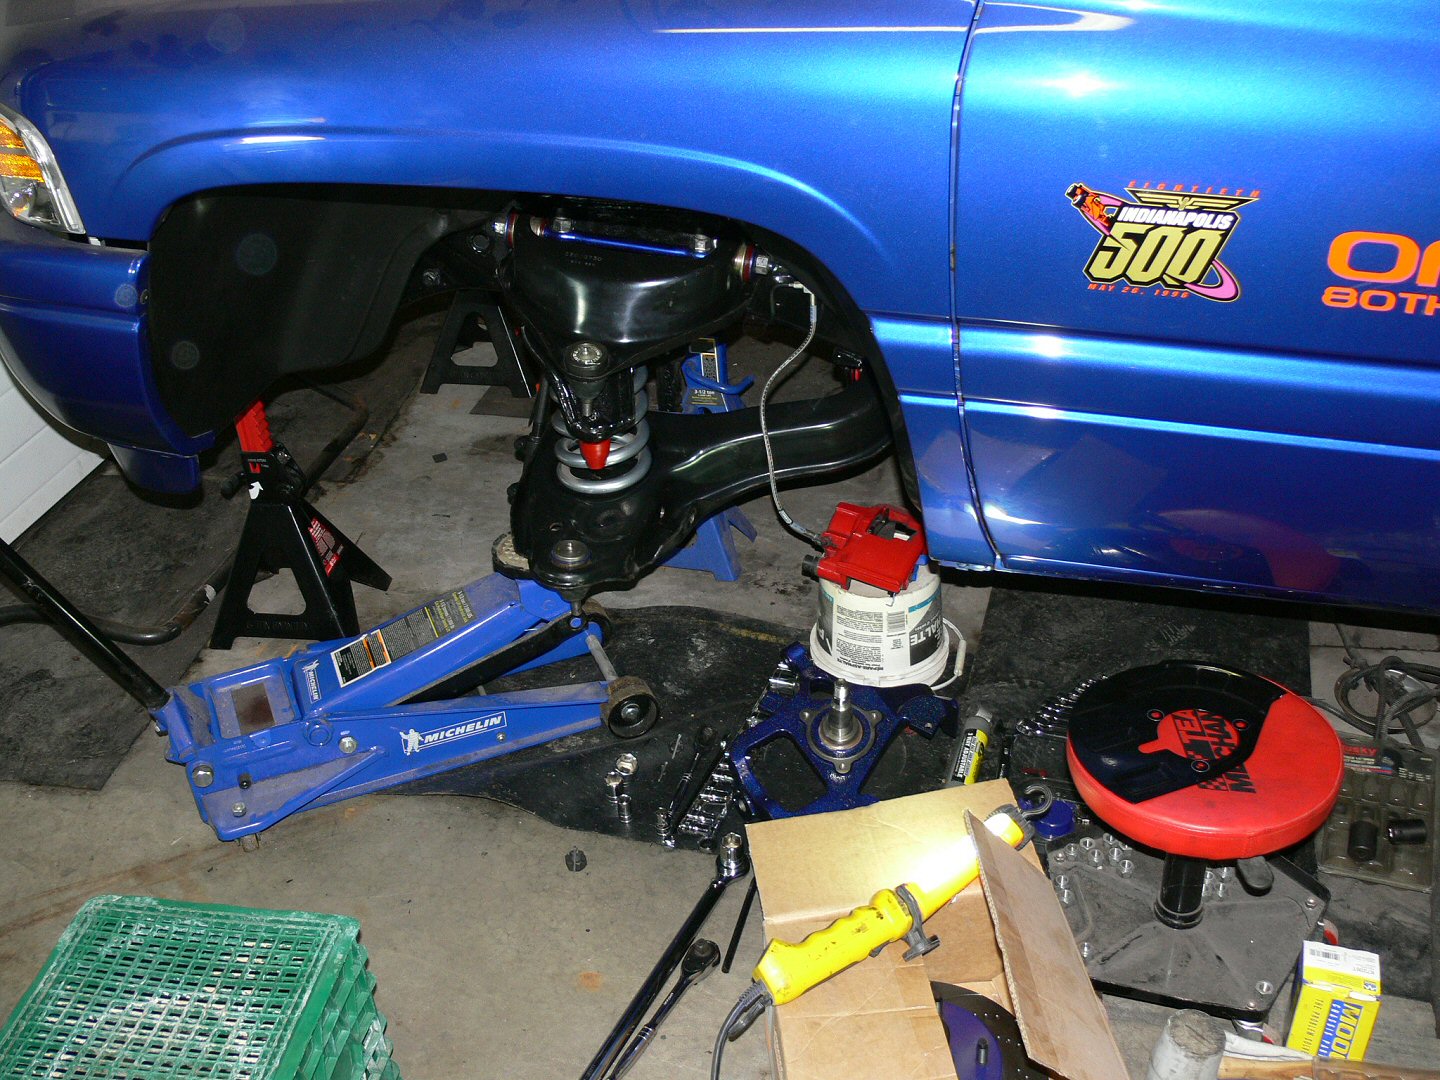
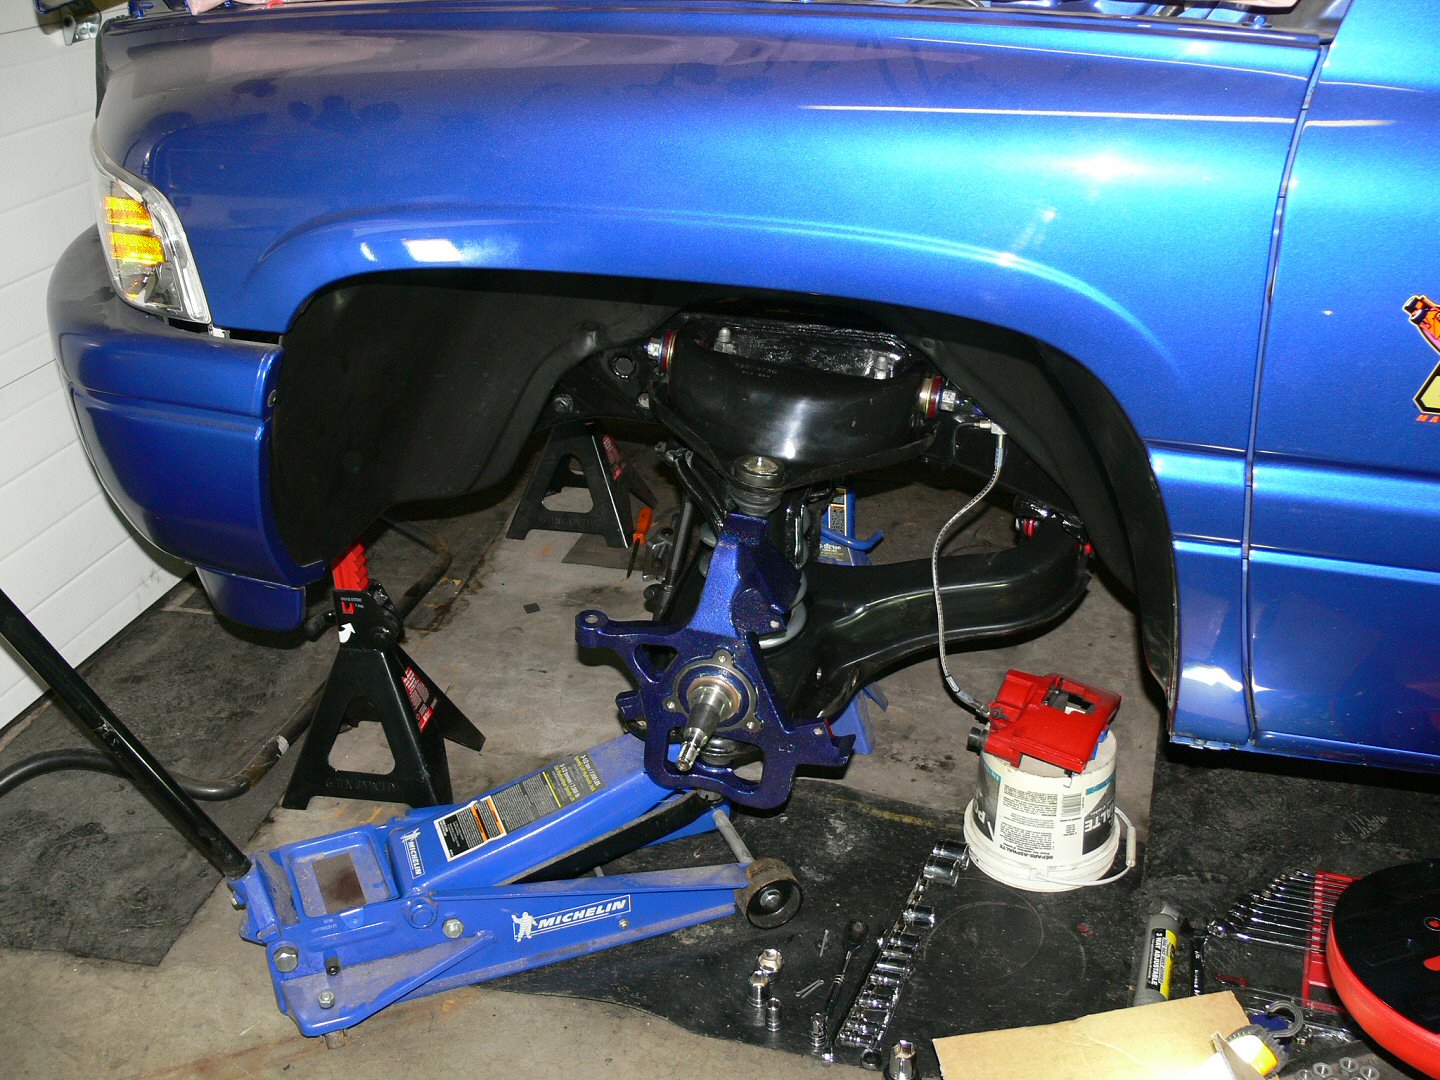
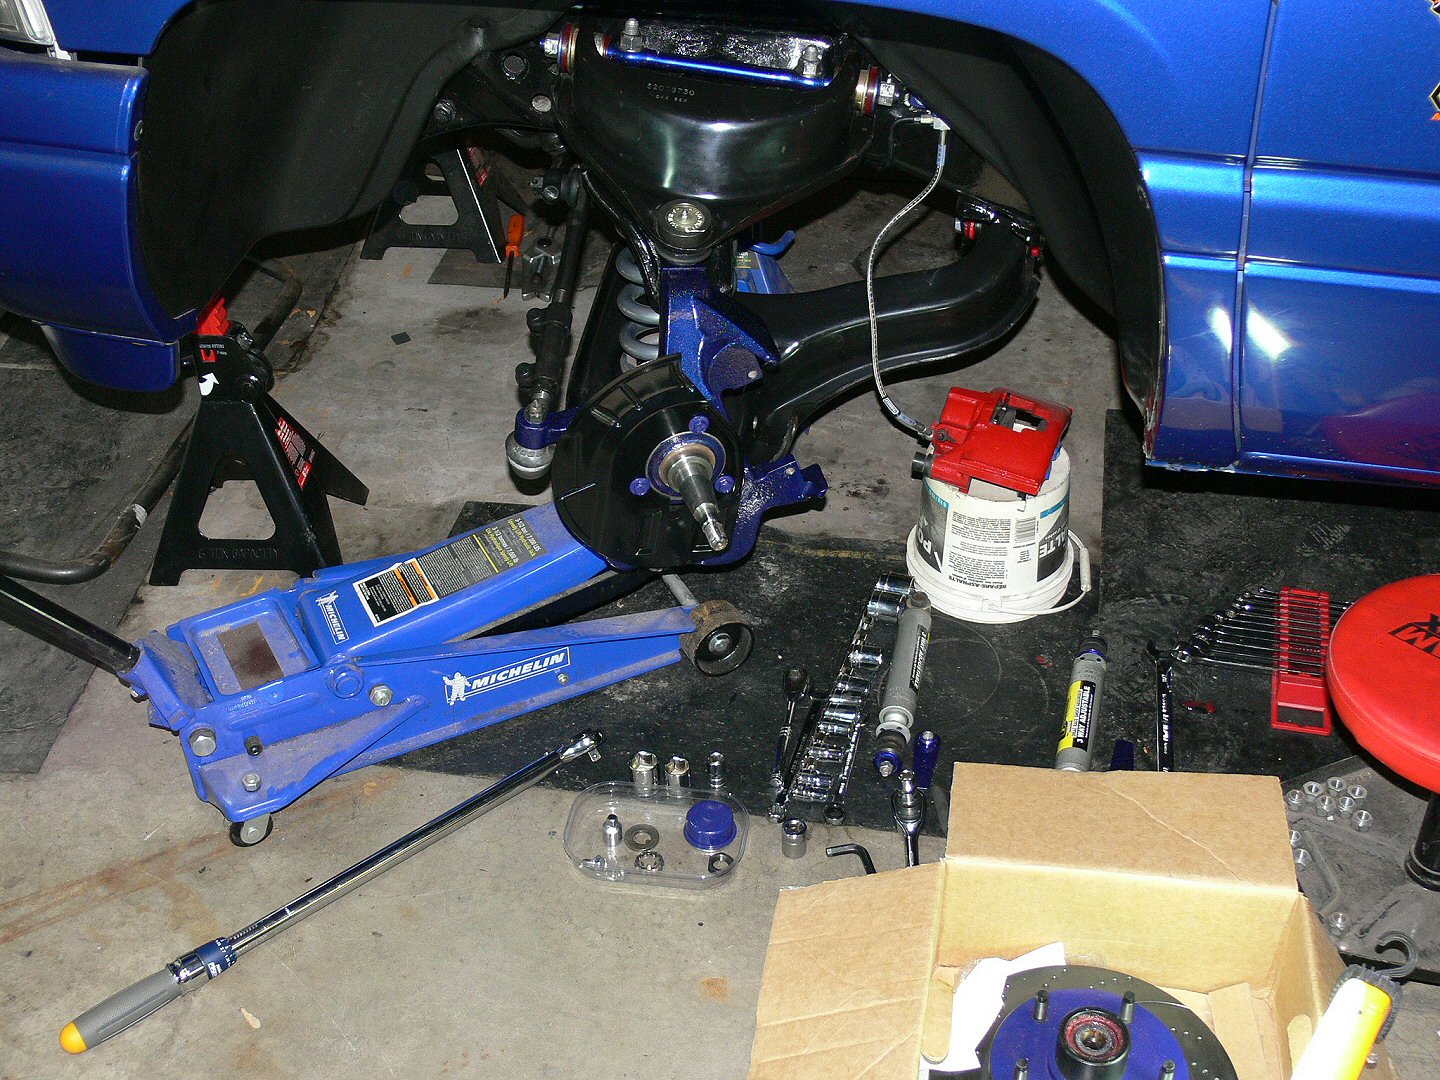
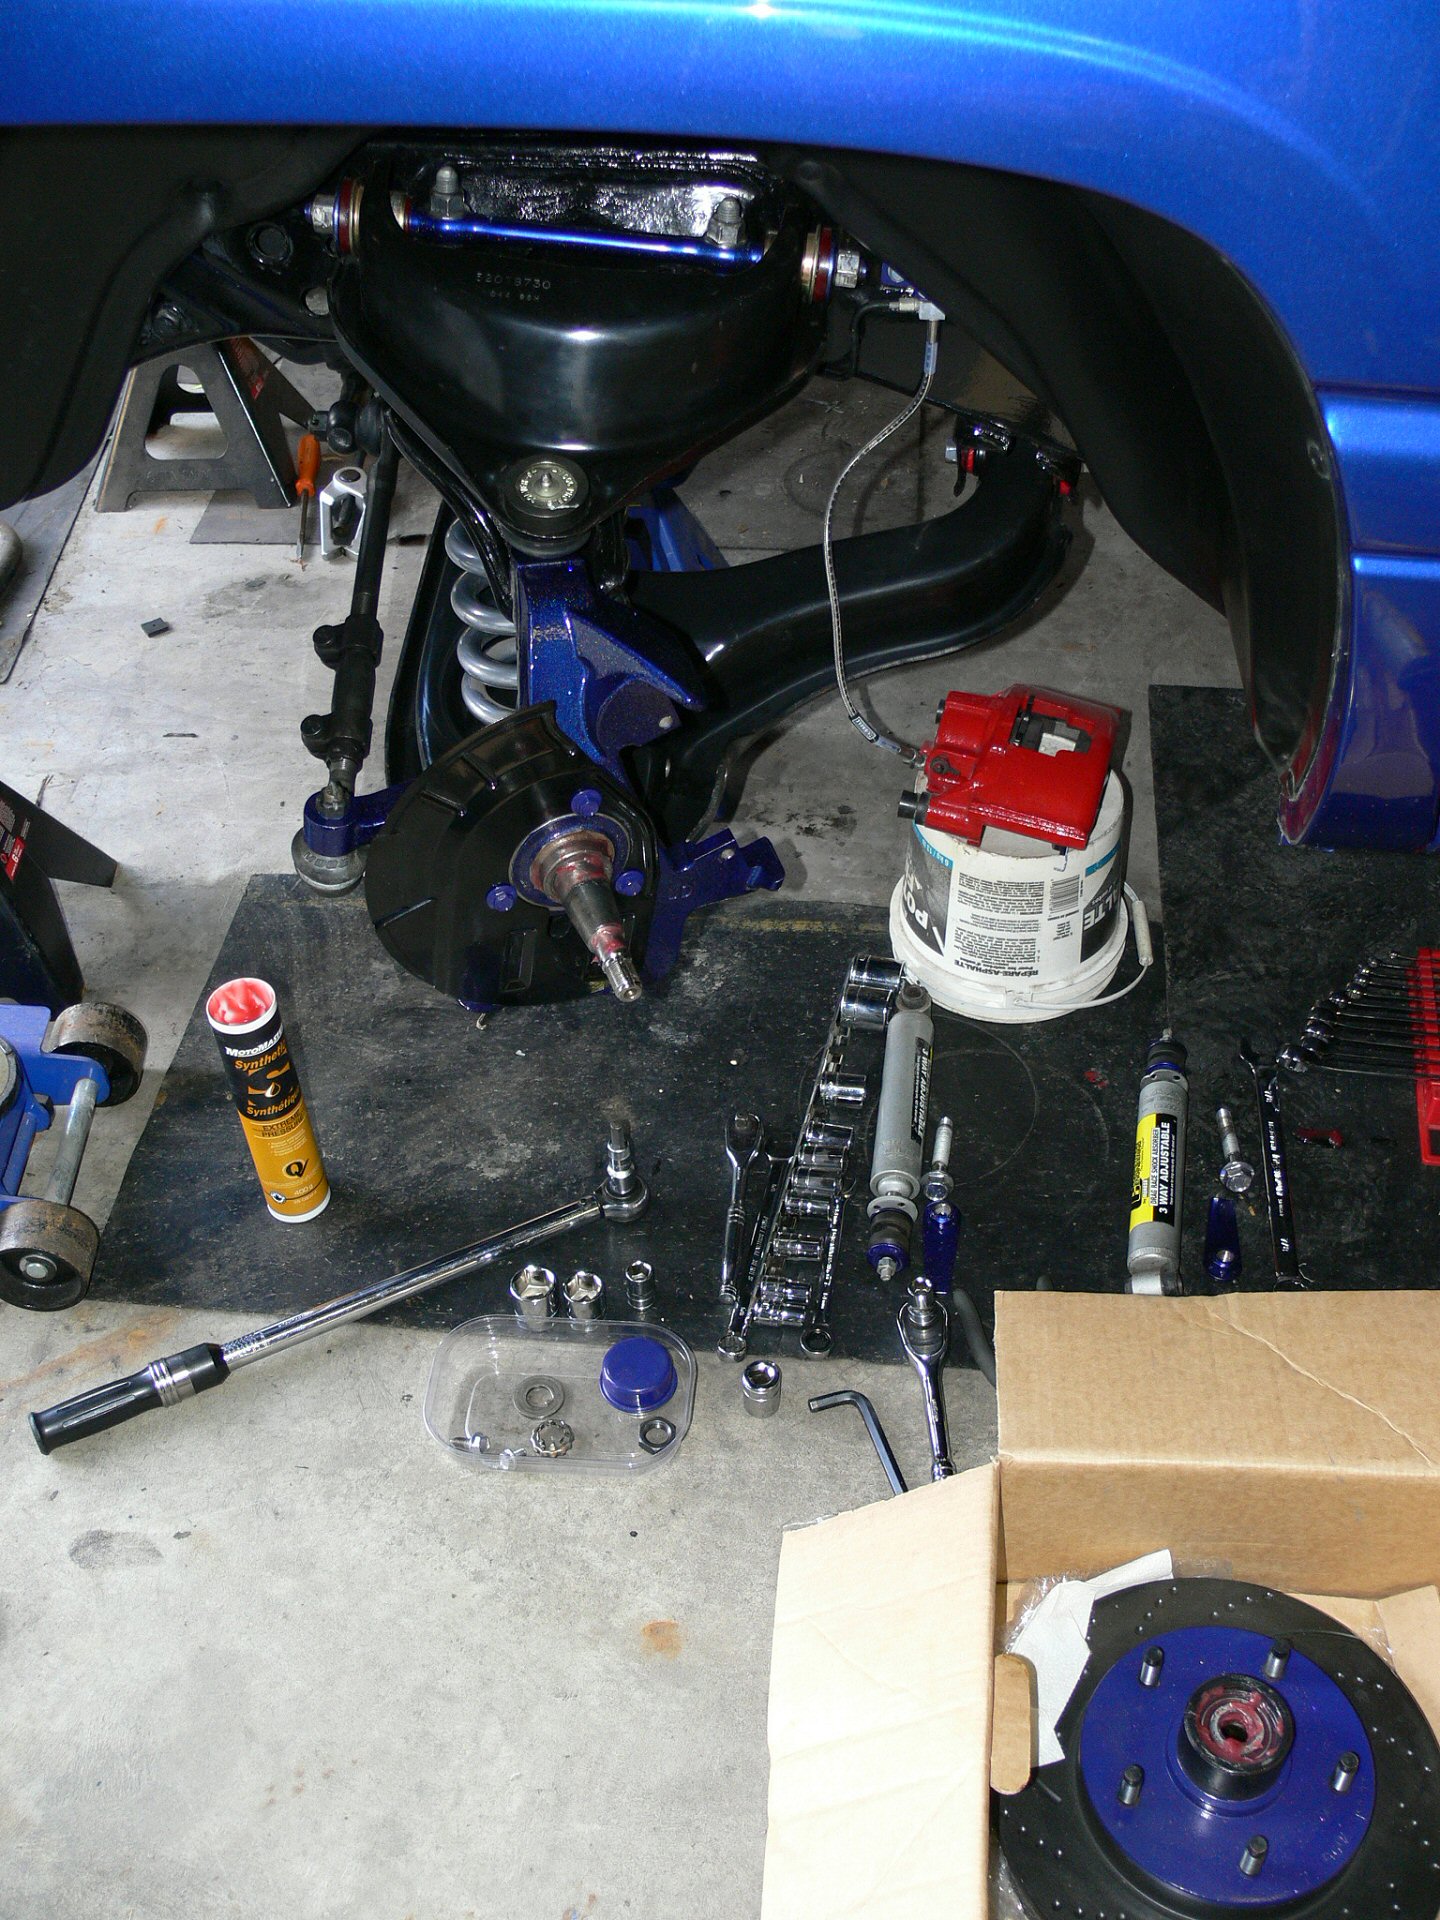
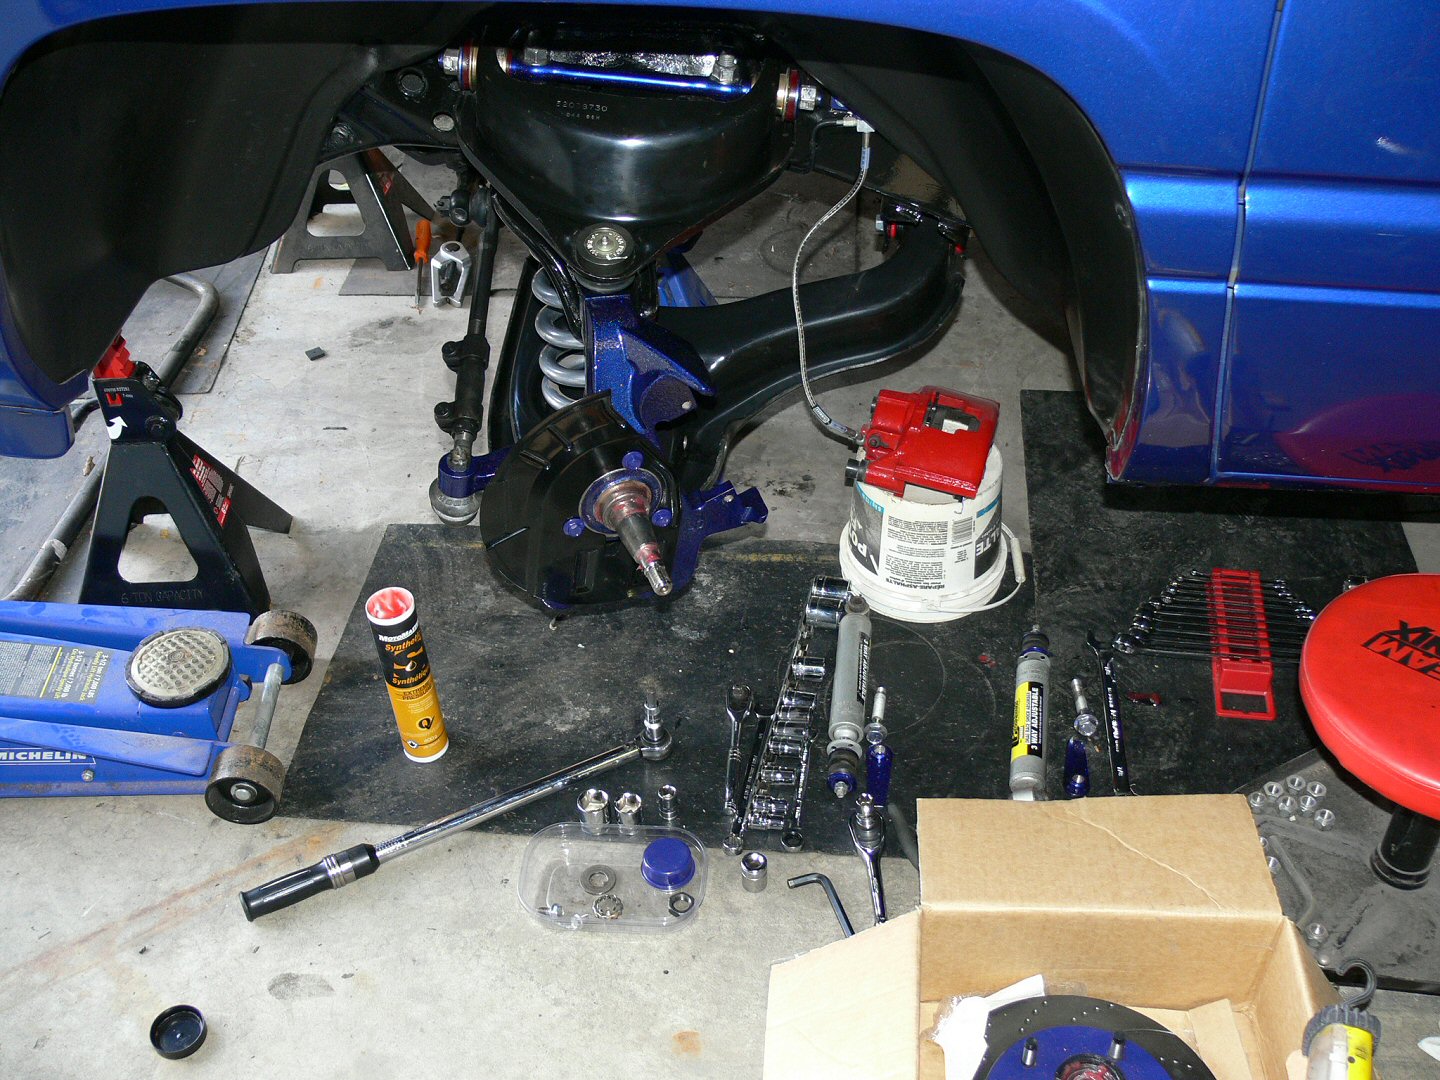
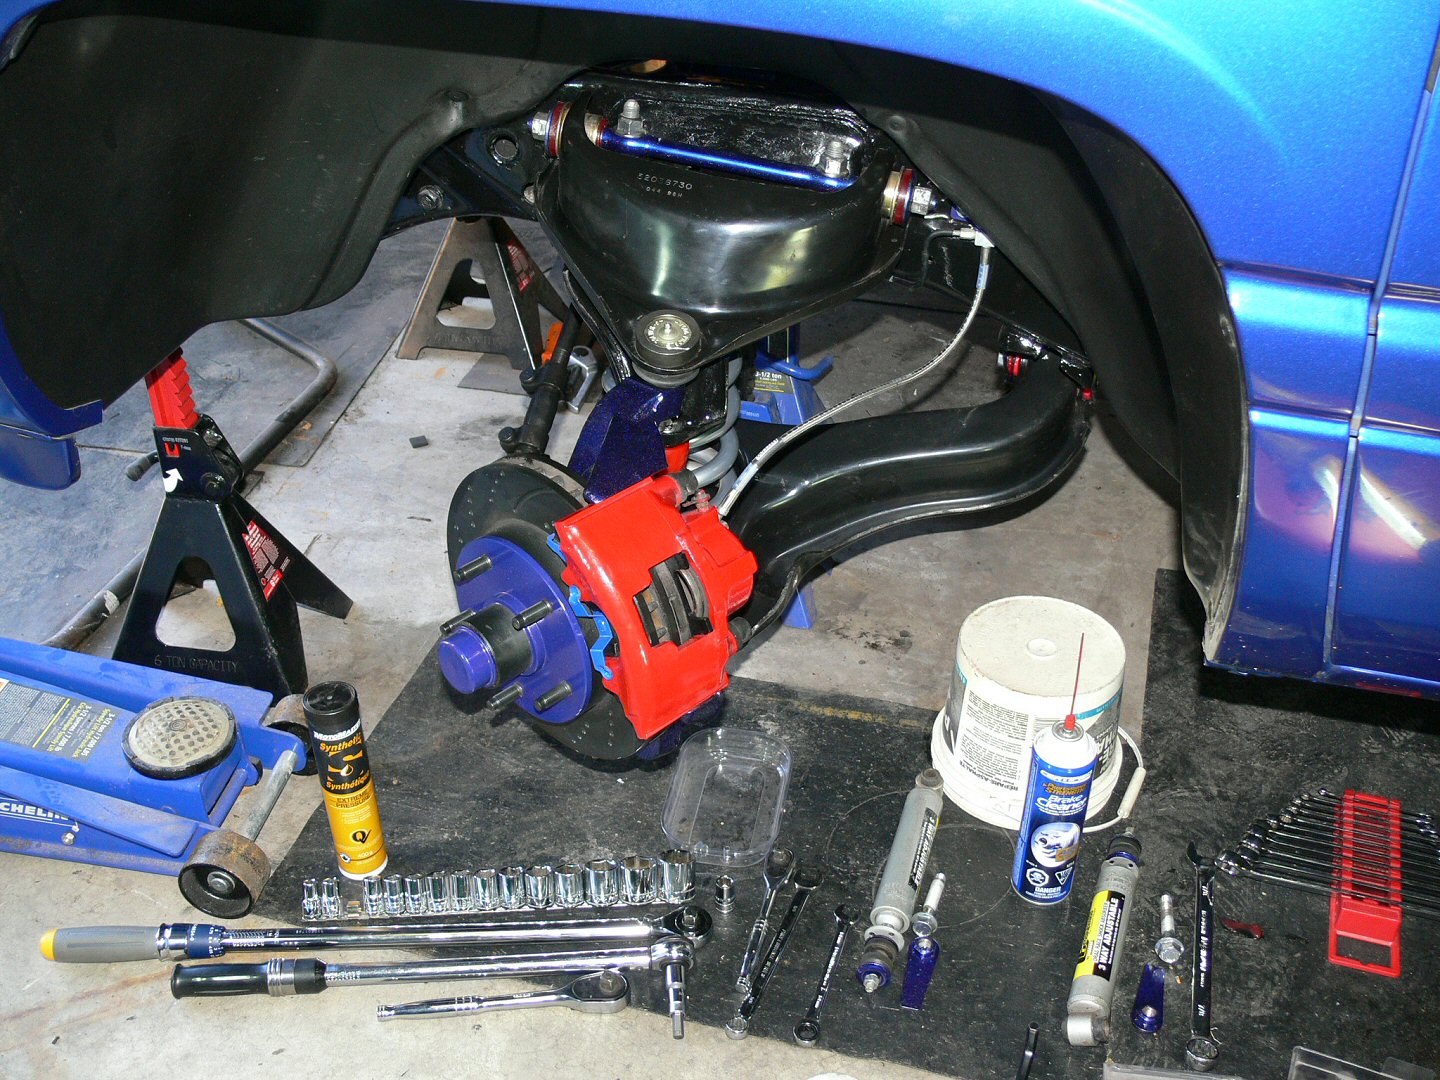
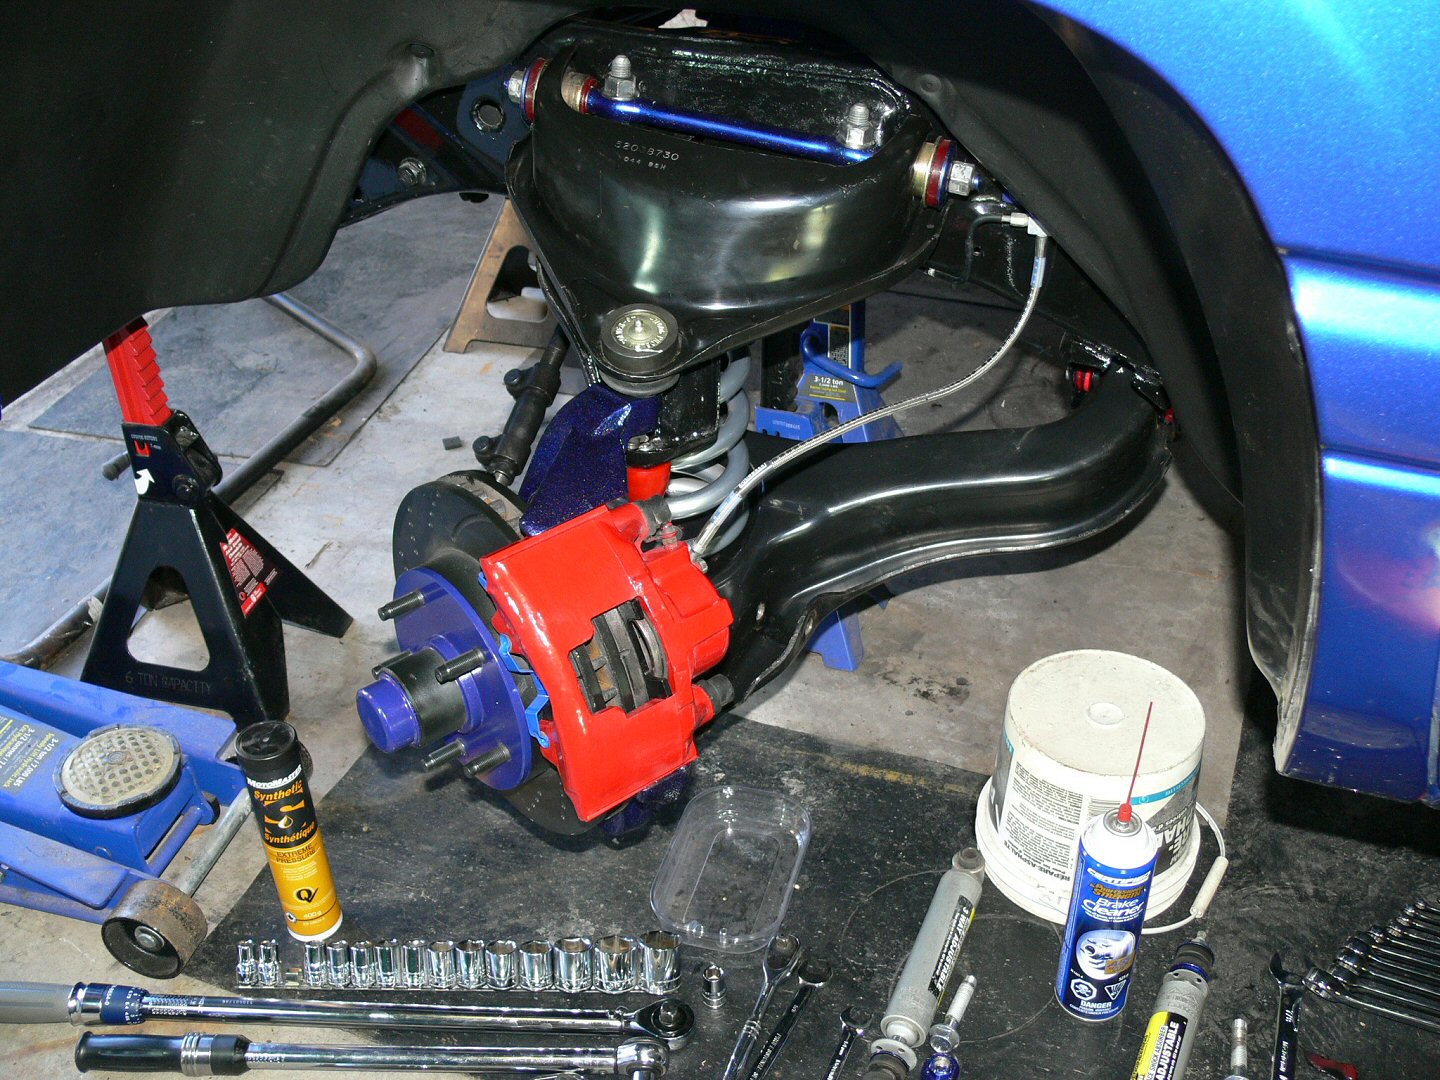
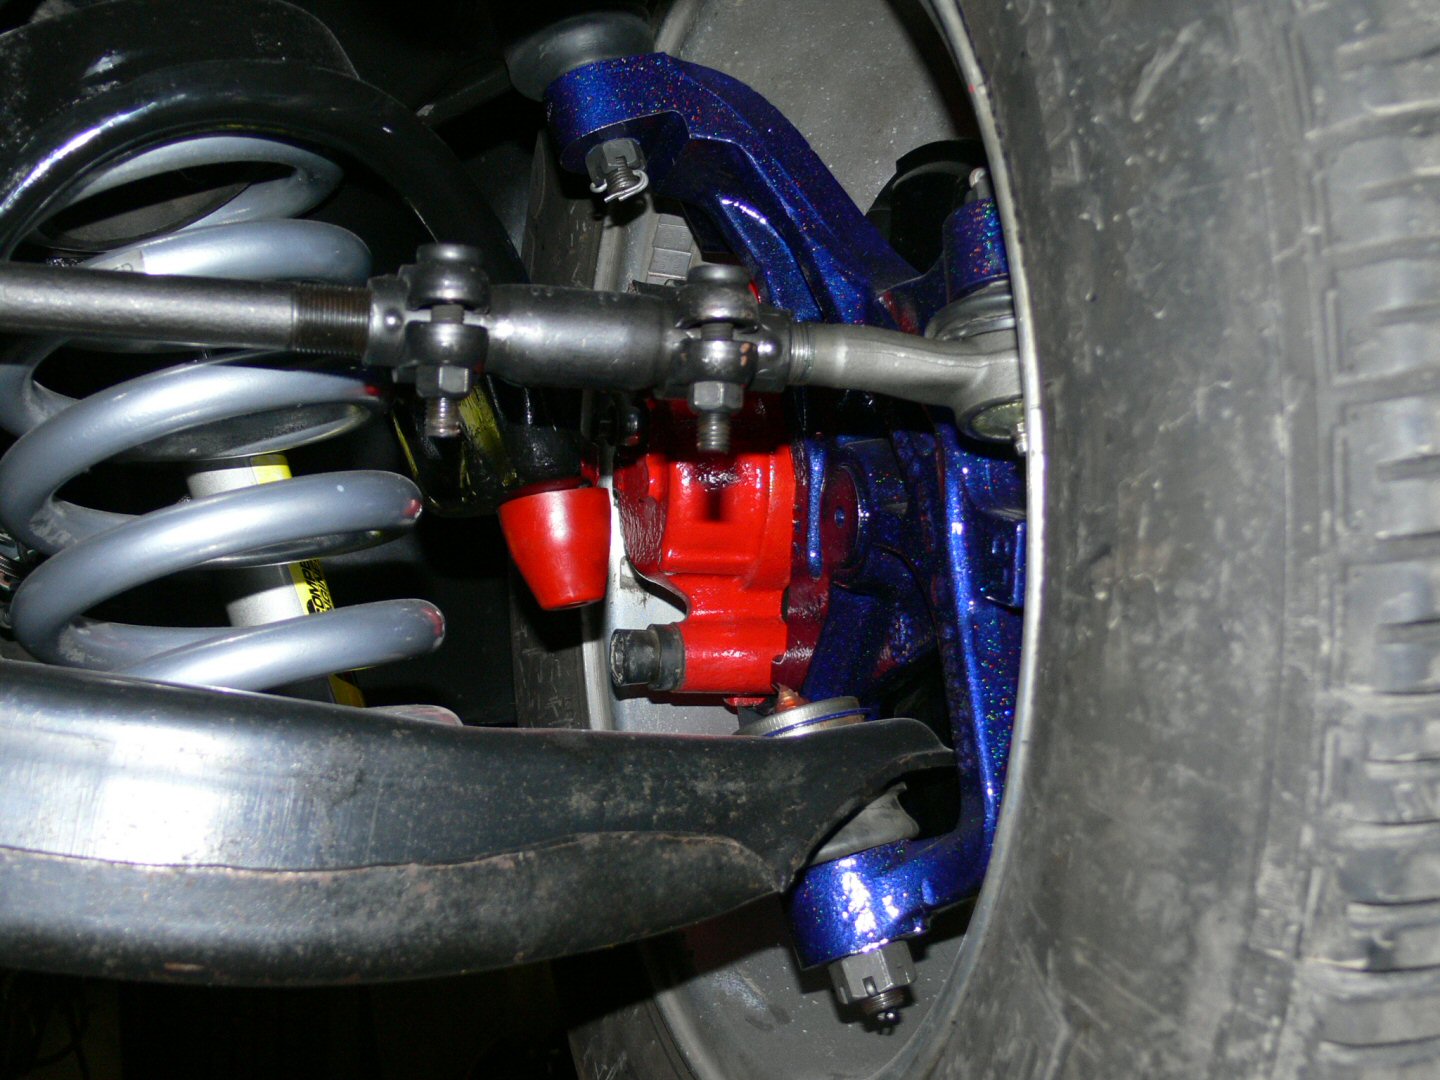
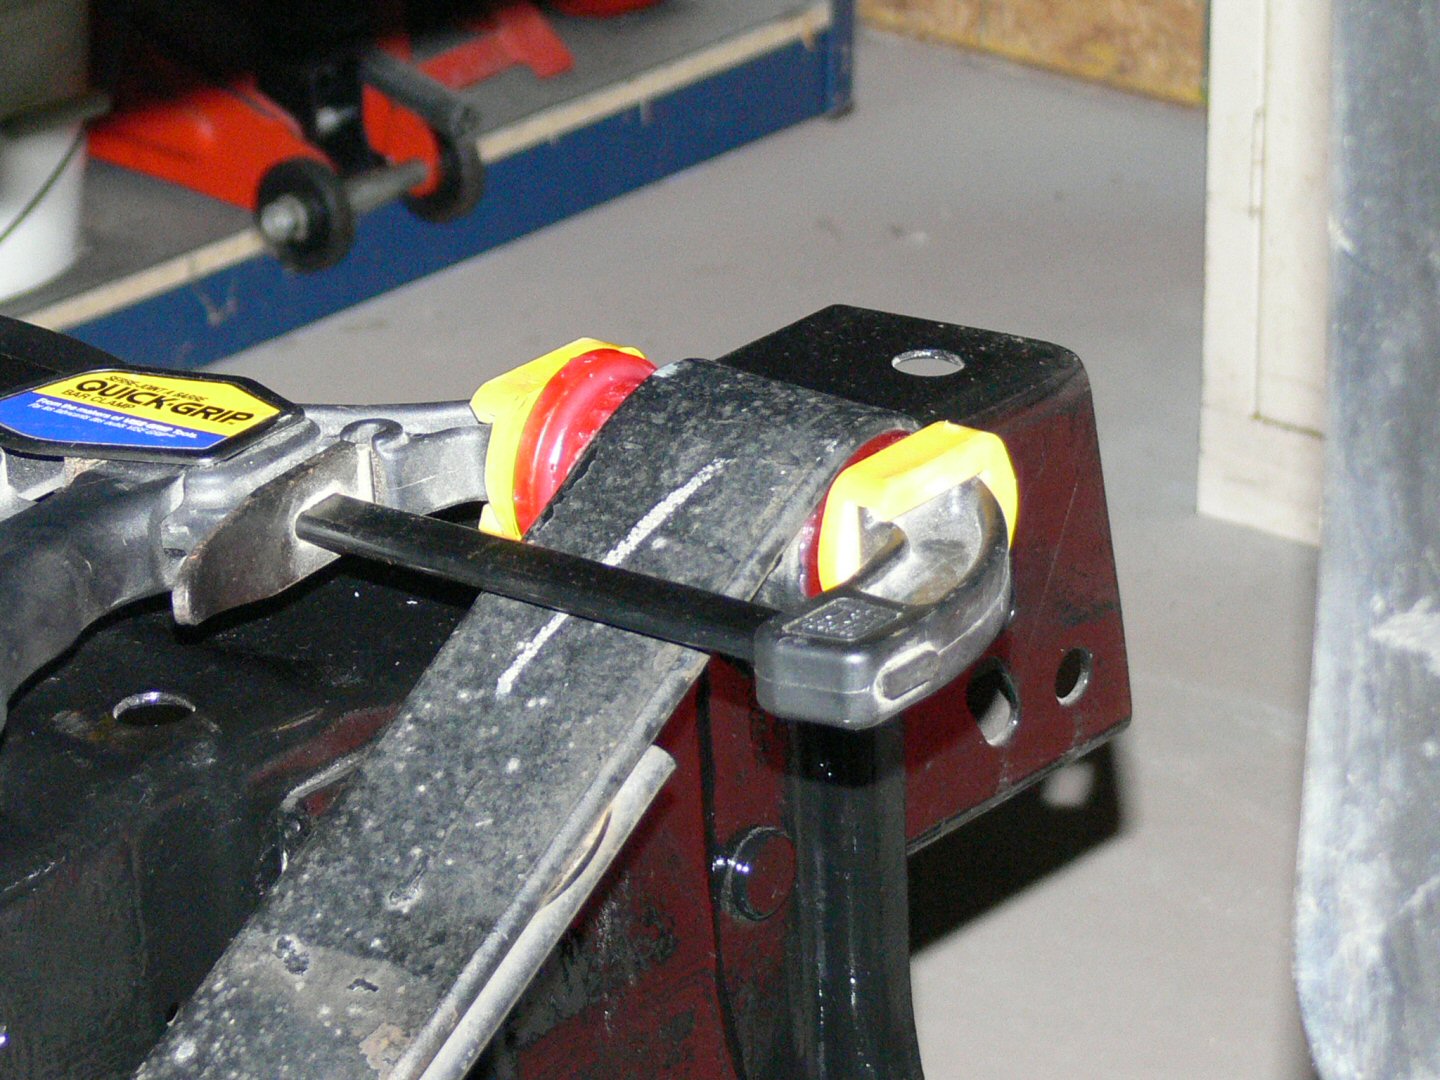
Installed the new Moog tie rods in both sides, got the last of the powder coat I needed to remove off the pass. side knuckles inner bearing race. Installed the spring, knuckle & dust shield, rotor & calliper on the passenger side. Just need to put the shock on & dust cap & I can put the wheel on.
*noticed the other driver involved in the big crash (driving Caddy) came back to the scene of the crime today lol. (showing girlfriend?)
July 24, blasted, wire wheeled & powder coated the shock bolts (chrome), used Indy blue pwdrct on the funny nut for the bolts & the washers for the rubber bushings on top of the shocks. Got the drivers side spring, knuckle, dust shield & tie rod attached.
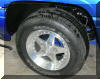
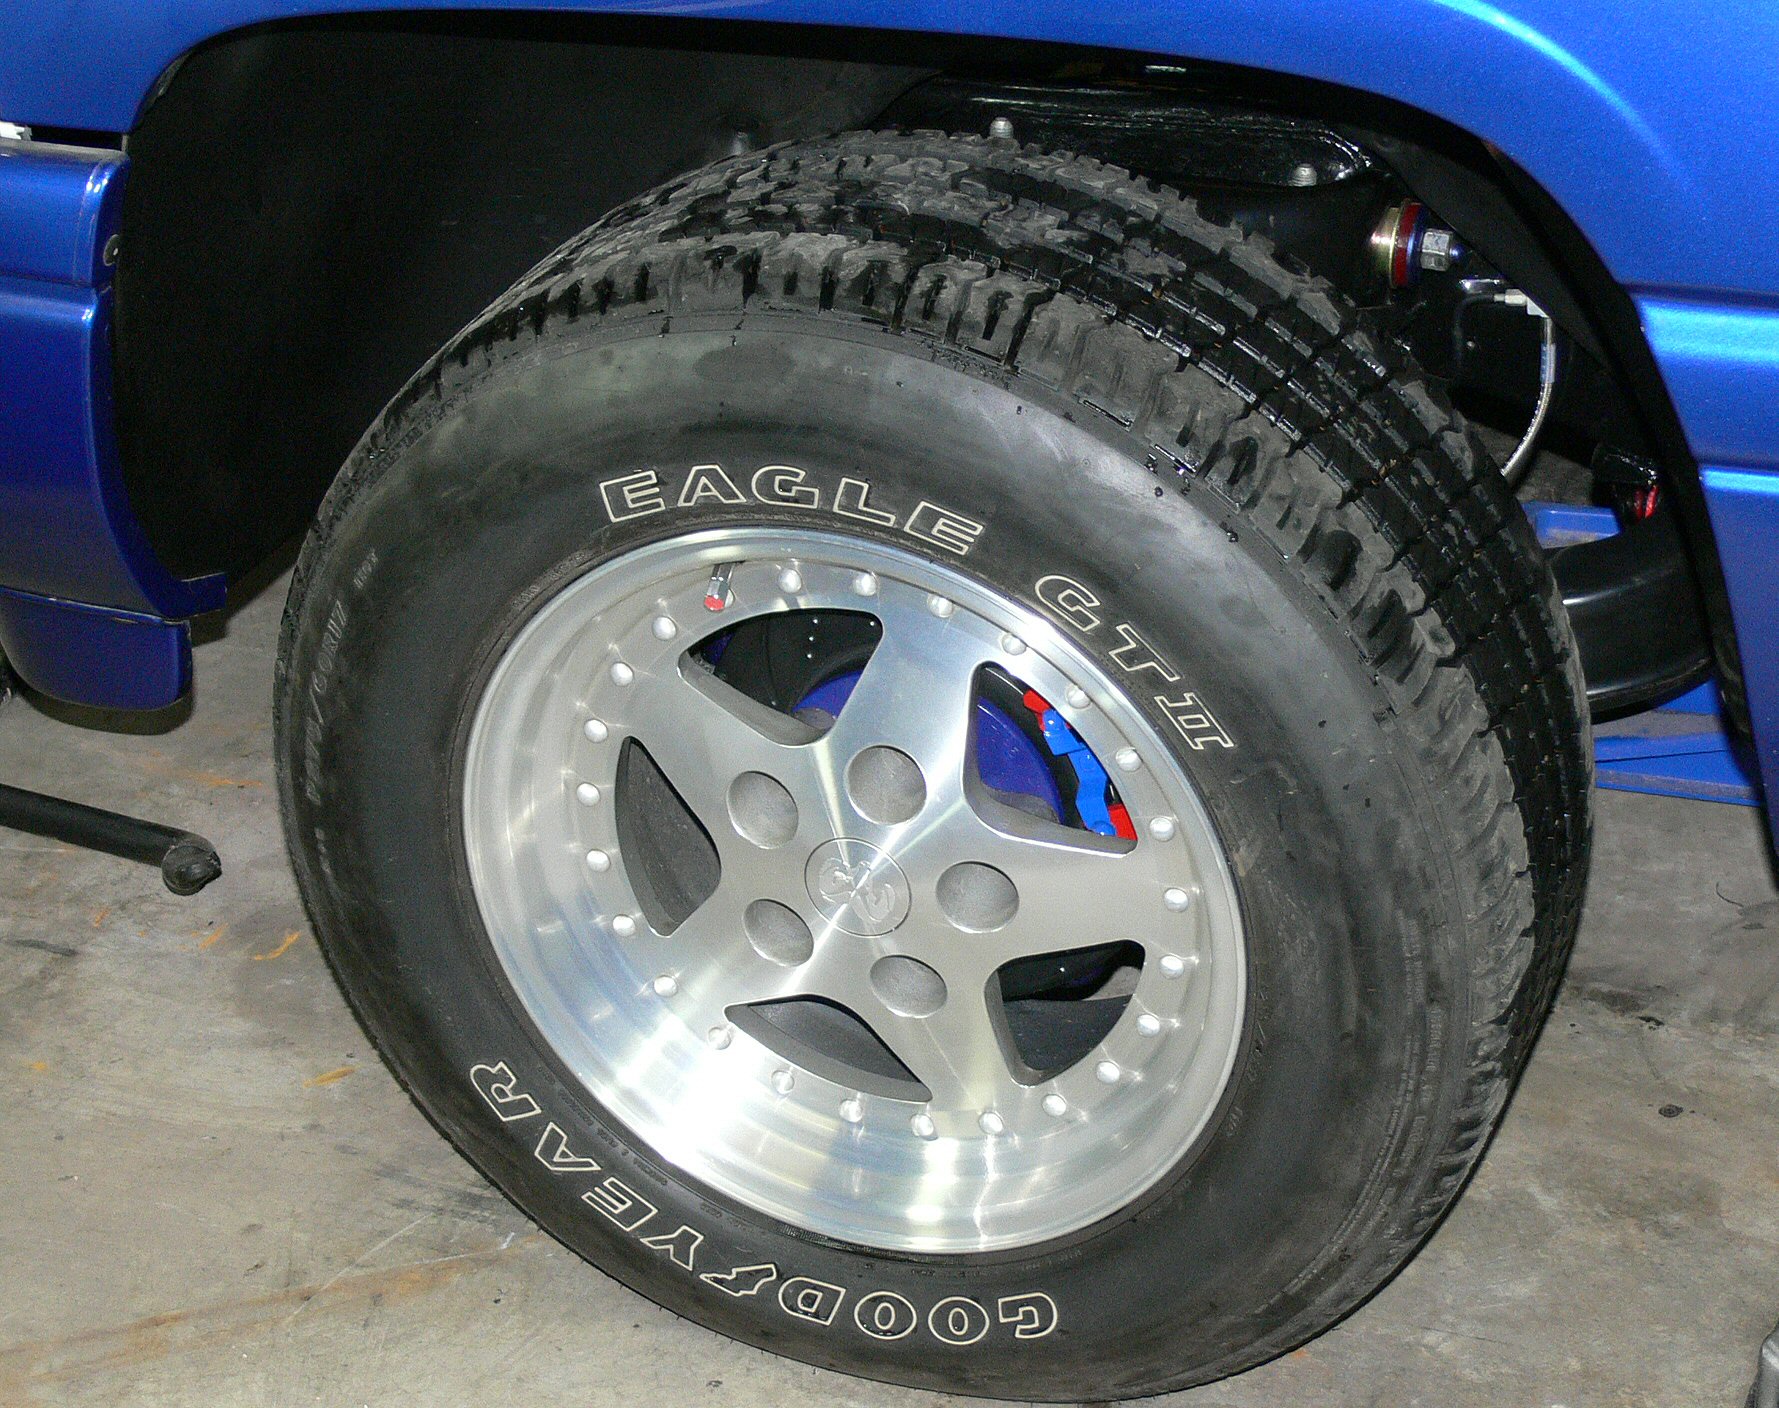
July 25, installed the drivers side rotor, callipers & shocks on both sides. Still have the sway bar off cause Ill be doing something with it. (debating color). Put the stock wheels back on & got her off the jack stands so Ill be able to roll her out of the garage. Back on all 4 without bed, motor, trans & fuel & battery drivers side sitting 1/8" lower than passenger side. Wish I could weigh it at each corner.

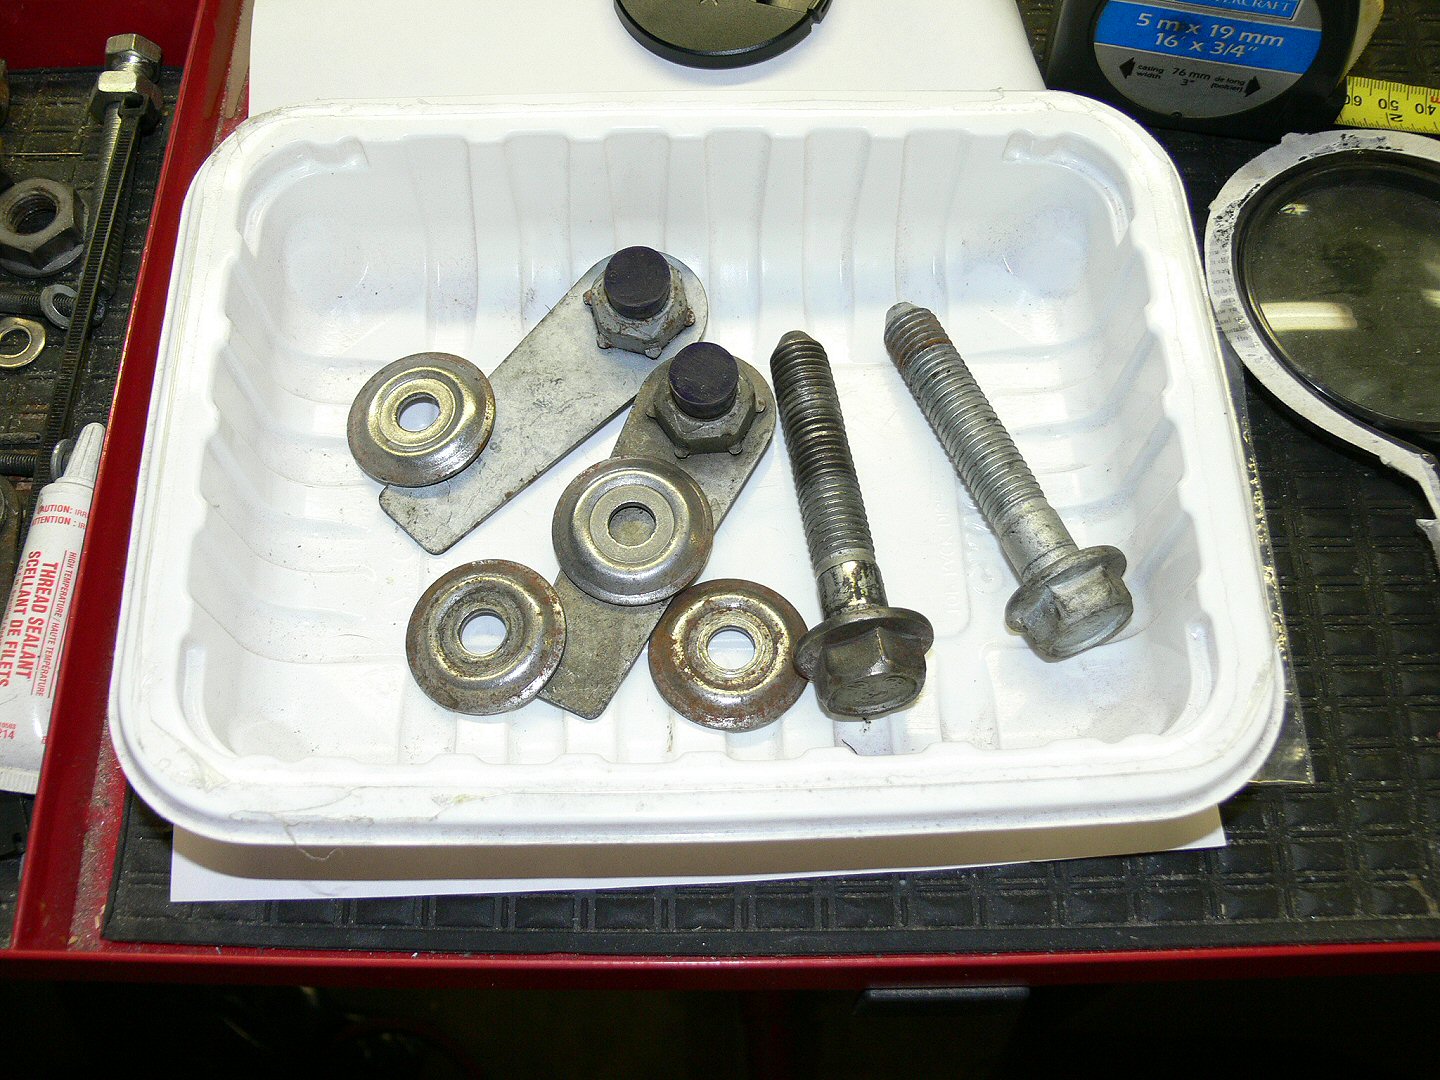
July 27, got the front drivers side front leaf spring out of the hanger popped the rubber bushing out & pressed in the Energy Suspension poly bushing. Went to torque it down & snapped the bolt off. Haynes manual says 150ftlb on the 96. Cause of the Belltech hanger the bolt goes in from the front with the unt on the back. Cant torque the nut only the bolt so Im just going to use a hand wrench & tighten it lots instead of using my 3' torque wrench.
July 31, just got back from the dealer, leaf spring bolt came to $41.25 w/HST (hated sales tax) & didn't include a new nut


Aug 1 to Aug 8, I replaced the broken leaf spring bolt & then went on to screw up on the shackle next lol. I popped out the bushing from the first Belltech shackle. Looked like the new poly bushing was the same size but after getting the rubber one out I found out they weren't the same. Got the stock shackle to compare & sure enough, the Belltech is about 1/8" smaller dia. Took a fair bit of playing around over 2days to get the rubber bushing & sleeve back into the Belltech shackle. I dont have bushing press so had to try a few things to McGiver it back in. Screwed up the rubber a little bit getting it back in but luckily its on the bottom side & all the weight is on the top of the bushing so it will be fine. What started out as a very easy install I managed to make much more difficult than need be lol.
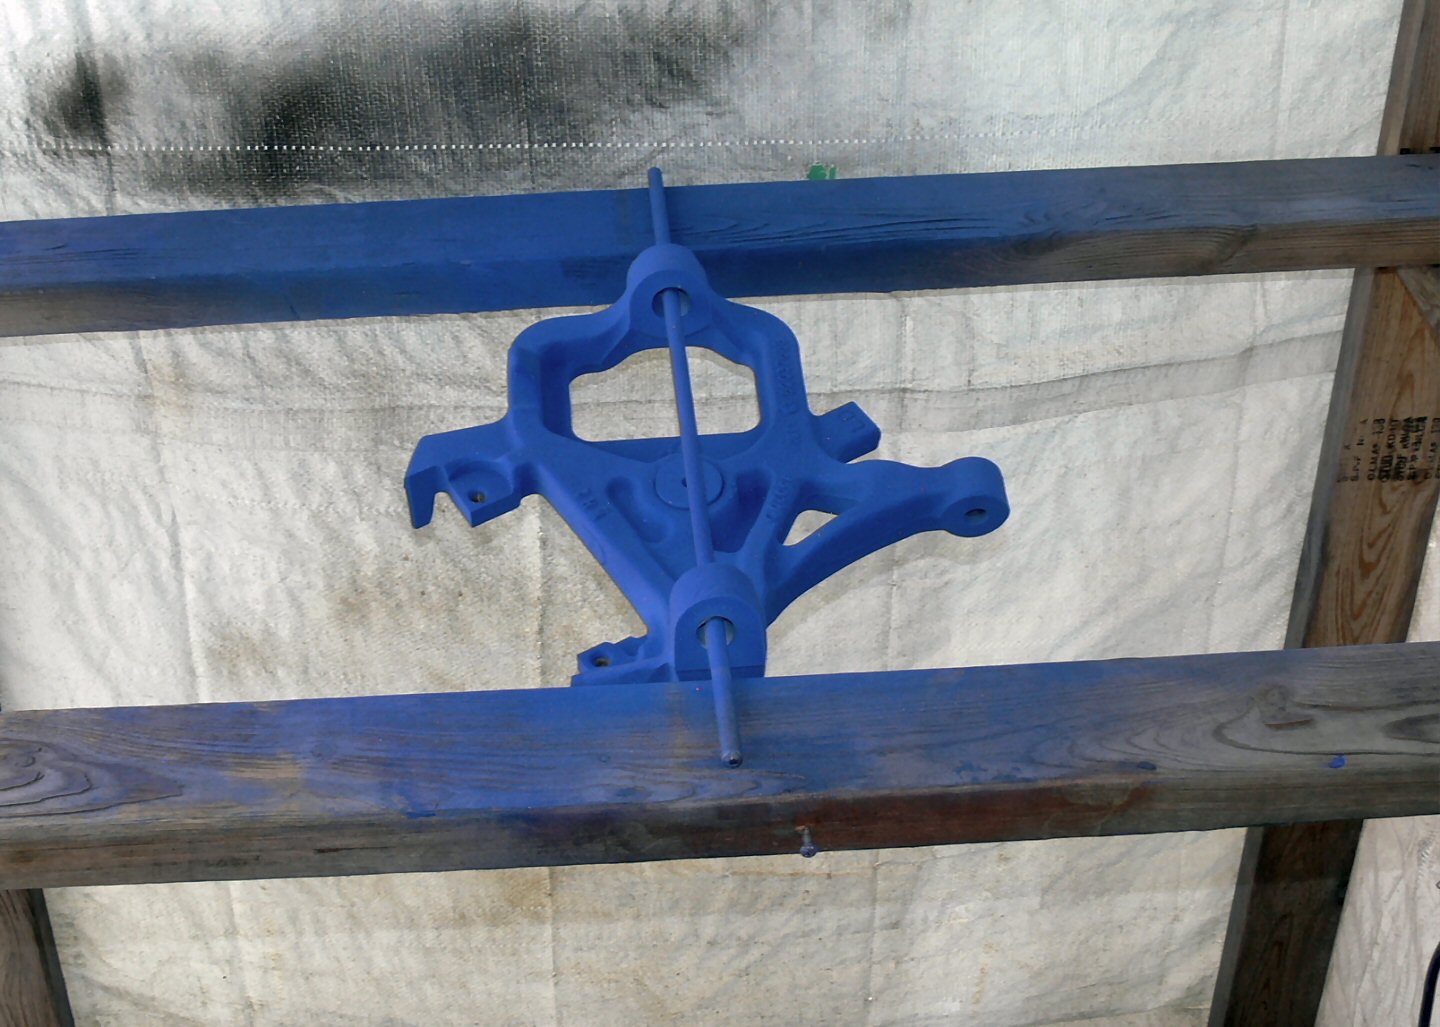
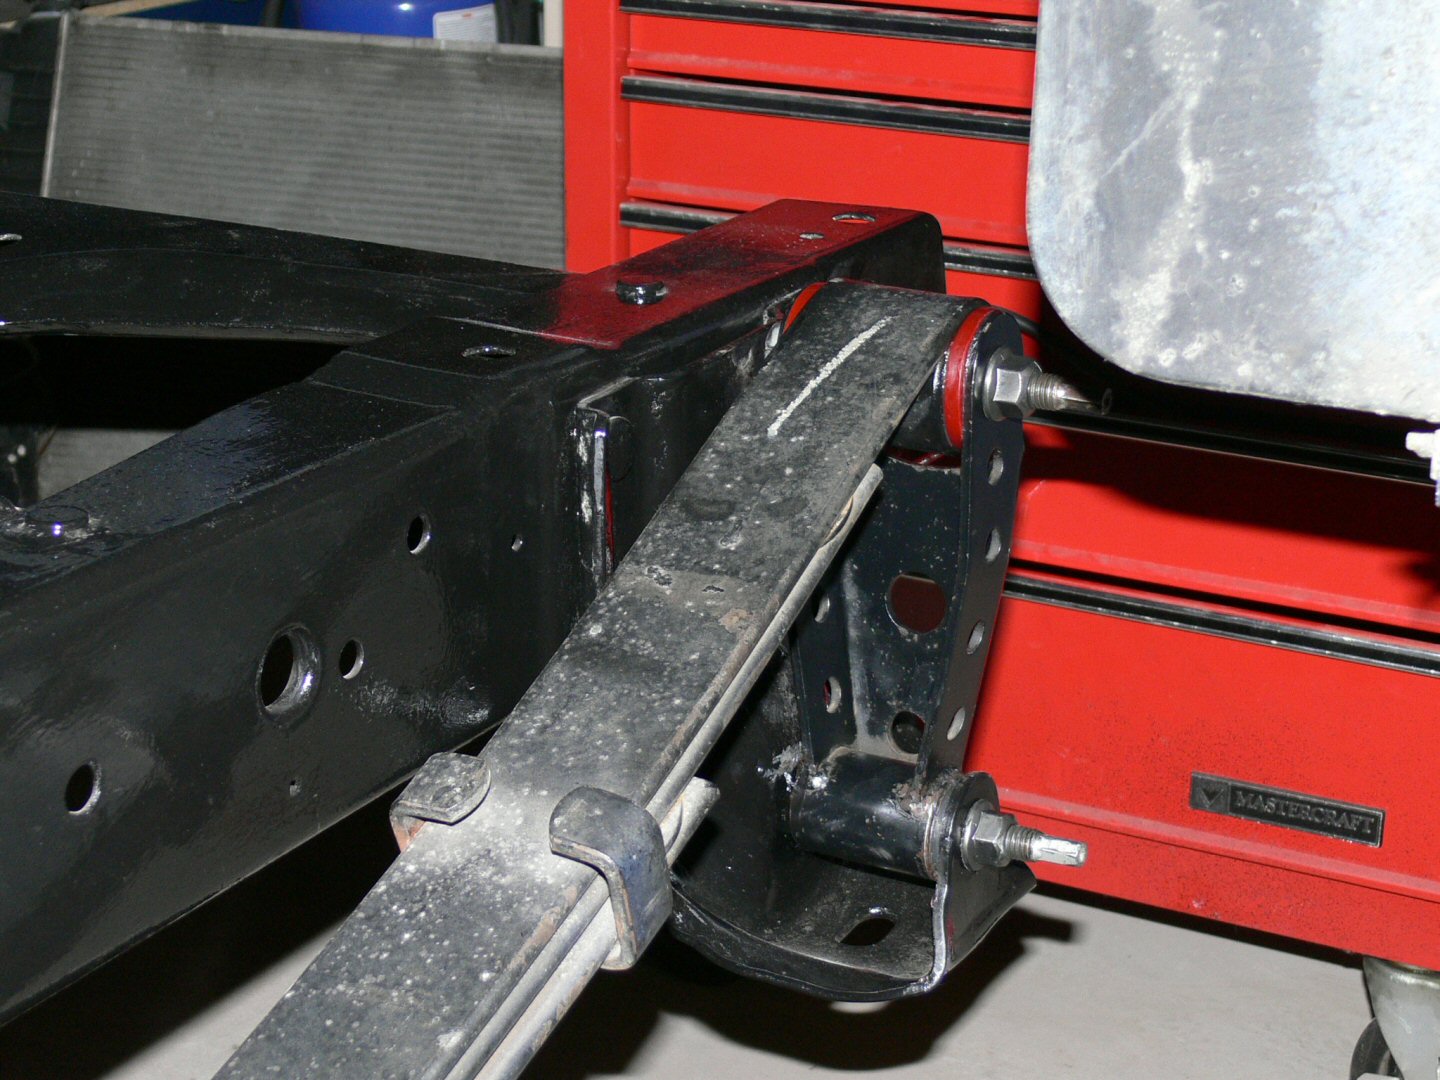
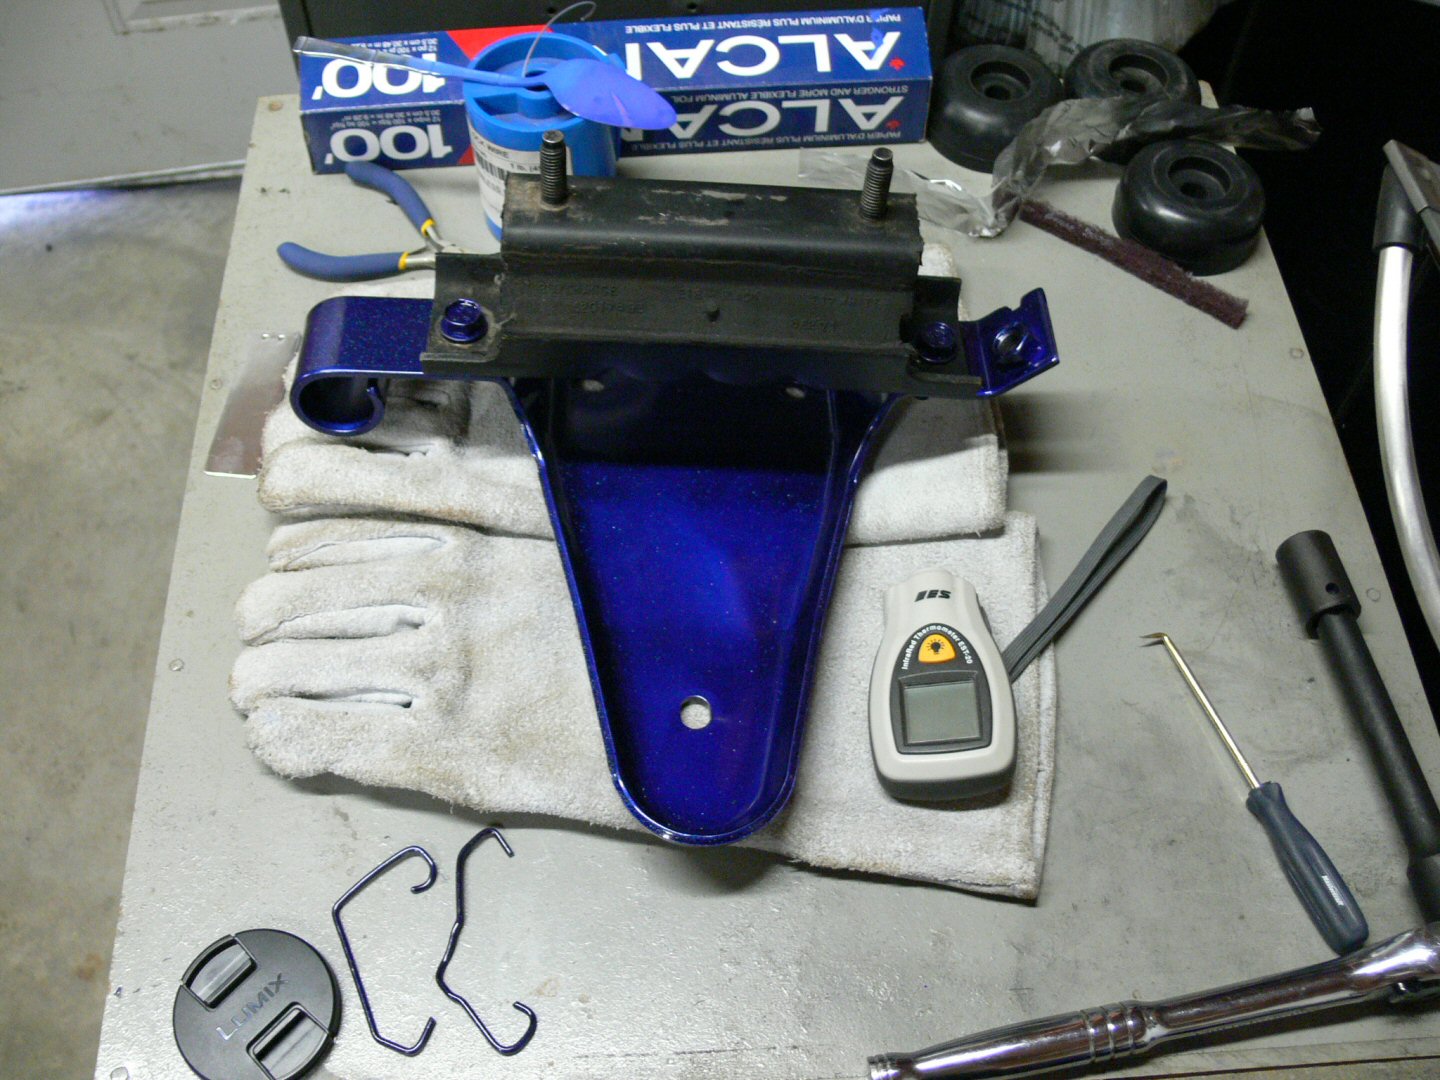
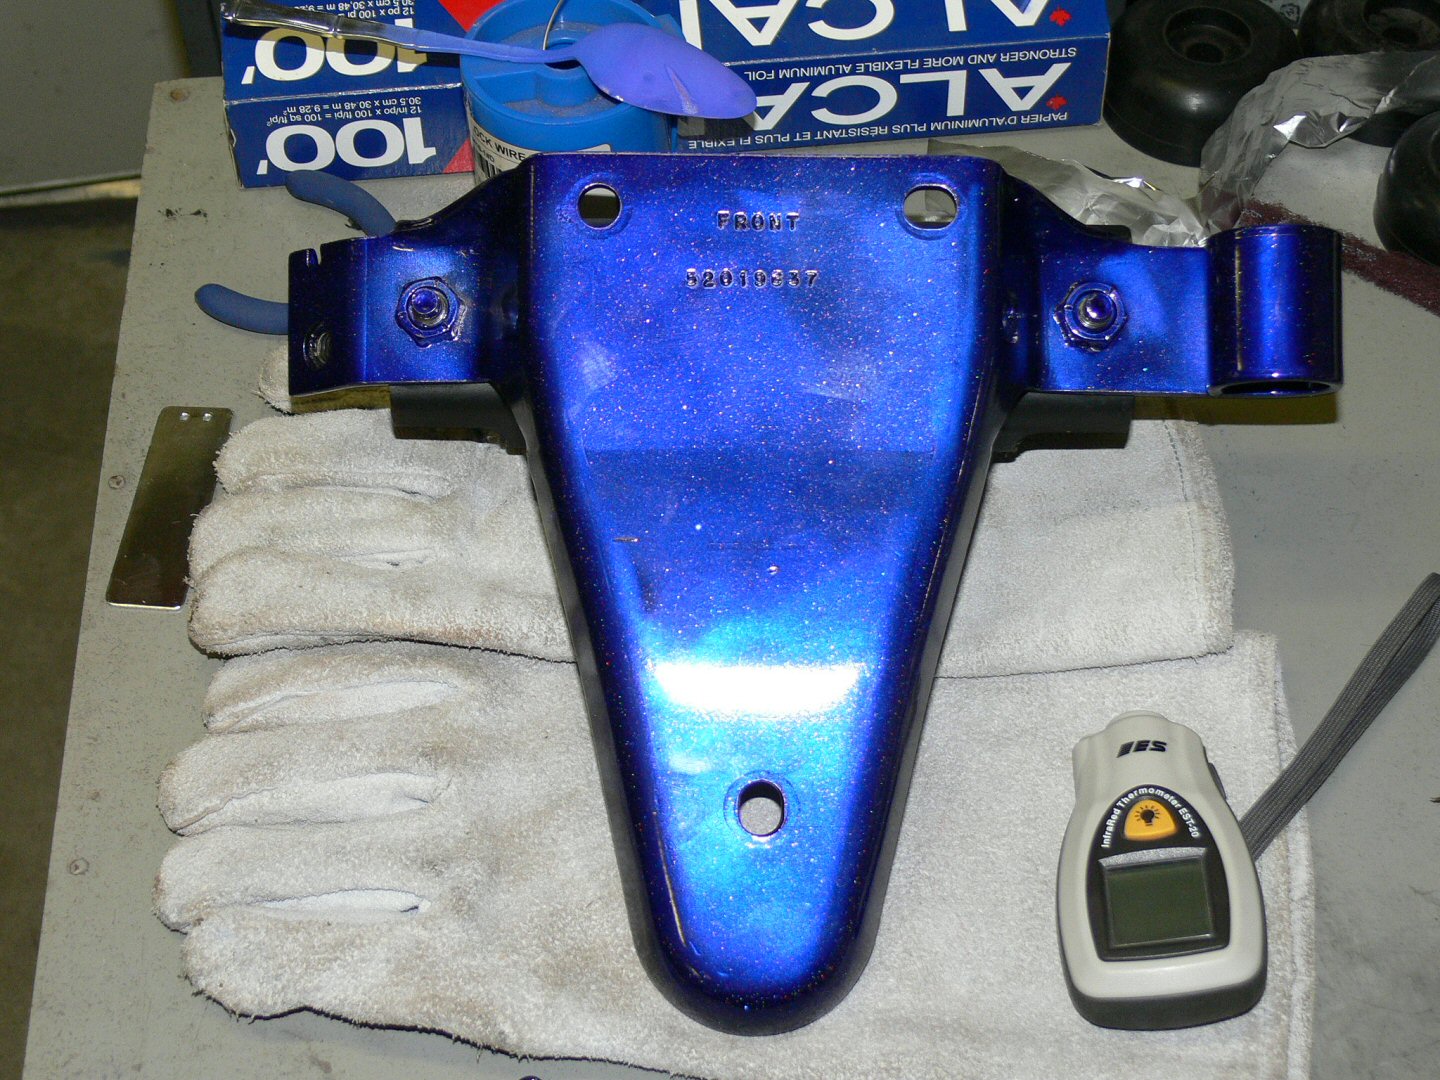
I separated the bottom plate for the trans tail shaft that holds the rubber dampener that attaches to the cross member. Blasted, wire wheeled it & pwdrctd it with the Indy mix. Didn't take any pics before or while I was working on it, just when I was finished. Also coated the bolts as well.
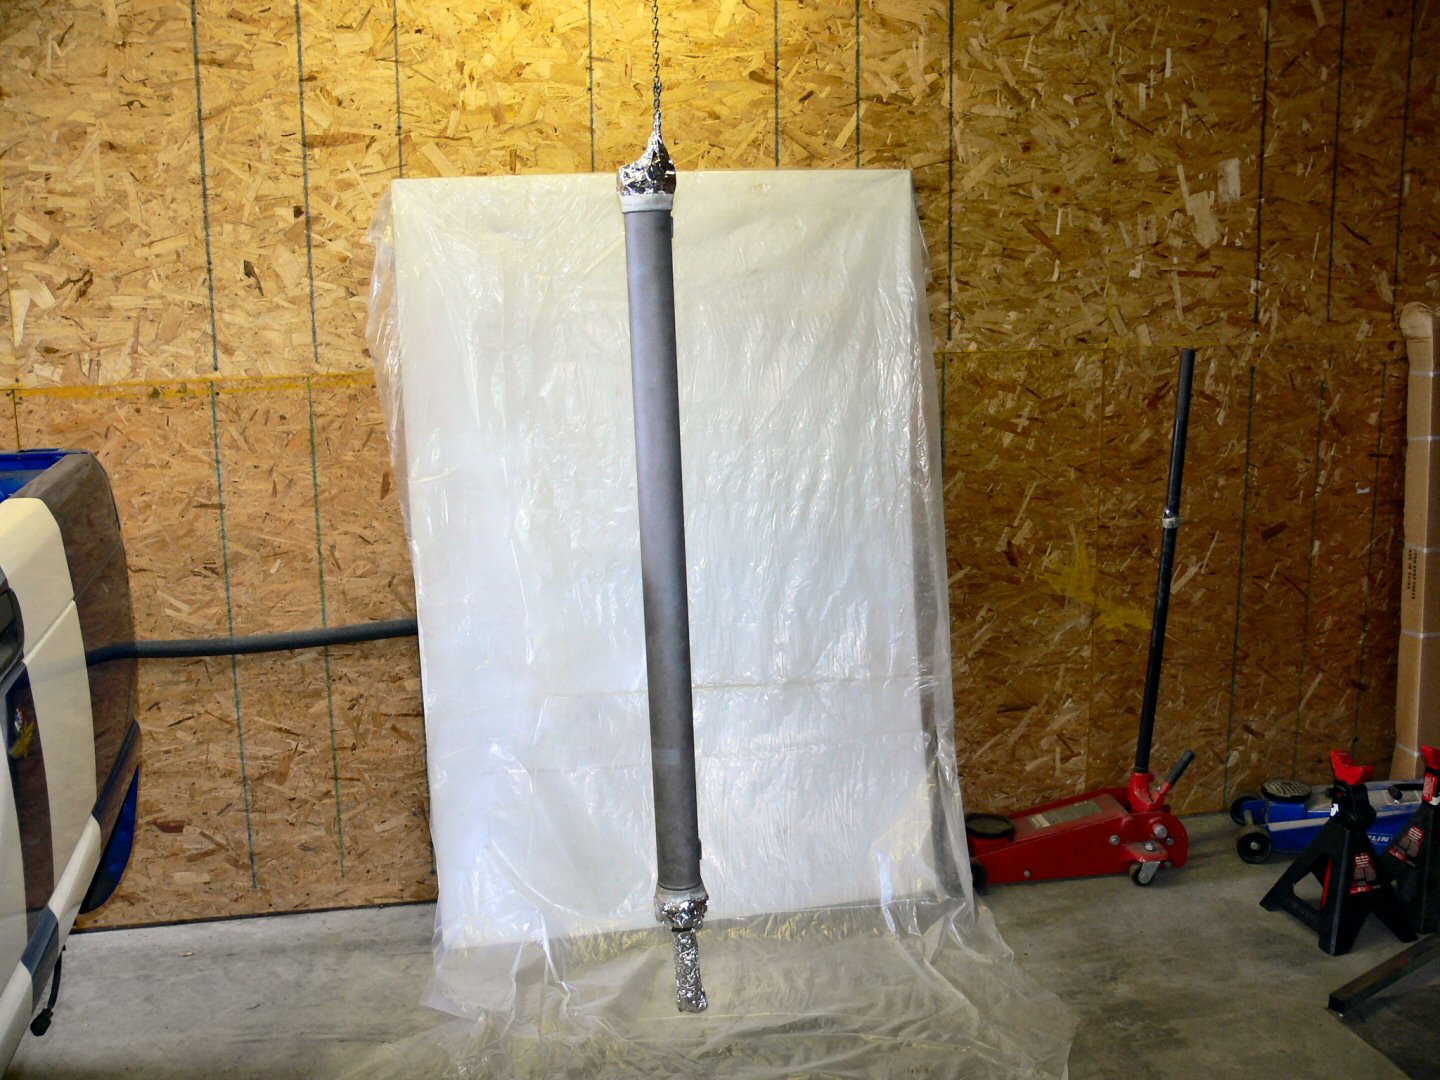
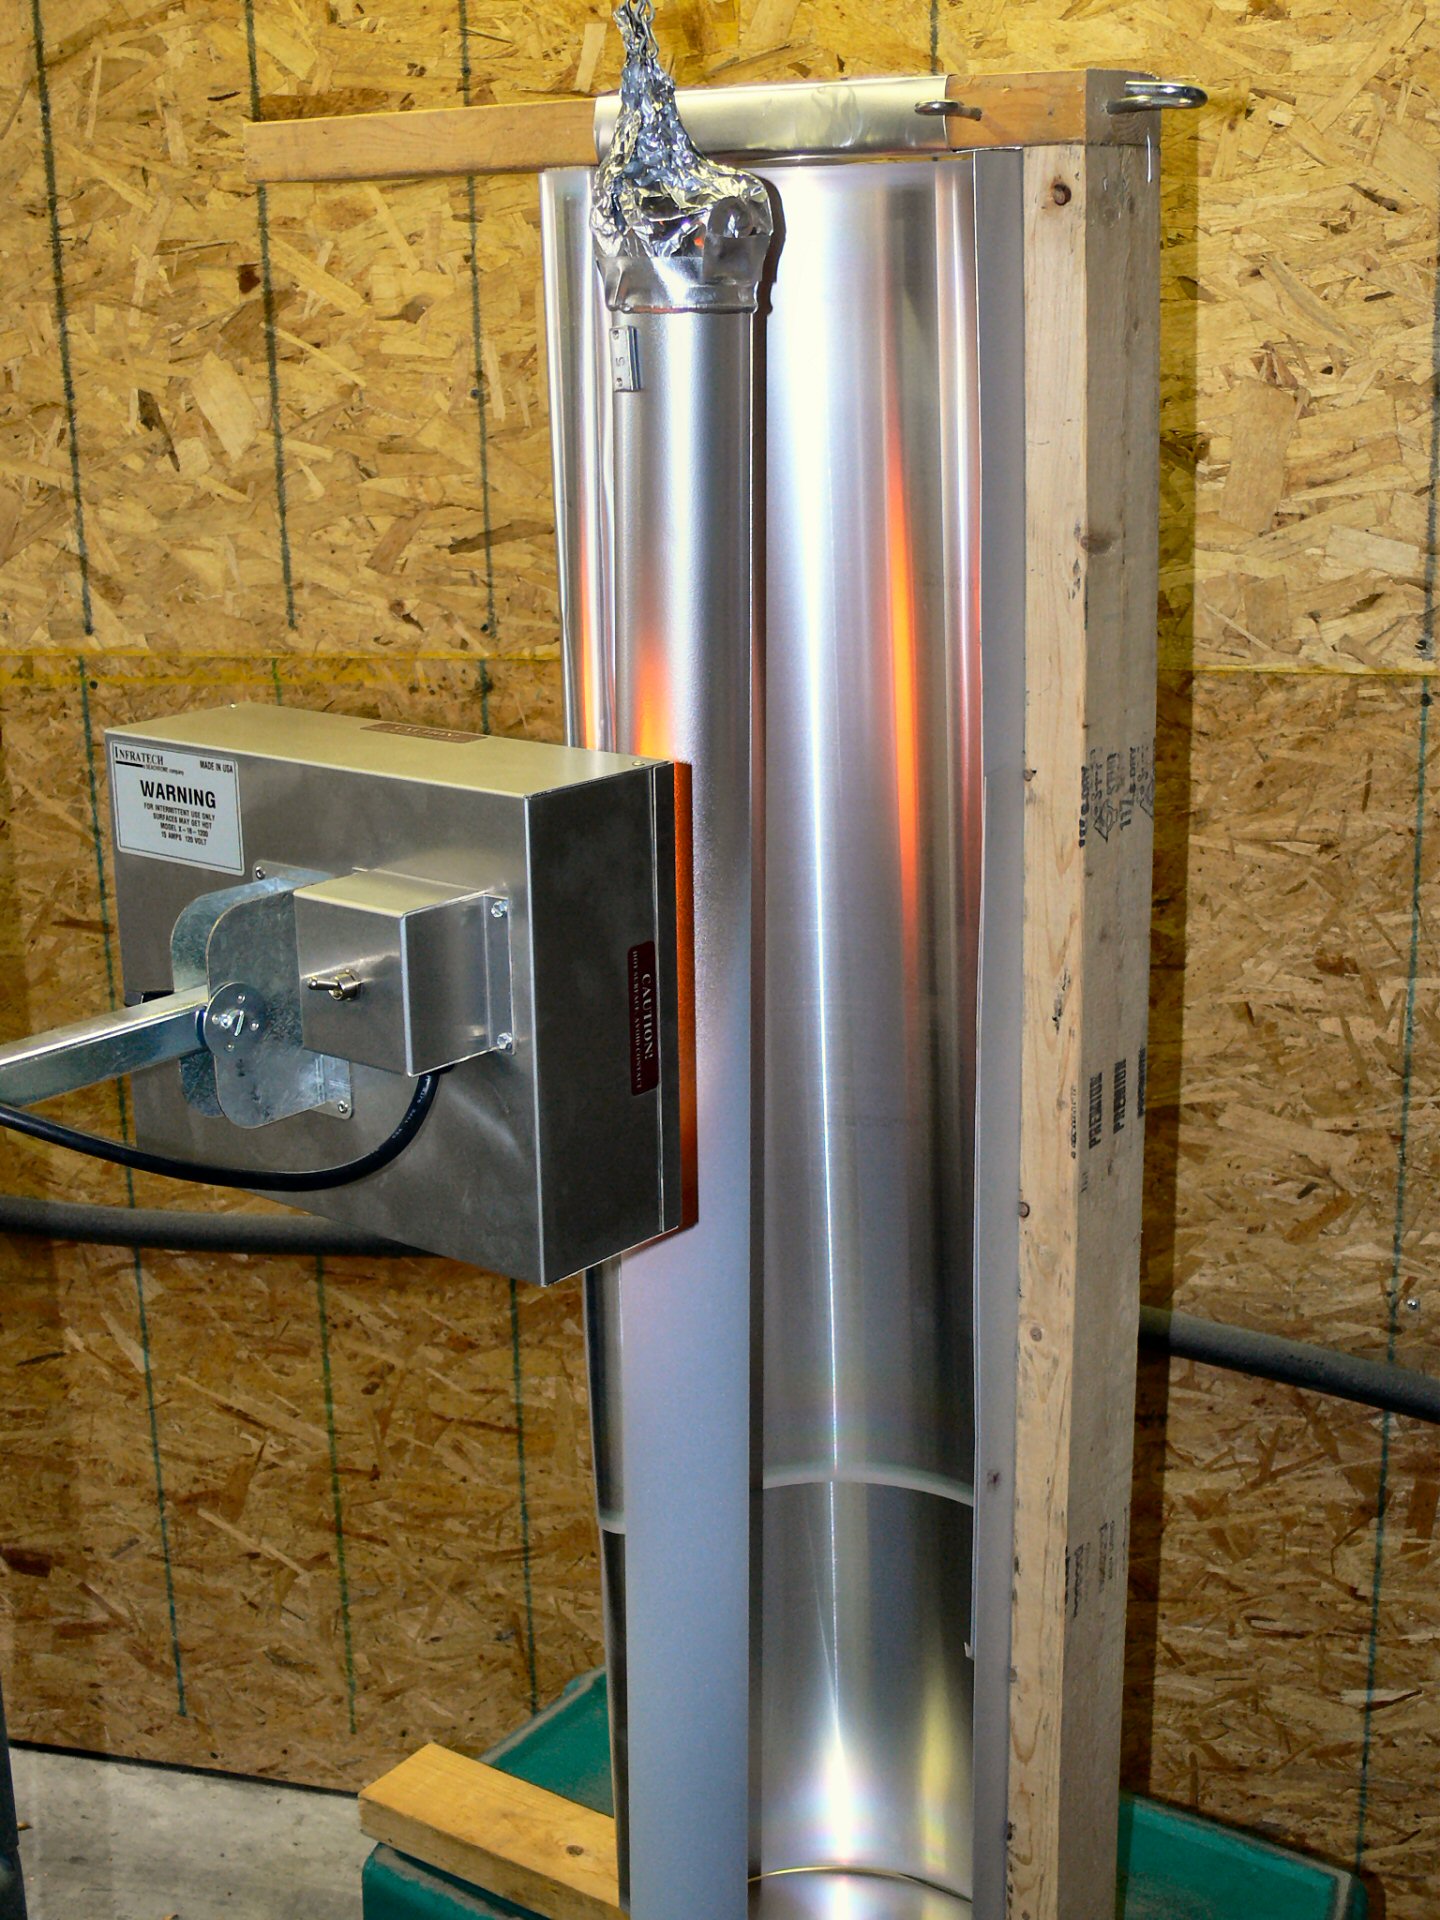
When I killed my old compressor last year I was working on blasting the driveshaft. I only got it about 1/2 way done when the compressor died. So I ended up spending about 2hrs blasting the whole thing. Its going to be a real PITA to pwdrct. I will have to reblast the whole thing outside again to get rid of any rust that forms by the time Im ready to pwdrct. I have to use my pressurized blast tank so I dont get a ton of dust floating in the garage. Then take the wire wheel to it. I may not be able to spray the pwdr in my pwdr hut thats just outside the side door. May have to spray the pwdr in the garage which I never do. Ive made up a reflector that will be also able to support the shaft but not sure if Ill use it or not. During this coming week I will roll the truck out of the garage & do some testing of lifting the shaft on & off the reflector to see if its even feasible to use it. Reflector has a wood frame on so hate to set it on fire trying to cure the pwdr lol. Not looking forward to this one. If I screw it up its going to take a ton of time to strip it back down again. If the reflector doesnt pan out then Ill just hang the shaft from the ceiling, spray the powder & cure it with the IR lamp right where it is hanging to make things easier. Hmm, Im almost thinking that I shouldnt even bother with the reflector now,,,,,,


Aug 28 - Sept 4, the last month ended up wasting a lot of time with stuff related to the accident. Finally got the V10 back (mid Aug) & for just over a week was back & forth returning it cause it was leaking trans fluid at the radiator (they installed 2nd new rad finally). Friday just past noticed one piece of trim on the wife's Yaris that should of been replaced so back for that. The last 2weeks I had been doing repairs to my driveway & steps. Told the insurance company I would do the work for less then the quotes they got. Had to do a decent sized patch, fill in some cracks & the ashpalt had pulled away from the house from back door to front of building. Took a while to complete cause the ants kept digging back up through it. So had to kill them & mix sealant with sand so they couldnt get through, turned out great. After cleaning & degreasing where trans fluid & minor oil leaks were I sealed the driveway. (about 120'x8.5'). Naturally I ended up doing it on one of the hottest days of the year (40C). Only did one coat, will put another coat on it next spring (week of rain/time off finished).
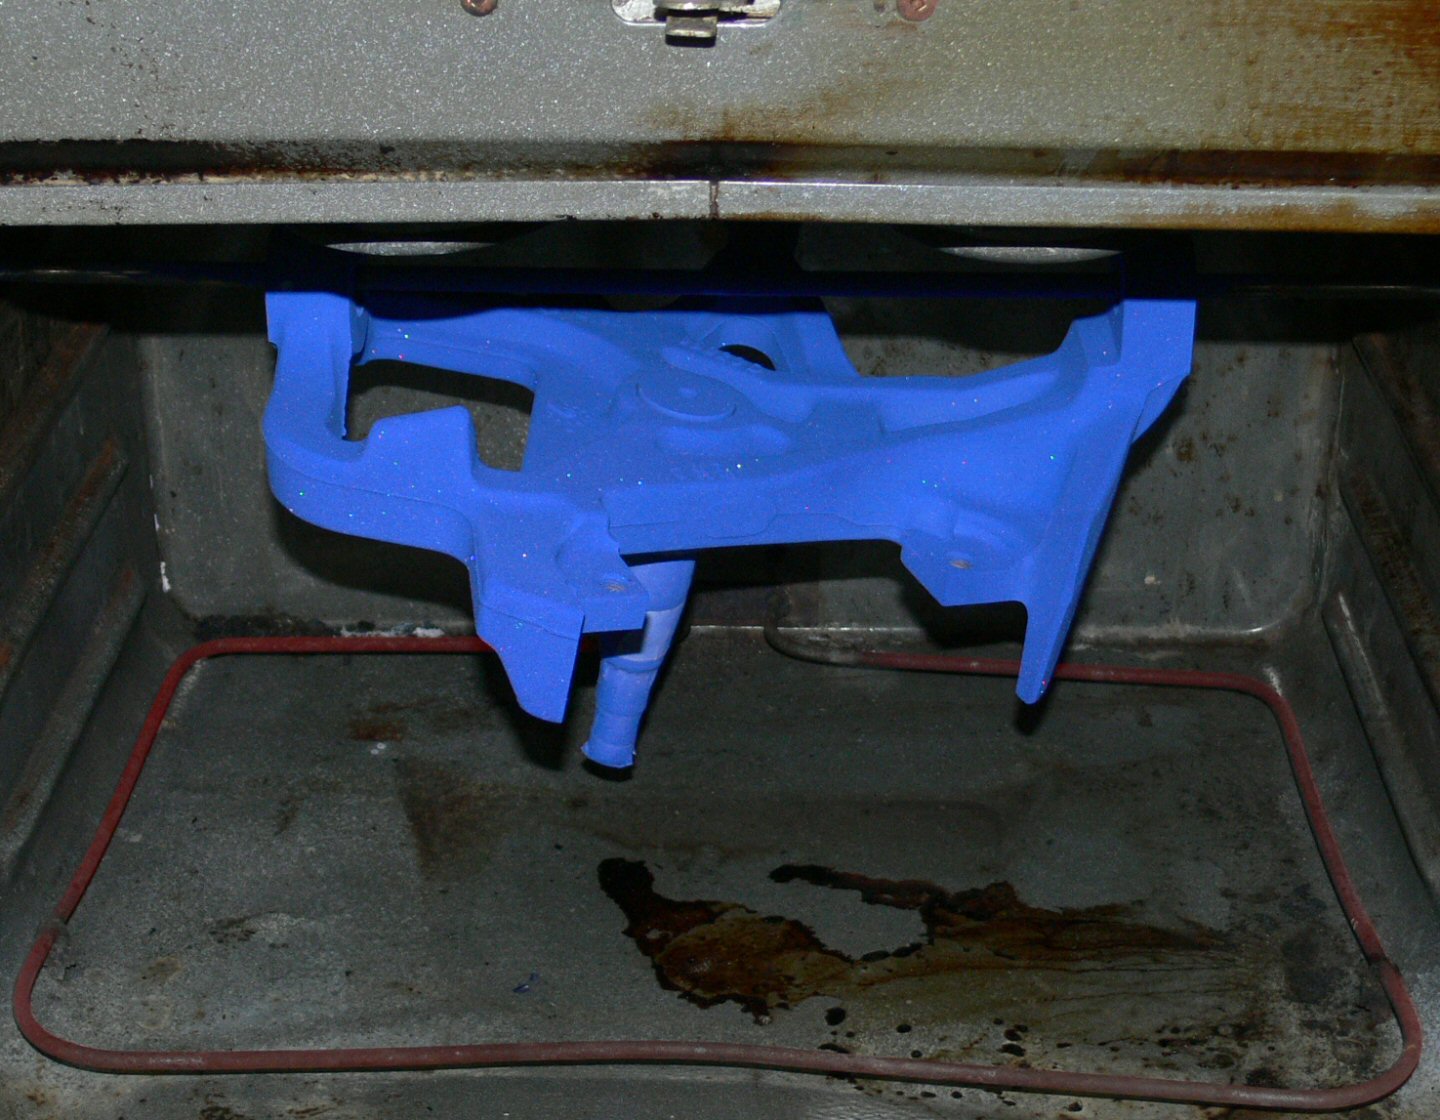
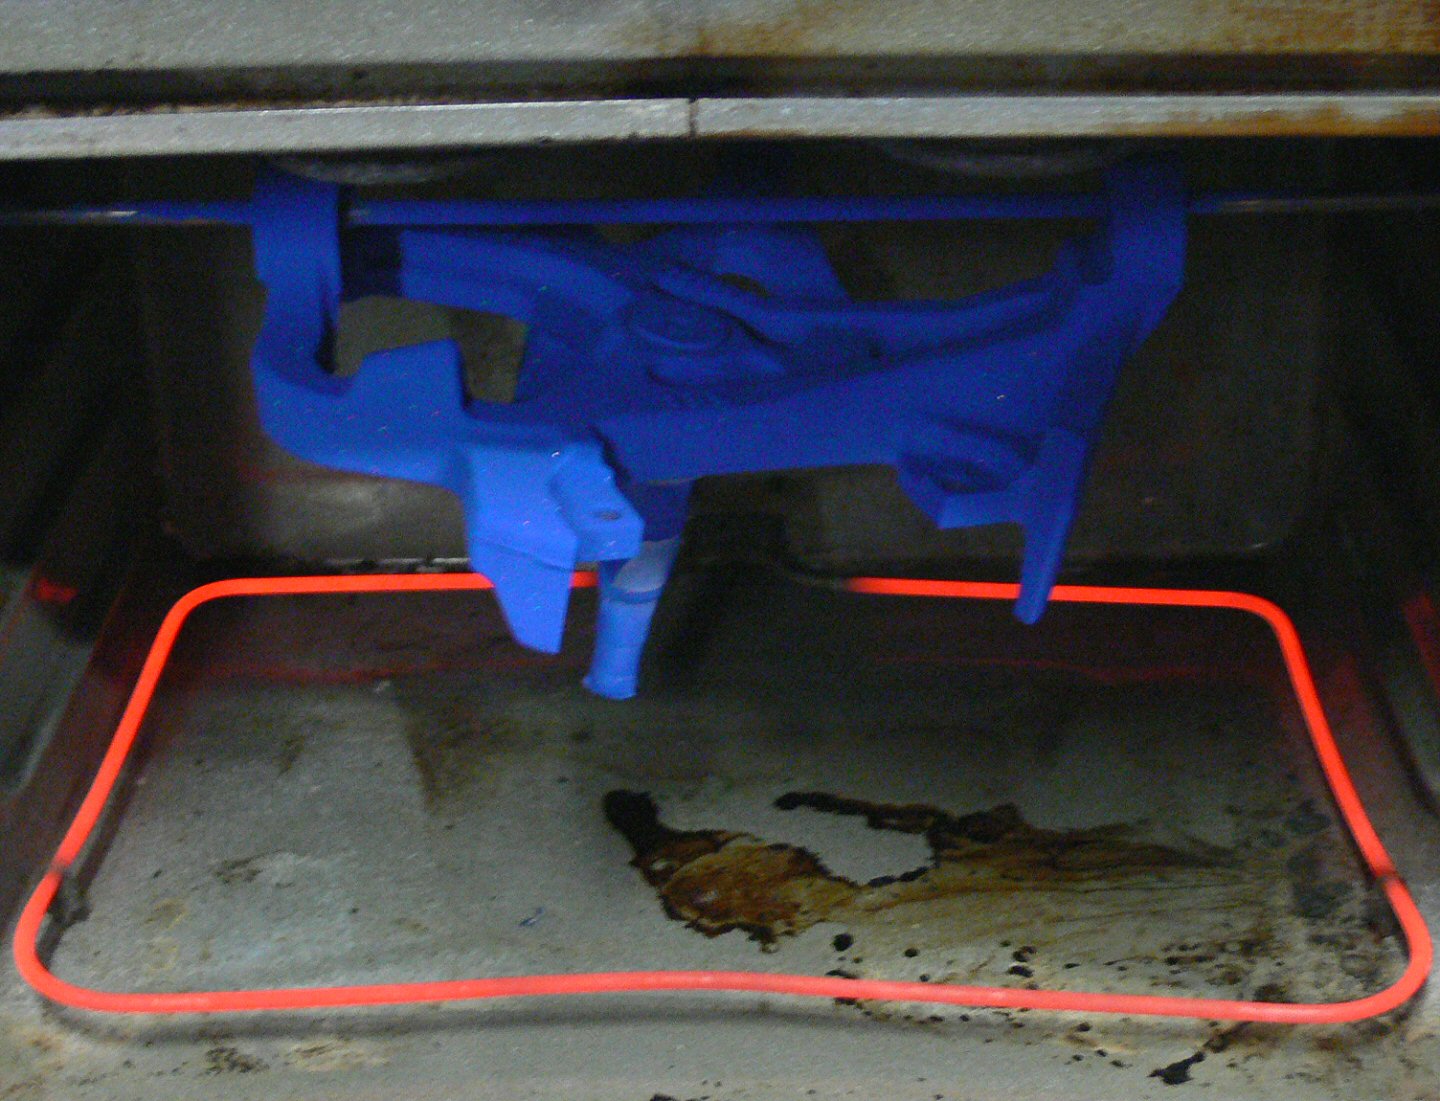
Sandblasted the driveshaft yet again cause of spot rust returning (too long since I blasted it last). Coated it with chrome powder coat. First time using my IR lamp, due to the length of the driveshaft it took most of the day to cure it. Turned out pretty good considering it was my first time using the lamp. Didn't hang it from the reflector I made, instead hung it from the ceiling & stood the reflector on end behind it.
Also painted the trans case this week with silver ceramic paint (caliper paint). Pulled the linkage attached to the trans off. (no case/linkage pics prior to paint/polish/pwdrct) Arm attached to the one linkage I couldnt seperate so I ended up wire wheeling it then polishing it. Both pieces turned out really well. 3rd piece couldn't get plastic grommet out (holds/protects trans fluid line) so just painted it silver. The last smaller arm I wire wheeled, then polished it as well as put a coat of my Indy mix on it & one washer & small piece that 2 springs attach to.
Separated the tv cable from the bracket at the trans, blasted the bracket bolt & washer as well as the nut for the tran line. Pwdrct the bracket & washer with the Indy mix & the bolt & nut in mirror black. Wire wheeled the yoke & ends of the drive shaft & painted them with black caliper paint to finish it off.
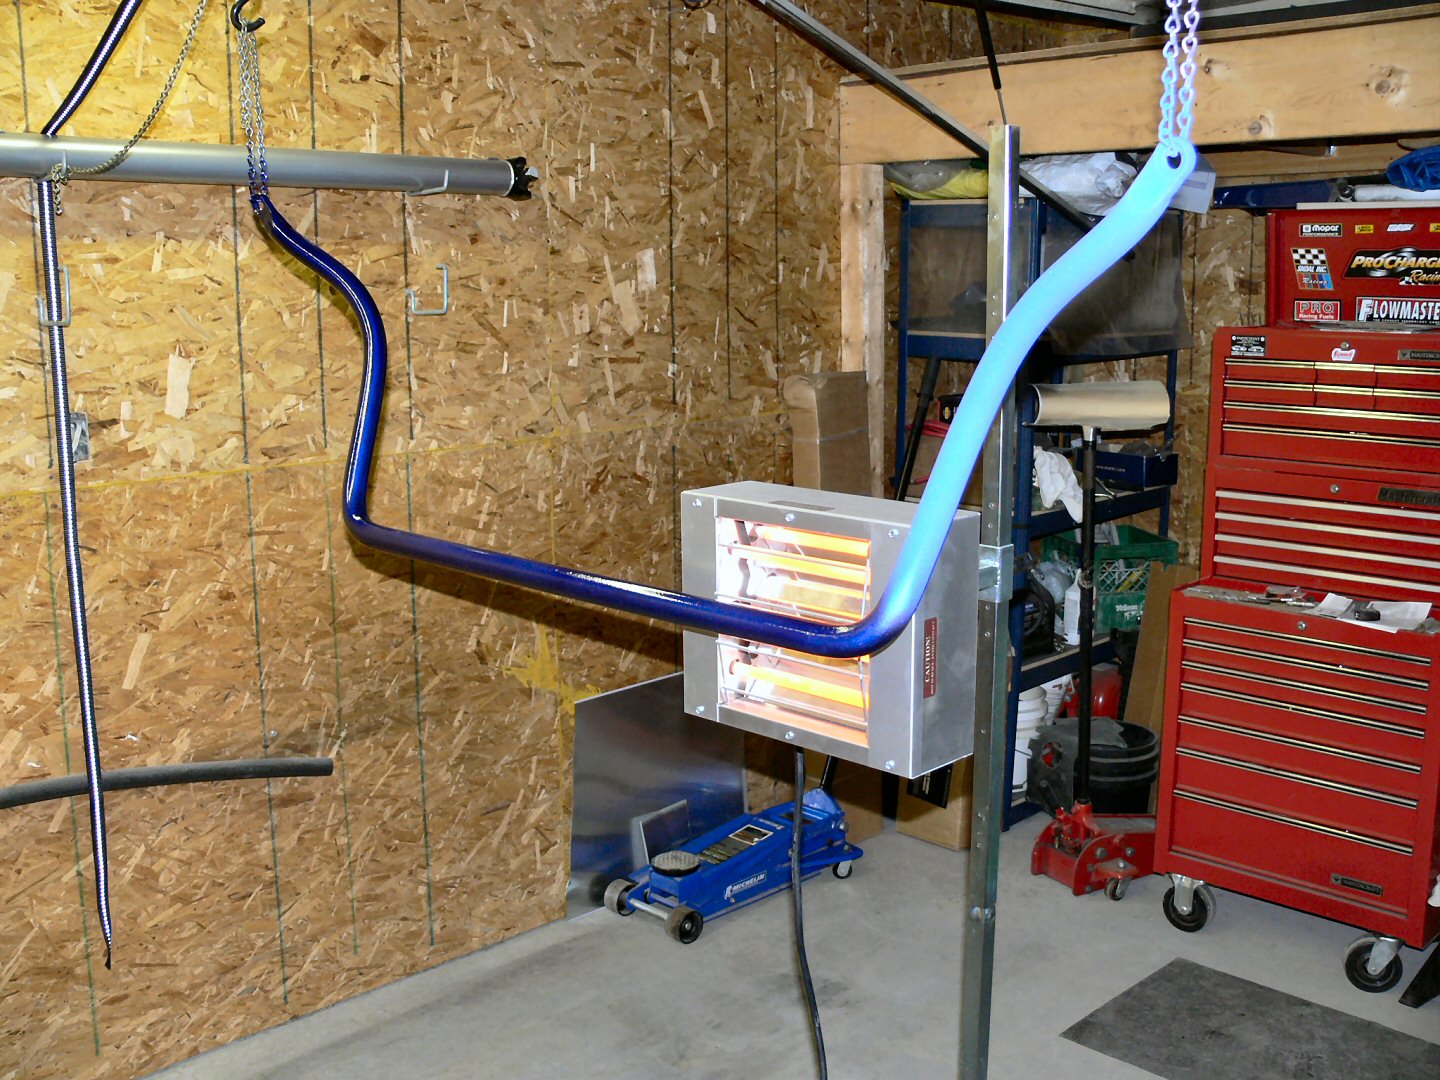
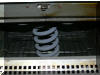
Sept 11-12, At noon Sat I started blasting the sway bar. Finished it & cleaned up by 3pm, ran out for 45min to get more wire wheels (couldn't use bench grinder due to where stand is mounted/size of bar). Wire wheeled the bar for about 1hr till I got a nice shiny finish(2nd pic partially done). Cleaned up, pushed the Indy outside & blew out the garage. Did some testing of how I would hang the bar & to see if I could use the big reflector I made for the dshaft coating last year. Turned out I could use the reflector. Mixed up a batch of my custom Indy mix & blended & sifted it for about 1hr to make sure it was an even color. Wiped down the sway bar with Pre (Eastwood) & setup my area for spraying & gave it a good coat of powder.
Cleaned up my spray equipment & assembled the IR lamp & put it in position. Started to cure it at 740pm. I didnt finished curing it till 450am!! By the time I cleaned up & pushed the Indy back into the garage is was 515am. I was beat after a very long day. Pics below of some of the different stages from beginning to end.
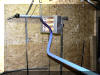
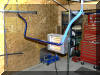
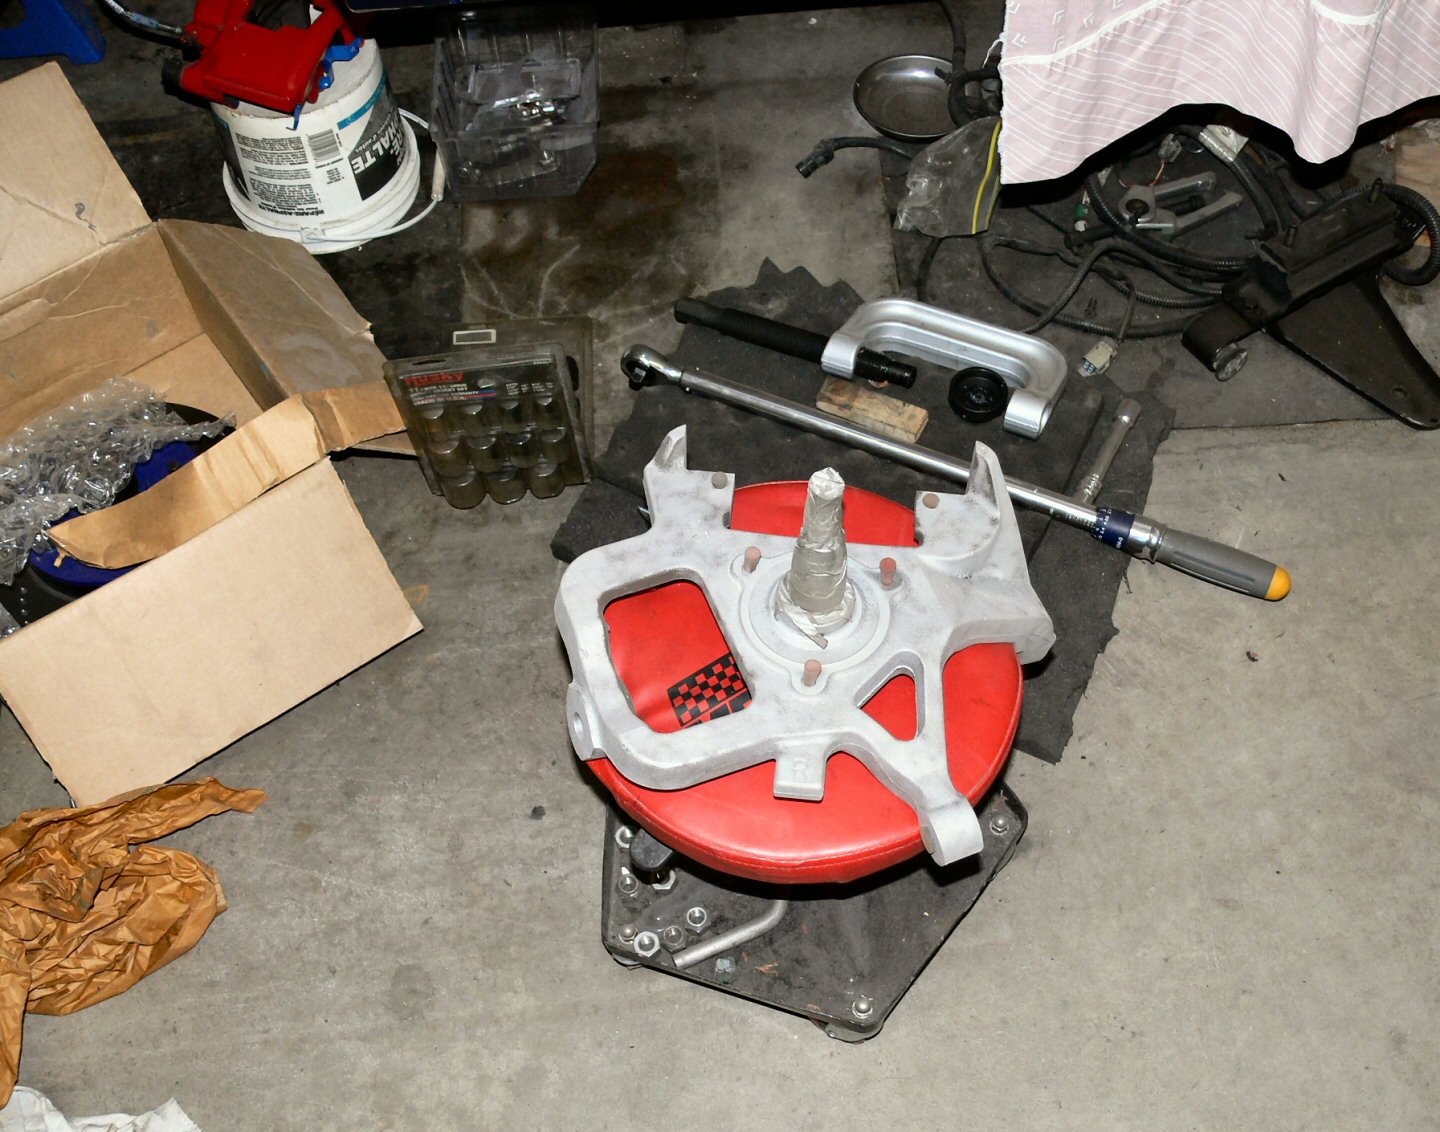
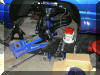
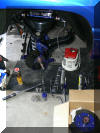
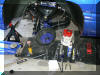
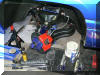
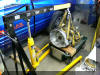
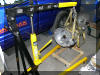
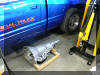
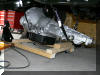
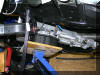
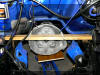
Sept 17-19. Made a dolly to help with the getting the trans under the truck. Pulling the trans out used chunk of 2x10 that was a bit tricky to keep ontop of the floor jack so wanted something better for re-installing the trans. Picked up a floor jack saddle at Princess Auto that replaces the normal cup for a wider square piece with a chunk of rubber screwed to it. Cut a piece of plywood just a bit bigger than the trans pan, used the rubber piece as a template to drill & counter sink holes through the plywood. I attached it to the floor jack saddle. Assembled my new shop crane & lifted the trans off the big cart & lowered it onto the dolly. Worked out perfect, trans pan only about 1" off the ground with trans on the dolly. Slid the trans under the truck with lots of room to spare & didnt have to yank front wheel & try to squeeze it in through the wheel well (like when I pulled it out). Used some ratchet straps attached to the truck frame rails to lift the trans off the dolly & high enough to get the floor jack with modified saddle under it. Lifted it into position & attached the mount to the tailshaft. Put some threaded rods through the case at the front & lowered it onto a 2x4 between the frame rails.
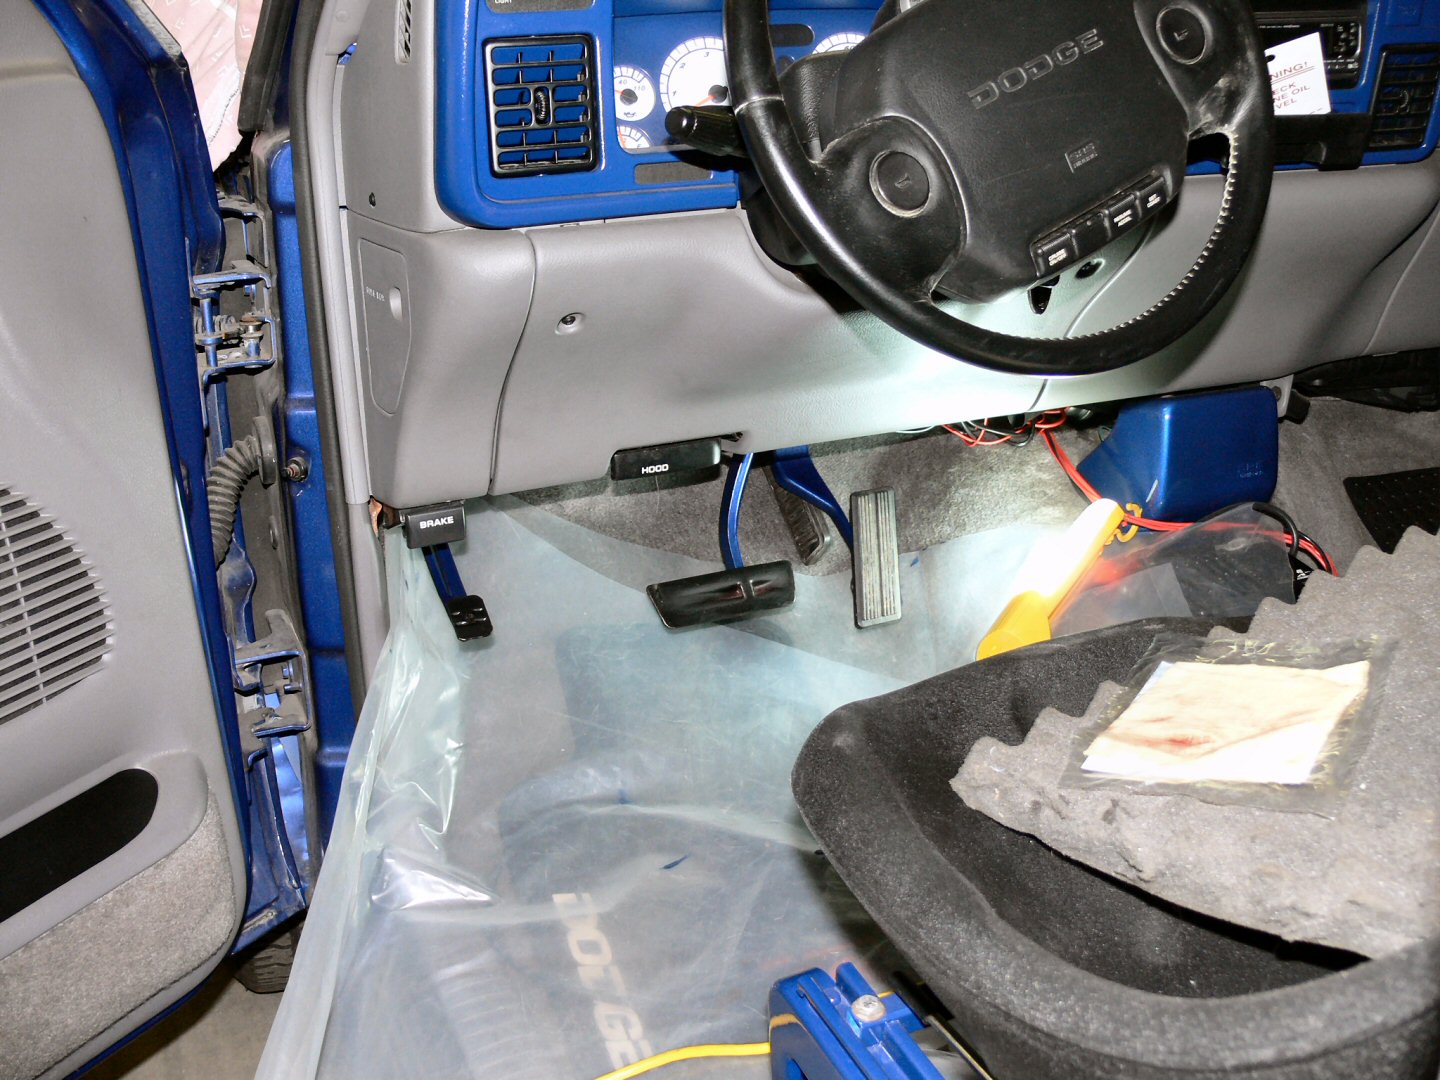
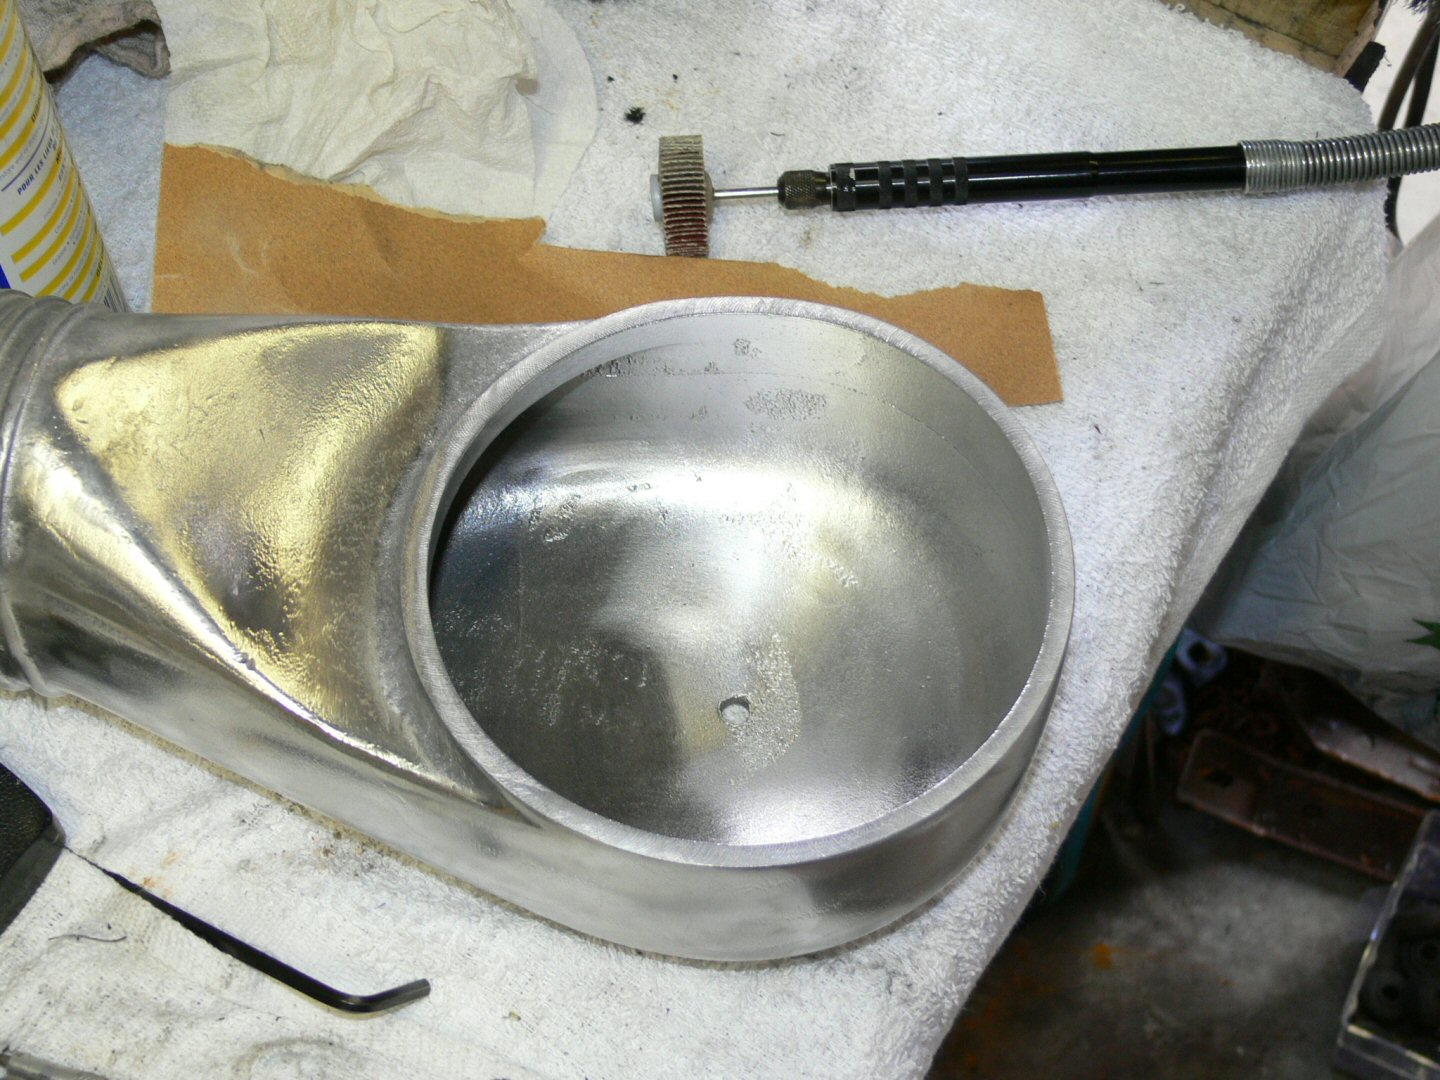
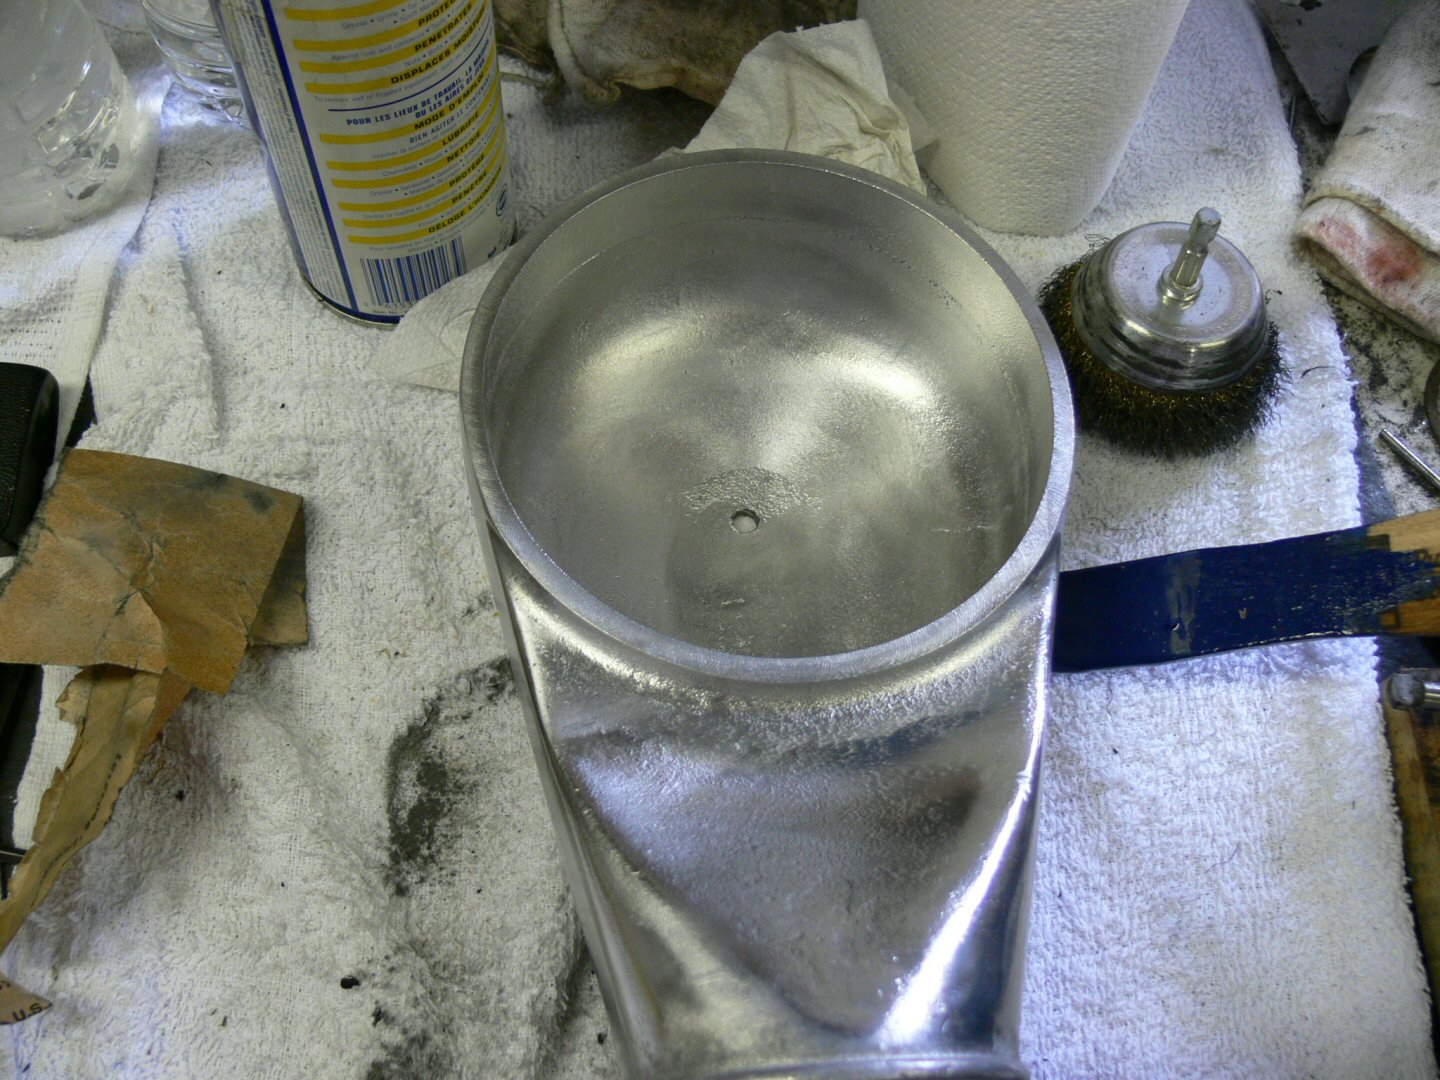
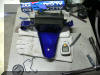
Oct 10-11, playing with the intercooler, cut off some more of the bracket off the back side with my dremel to get it to sit in closer to the rad at the bottom. Sanded & prepped an area under hood where the paint got rubbed off. Down low on inner fender behind headlight. It probably wont be seen with the s/c installed but figured good place to practise with the new airbrush I got last Xmas but still hadnt used. Also sanded the gas, brake & ebrake arms. Gave them a couple coats of matching Indy paint to cover up the red I had on prior. Red just didnt do it for me so now they are color matched to exterior. Just used a brush cause didnt want to remove them & didnt want to paper the interior to protect it. Still have to do clear coat under hood & to the peddles. Maybe get that tomorrow before work if I have time.