06 Pics n Slips

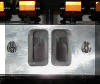
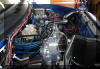
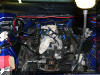
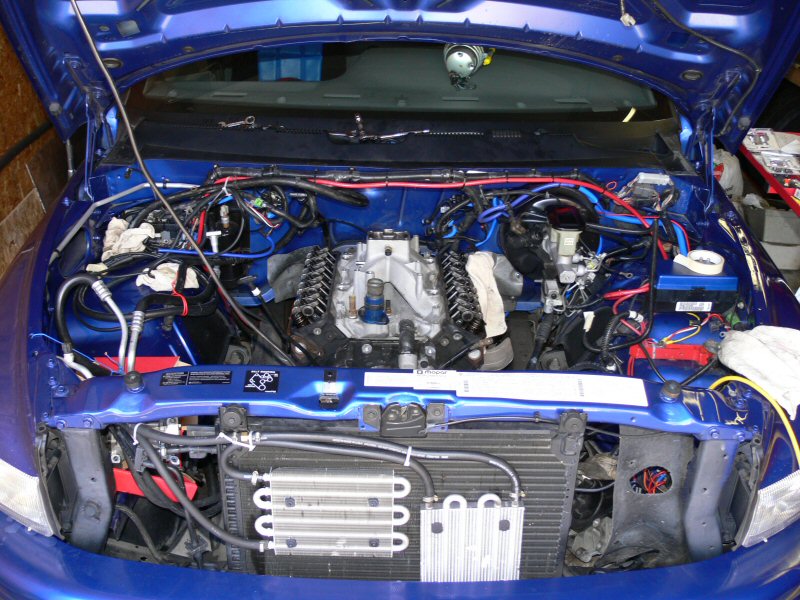
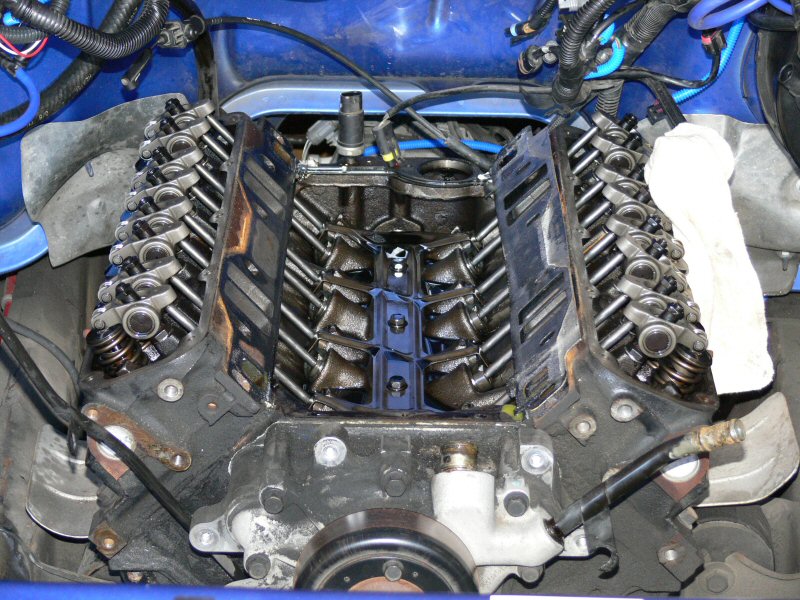
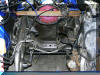
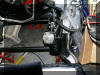
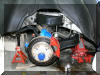
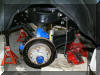
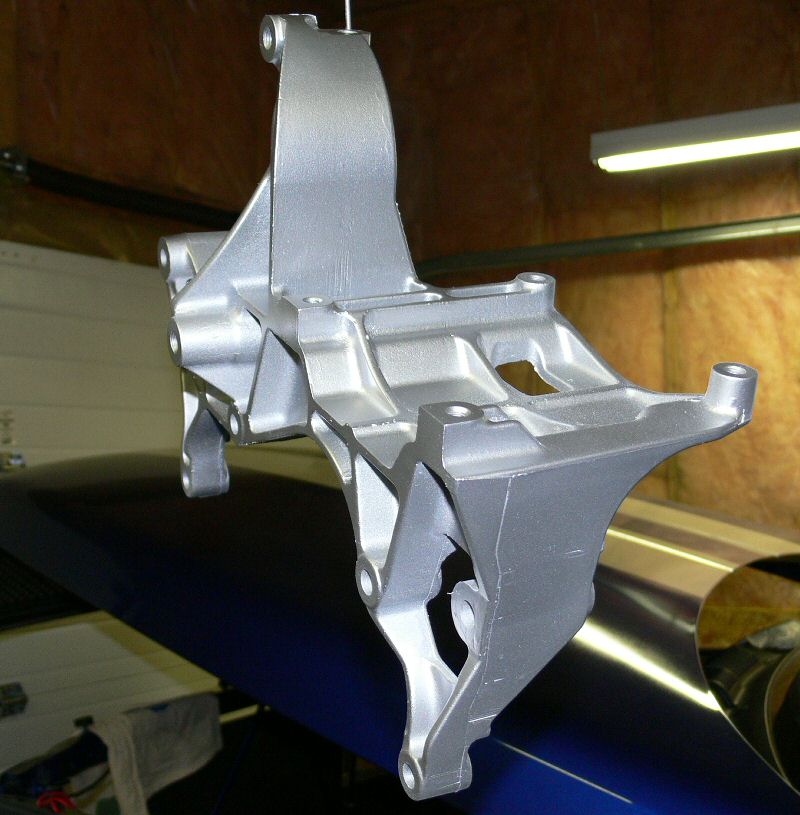
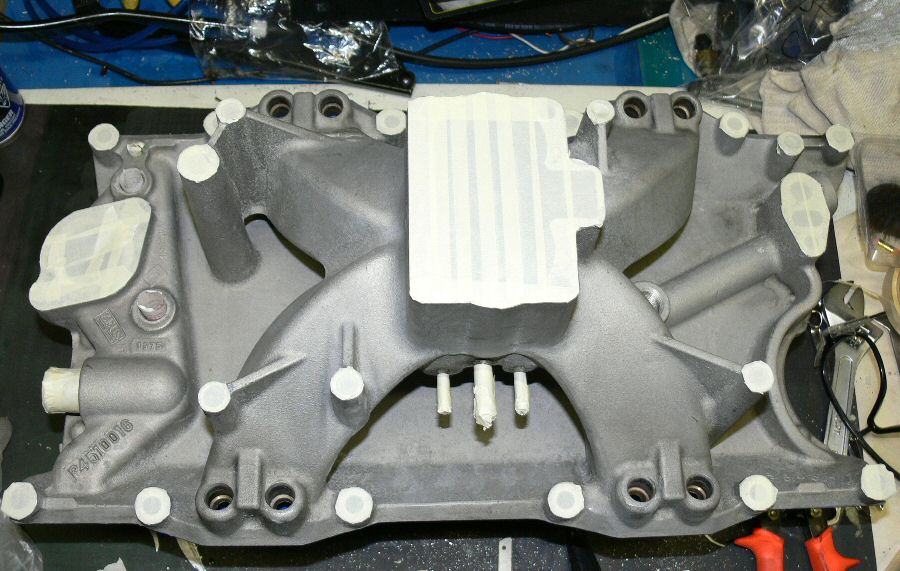
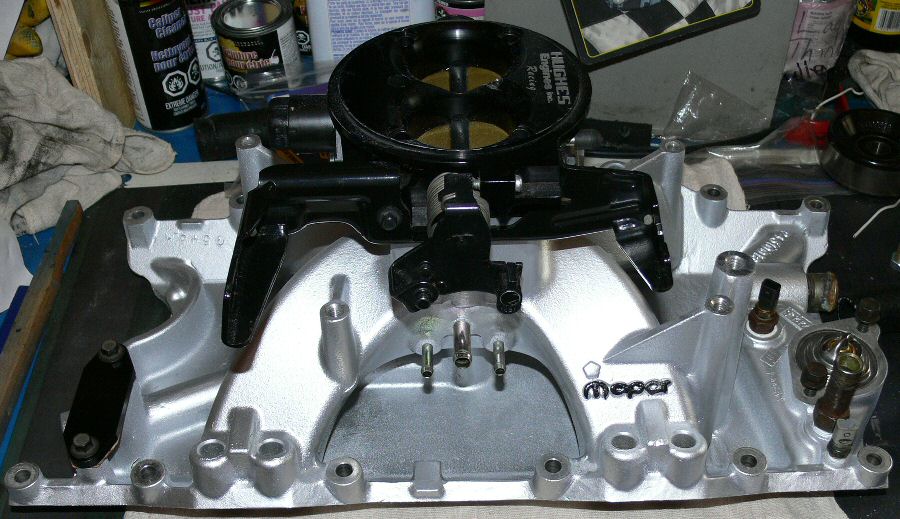
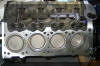
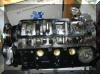
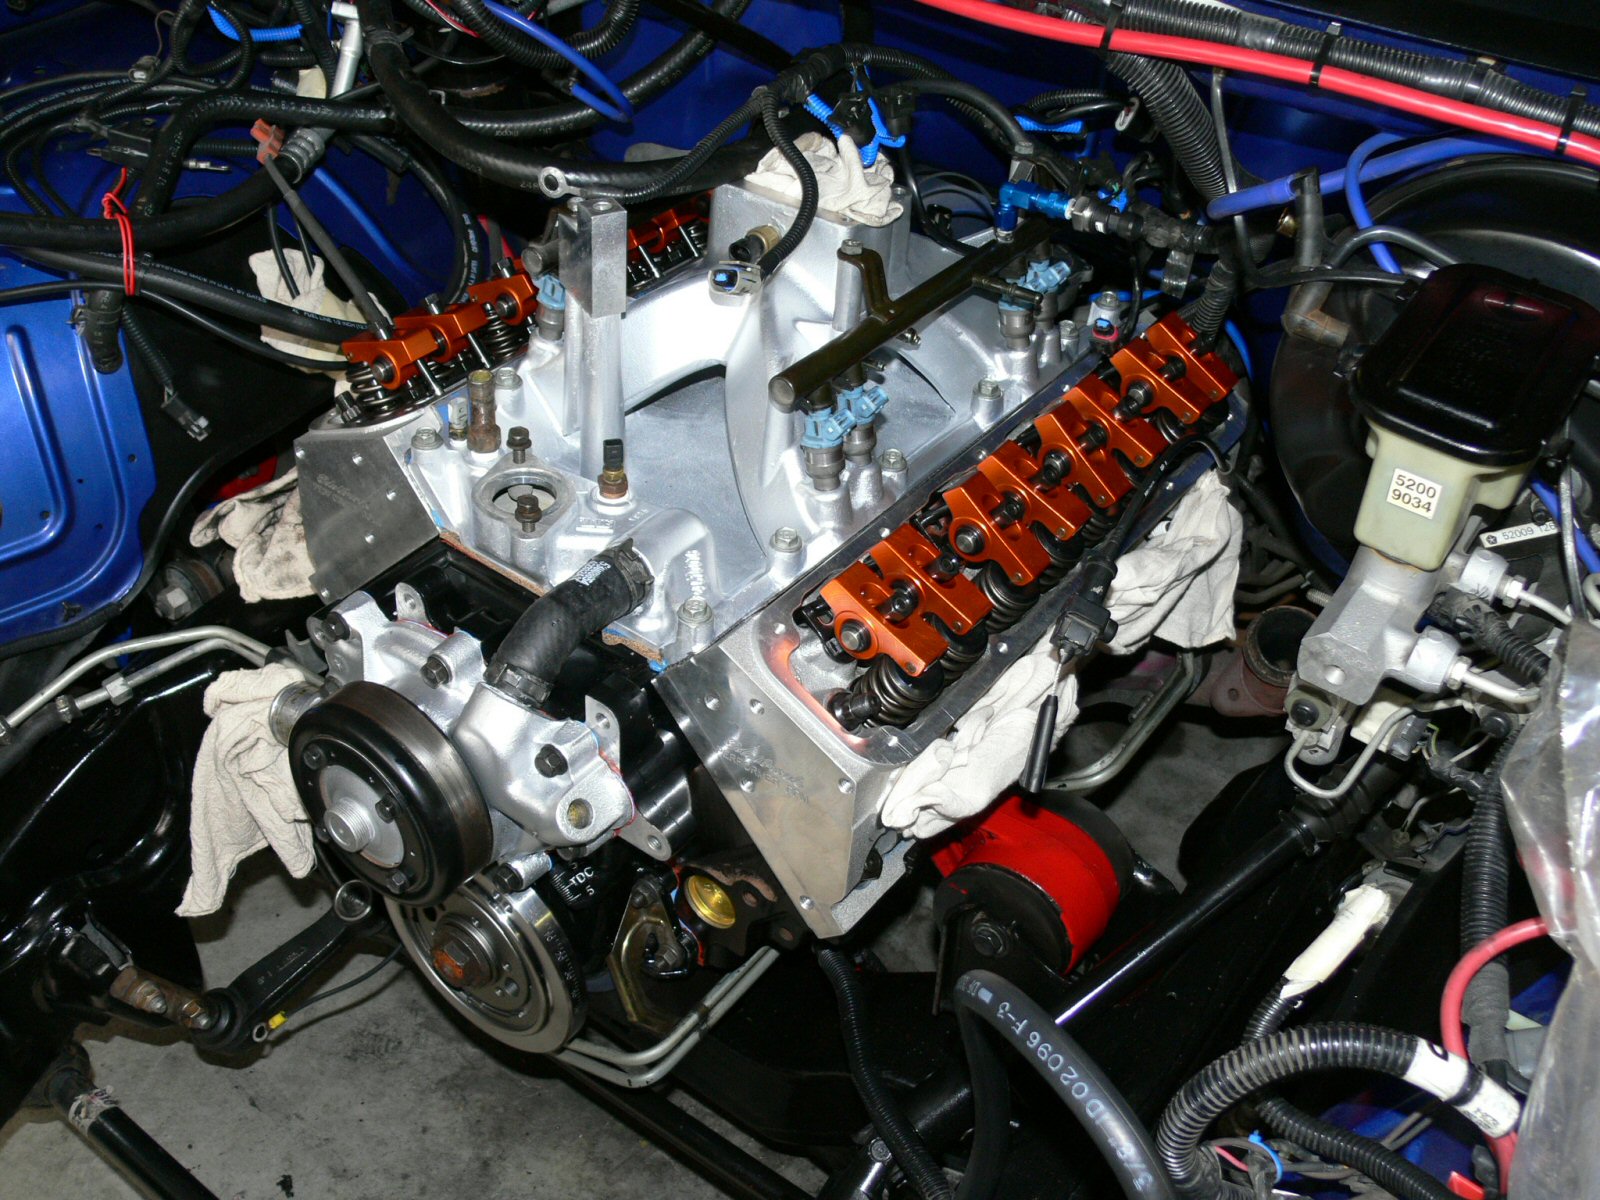
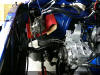
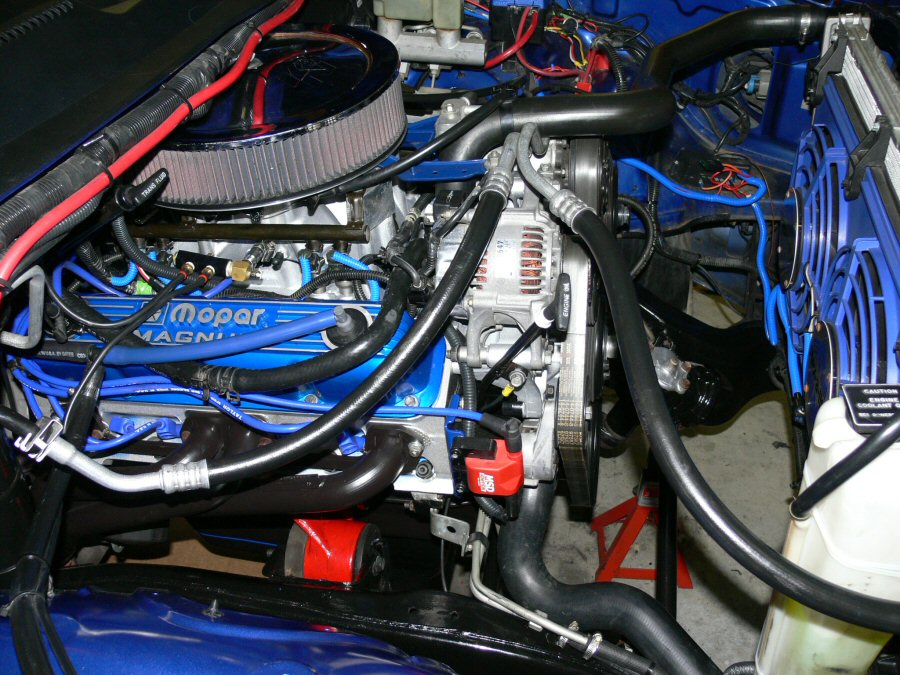
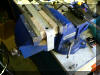
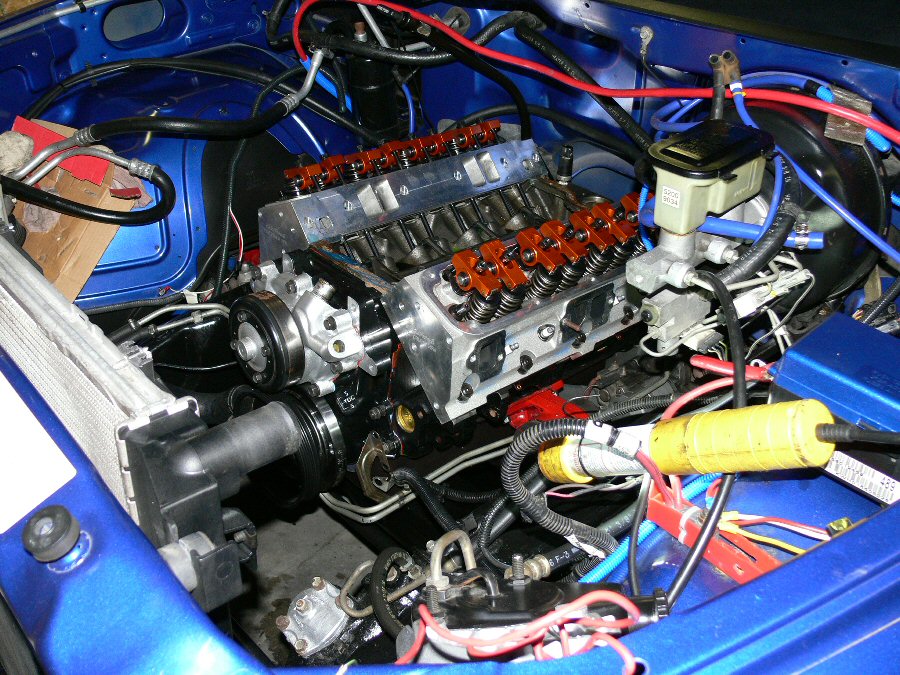
Test mock up at HP Indy Engines. My new Edelbrock 2.02 hds(292/255), Harland Sharp alum 1.6rr & Hughes 55mm 1050cfm. (thats HP's 4bb m1)
06's Planned Mods
Performance
Hughes Billet TB 55mm 1050cfm completed
ARP head studs completed
Hughes main studs completed
Edelbrock 2.02 alum heads completed
PnP, decked & matched hds completed
Harland Sharp alum 1.6rr completed
Cometic MLS headgaskets completed
Eagle 4340 Billet 4" crank completed
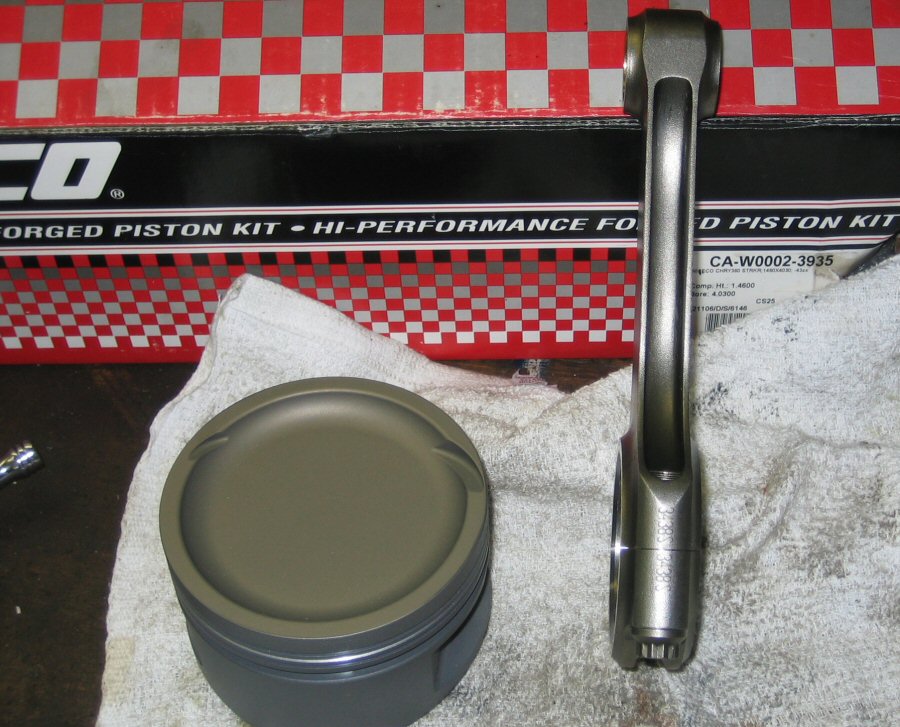
Eagle H beam c rods completed
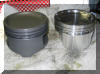
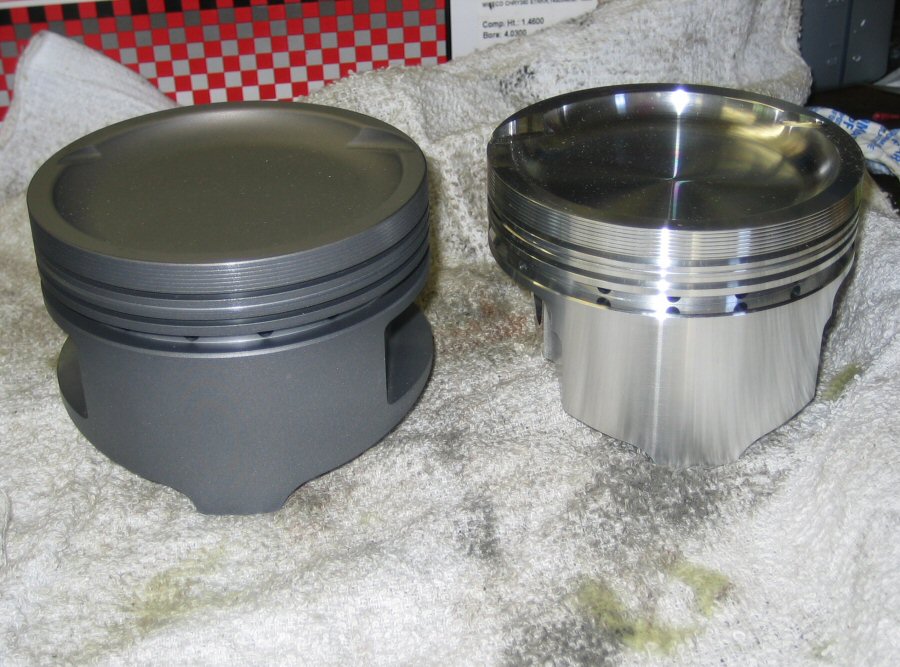
8.5cr blower pistons/forged completed
Hughes main b's stud girdle completed
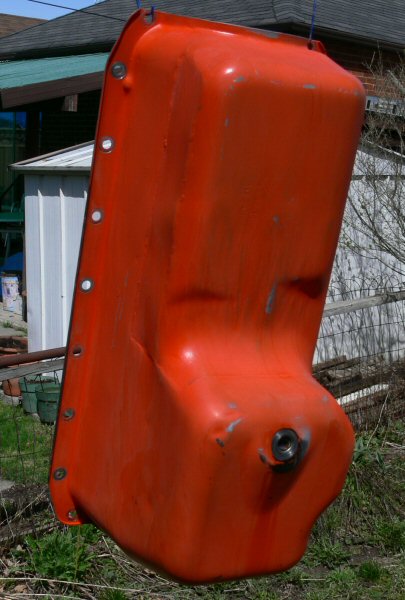
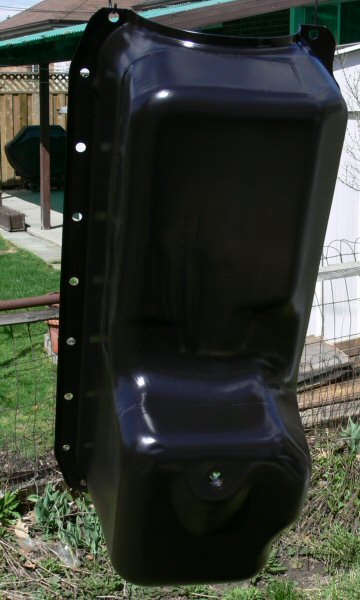
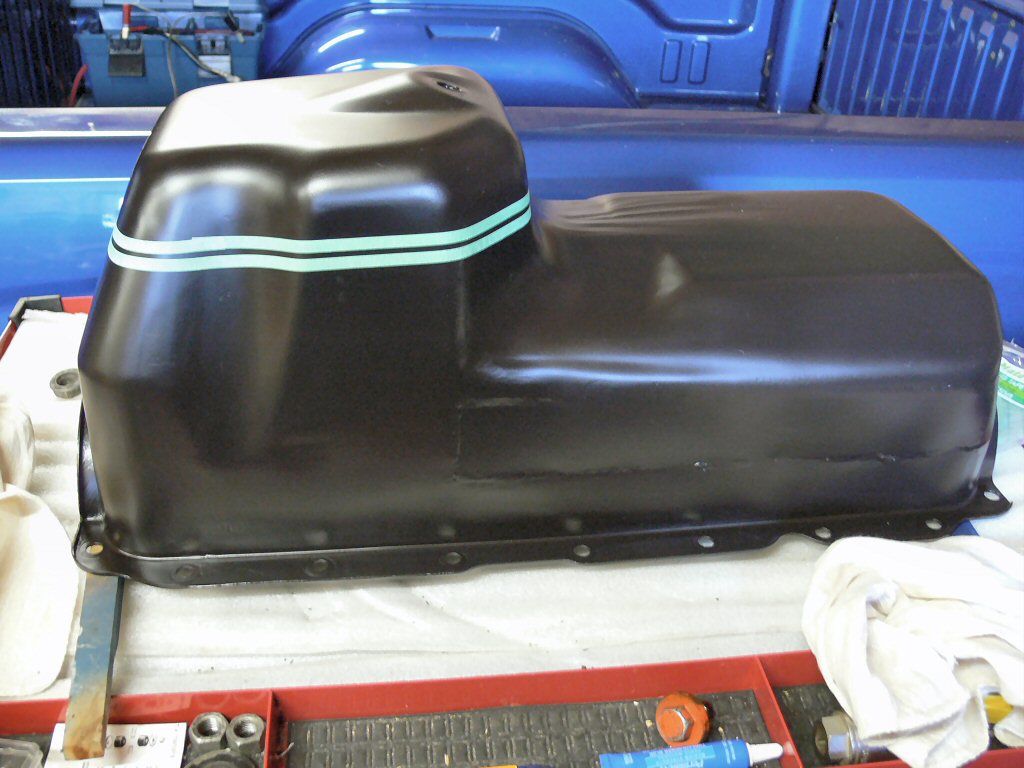
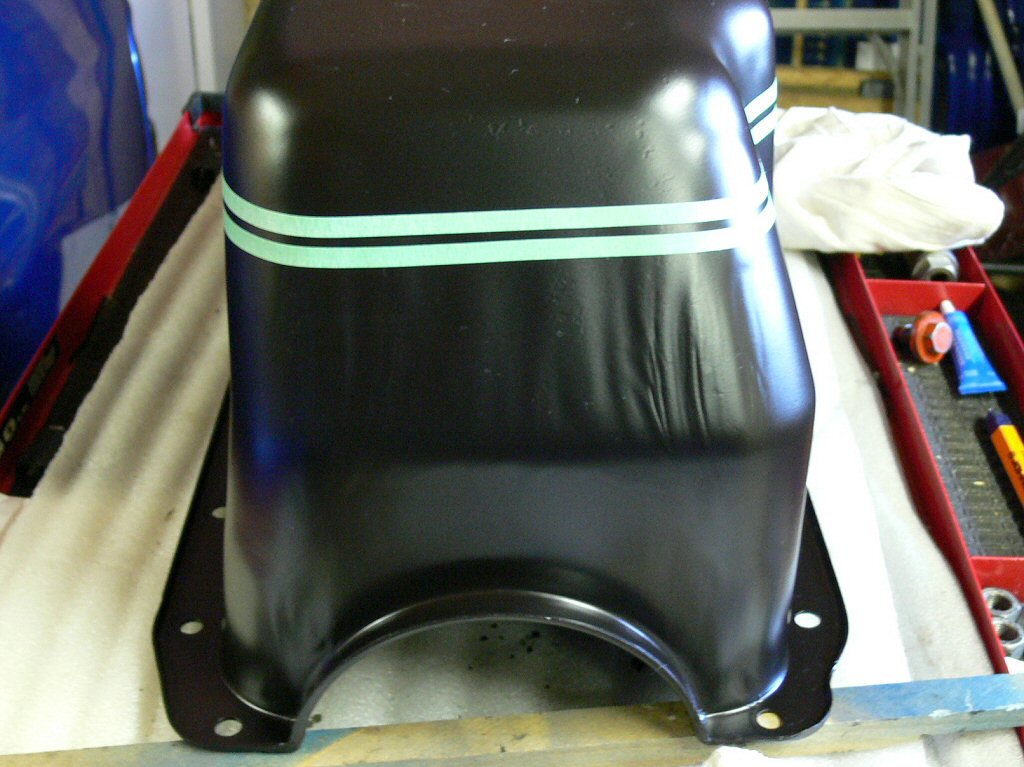
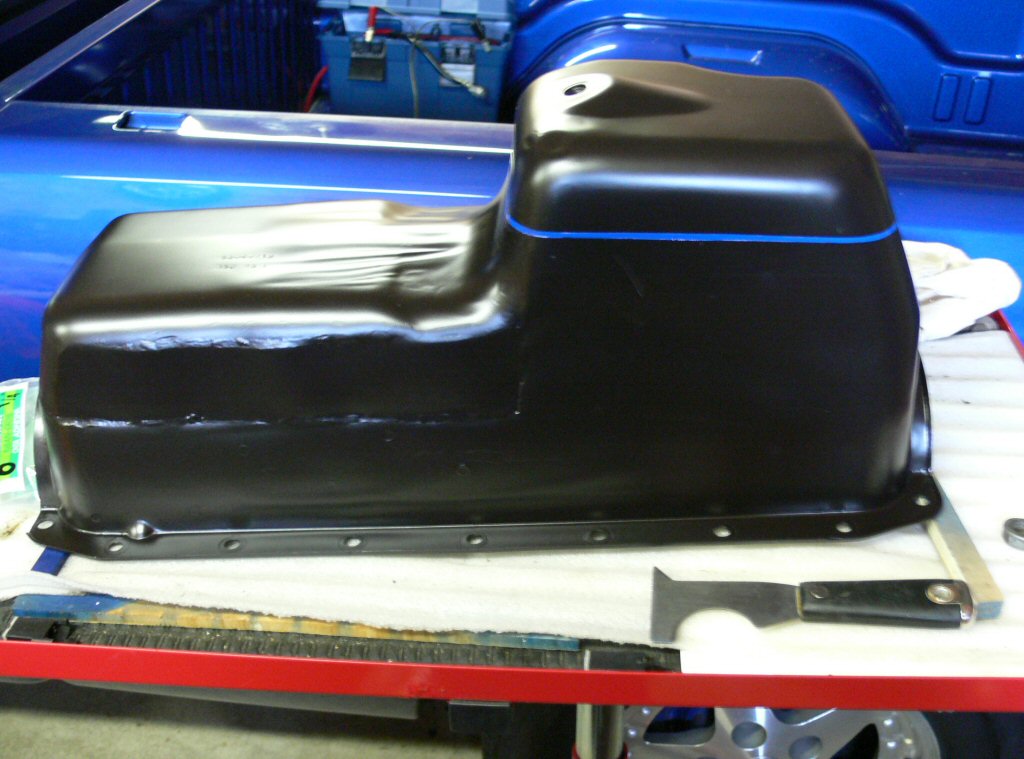
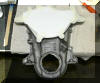
Custom deep oil pan completed
Clevite bearings completed
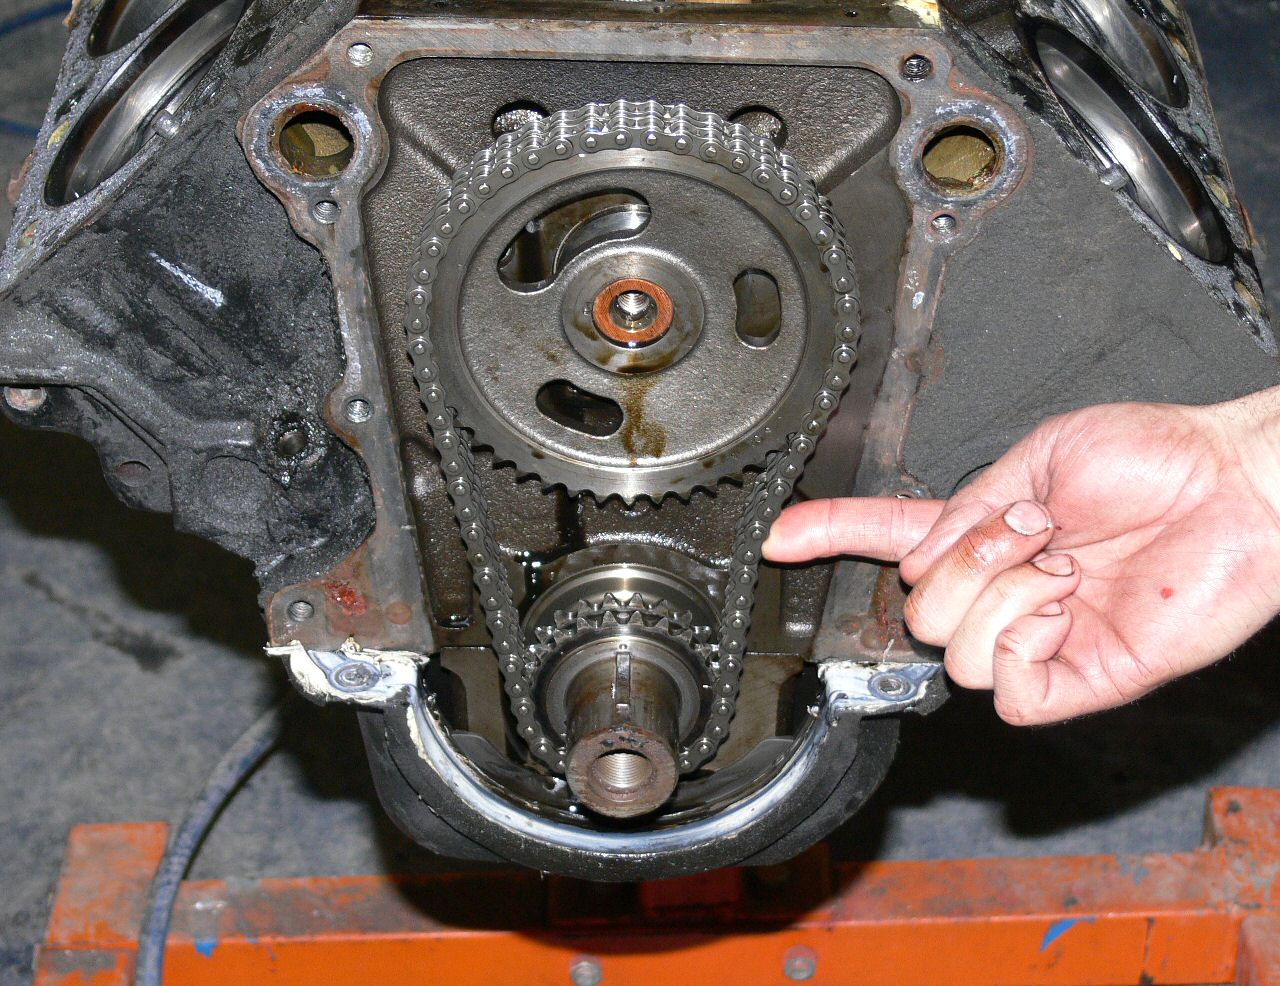
Timing chain & gears completed
Comp 236/242 .580/.577L, 114 completed
Accel 3bar map sensor on bench
Failsafe 180 thermo completed
Mopar Dampner completed
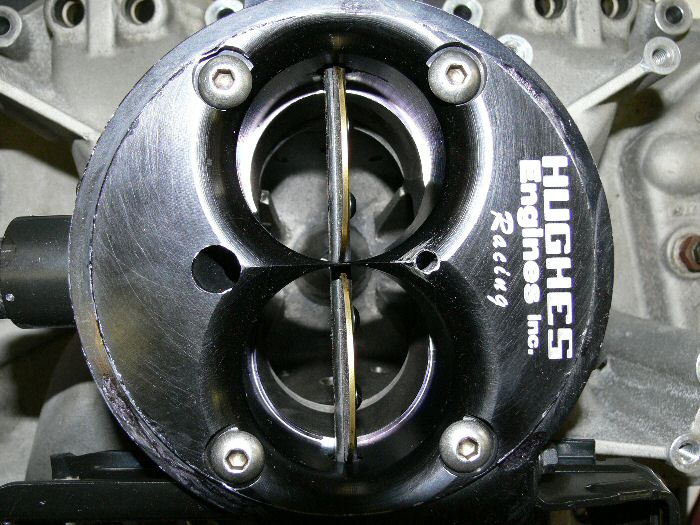
Open up M1 for 55mm tb completed
Other
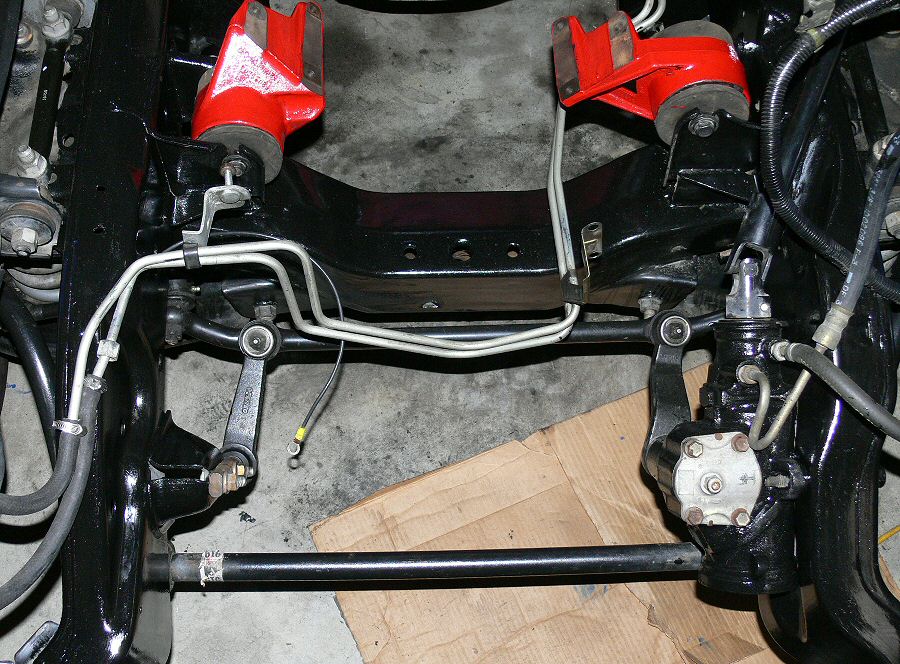
Paint frame rails in engine bay completed
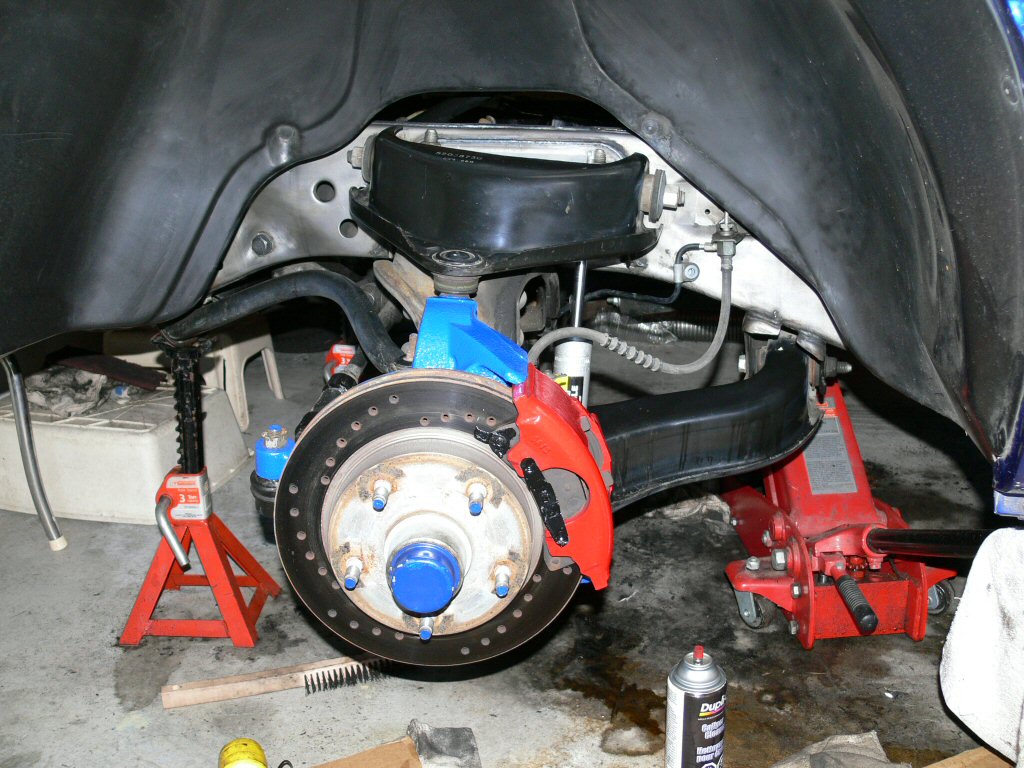
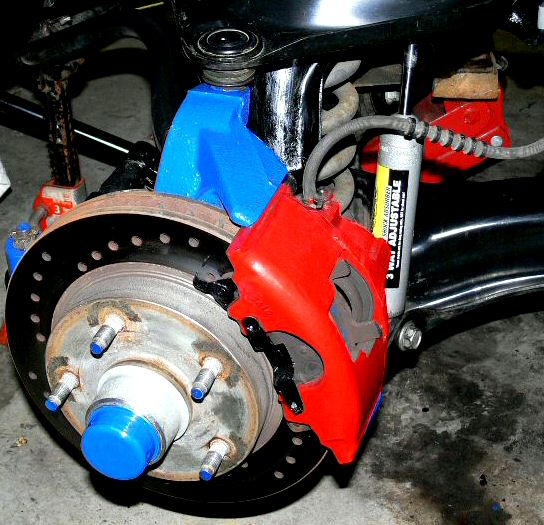
Paint spindles completed
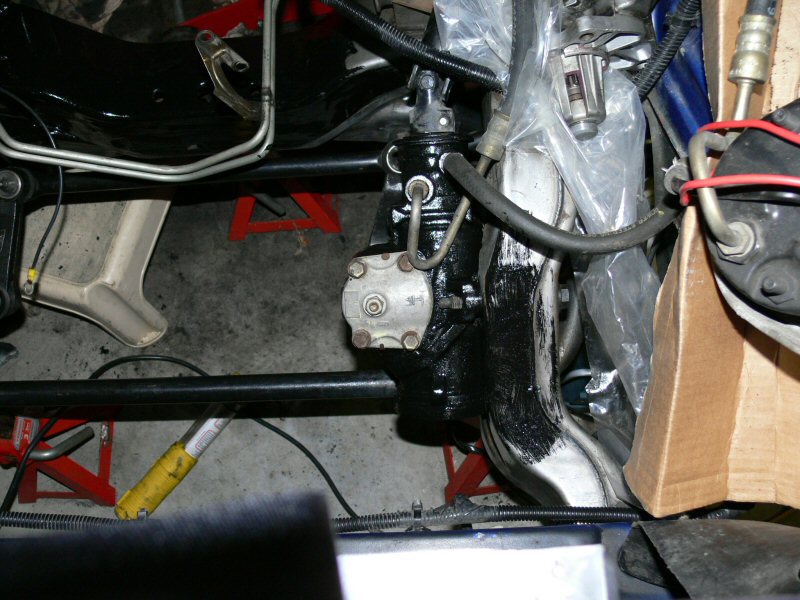
Paint power steering box completed
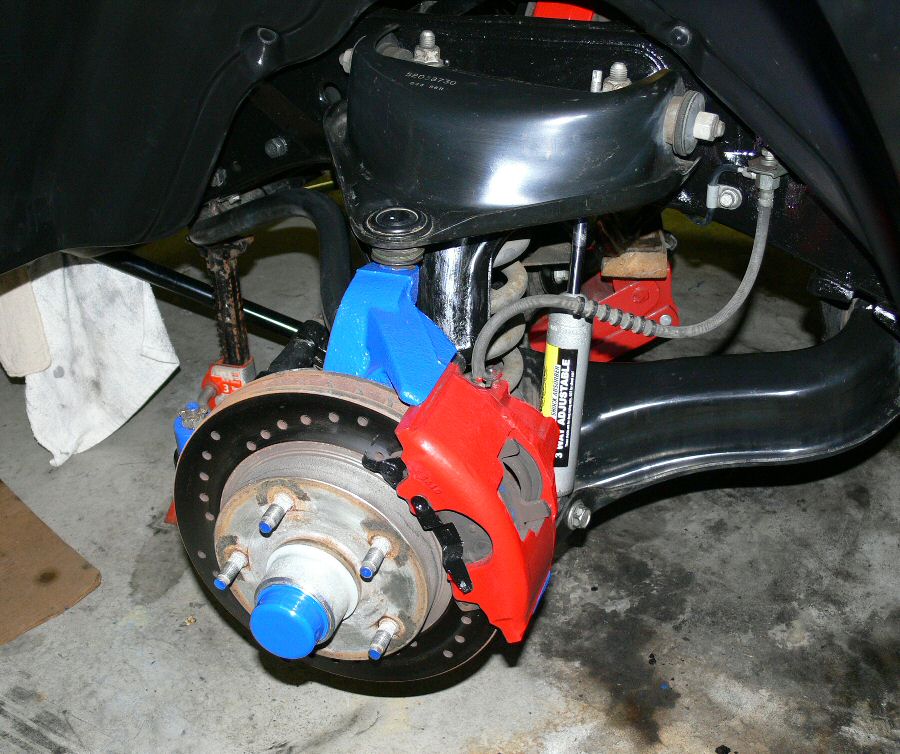
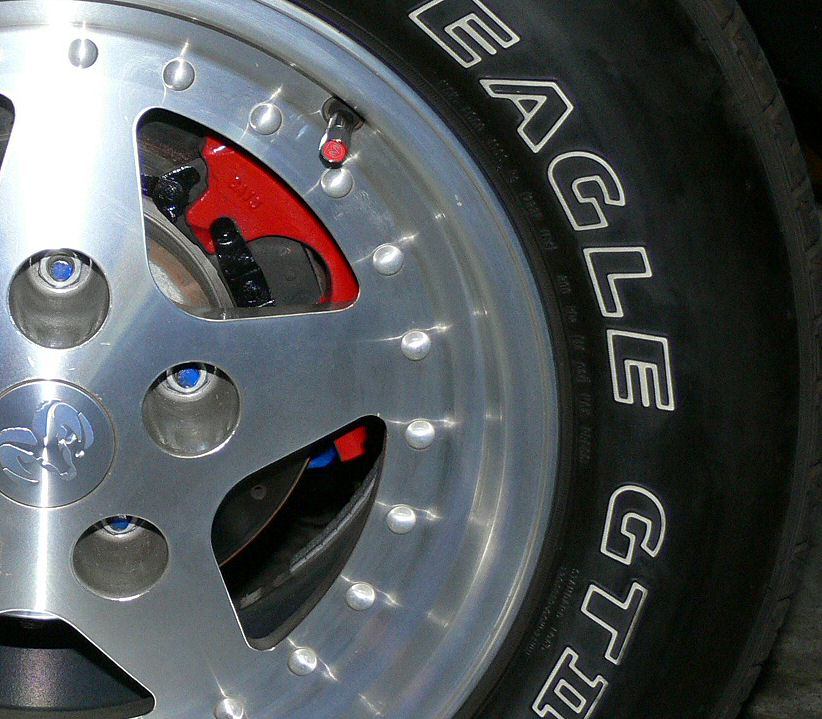
Repaint brake calipers completed
Paint motor mounts completed
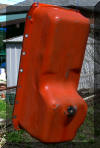
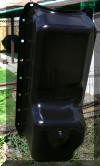
Paint blue stripe on oilpan completed
thermal/moly coat pistons completed
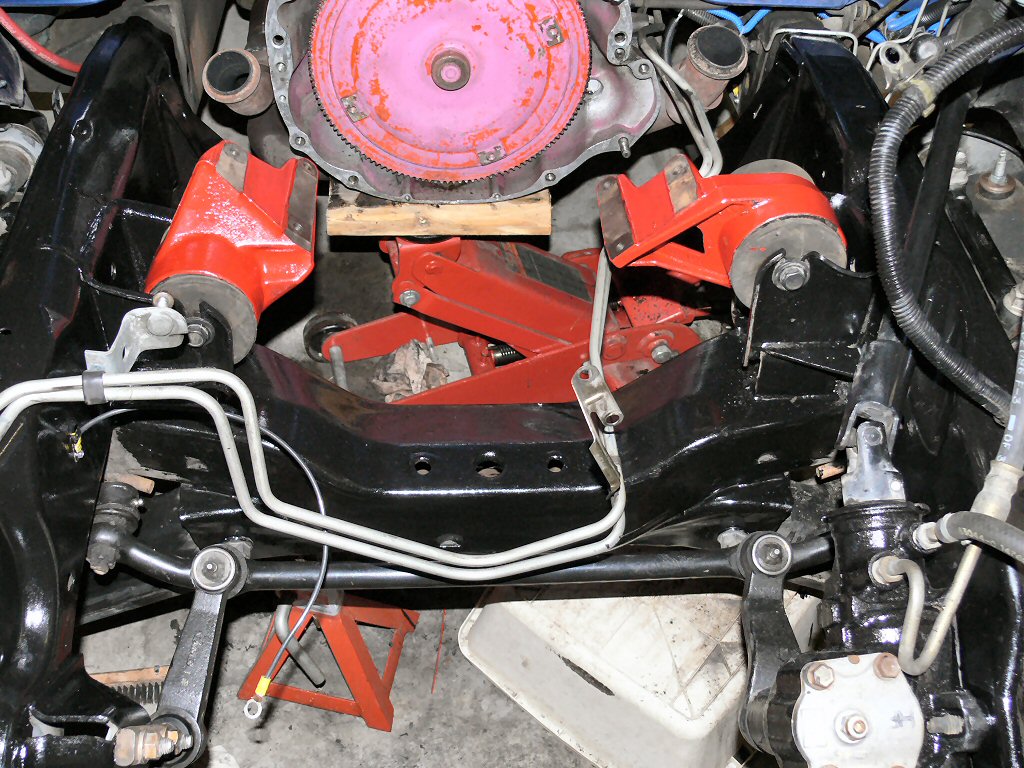
Paint trans motor supports completed
Paint alternator ac bracket completed
Modify condensor bracket completed
Fabricate condensor bracket spacers working on
Ceramic paint M1 completed
Paint pwr steering pump bracket completed
Tire valve caps w/ Rams heads completed
Paint block with ceramic black completed
Paint timing chain cover black completed
New water pump tube completed
New oil dipstick tube completed
Fabricate 4 brackets to move coolers completed
Lots of plans again this year
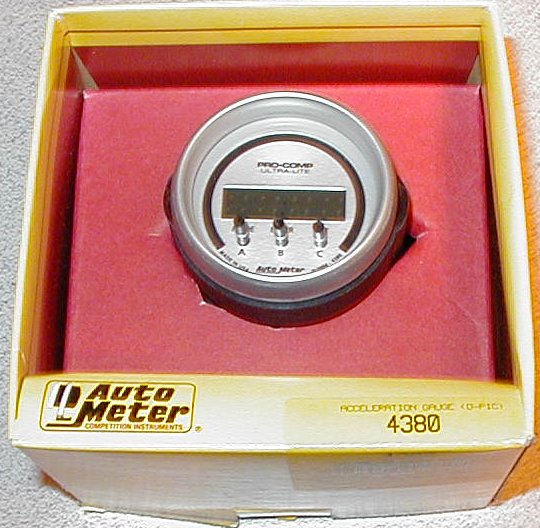
Interior; Still trying to locate a headlight switch face plate, new heater/ac knobs and a couple other small things. Plan to change the carpet & fabricate a center console. I want the console to hold a few switches, Autometer D-Pic (like a GTech), new shifter with rpm limiter switch, adjuster for the boost retard, spot for my laptop plus the cd 12pack changer and power invertor.
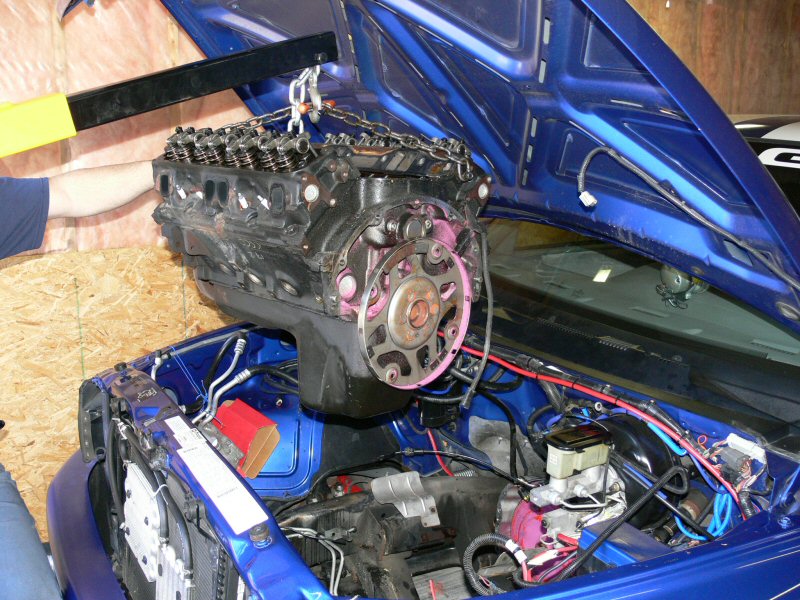
I will be removing the engine and replacing most of the internals. Forged balanced & blueprinted low compression 408 with ported Edelbrock 2.02 alum heads and a Hughes 1828 cam. Swapping ss 1.7s for alum 1.6rrs.
I still haven't figured out the tune and if I can use the SMT6 but am borrowing a 408 flashed PCM from HP Indy and will just run the boost retard for now and tuning fuel with the Aeromotive FMU.
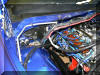
Chances are I will finally remove the ac from the truck. The compressor crapped out last year and I really want the intercooler where the condensor is. Unless I move everything back I can't see any other way to get the intercooler out from under the bumper. Ill be replacing all the hose clamps for the rubber hoses for the blower/intercooler. Figure I'm loosing a psi or 2 because of them. Stripped 2 trying to get the system to not leak.
Couple of the blower brackets, tb hat and possibly one or two engine brackets will be getting powder coated.
This year's Goals
less than 8.0 in 1/8mile
less than 12.0 in 1/4 mile
0-60mph in under 4 seconds
Stay tuned on if I make it or not
Dec 16, Edelbrock heads in getting ported, decked and gasket matched.
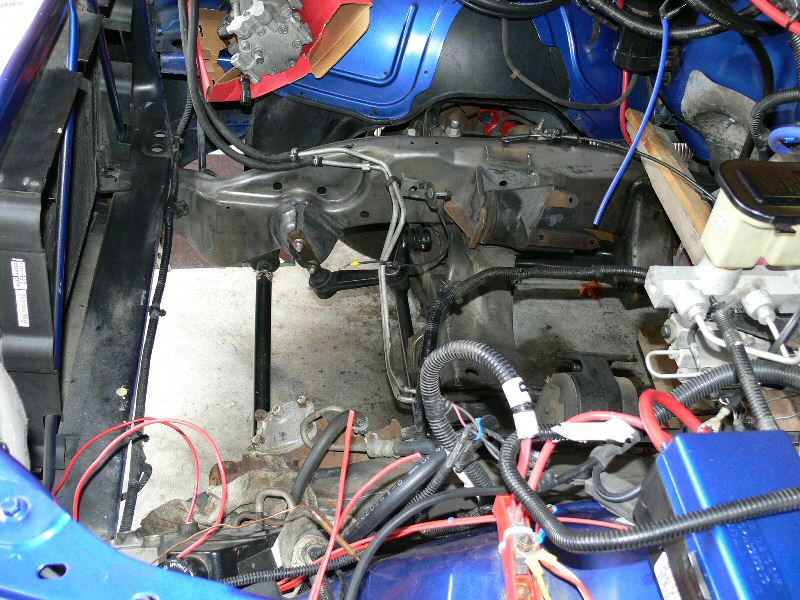
Dec 27-29, Started prepping my garage for the next major project. Had to put a bunch of my spare/stock parts in the basement to make room for everything I'm removing. Pulled out 1/2 the intercooler pipe work and the cold air kit. Pretty cold in the garage so all the rubber connectors and bends in the cold air, s/c and intercooler to tb connections are a real struggle to get apart.
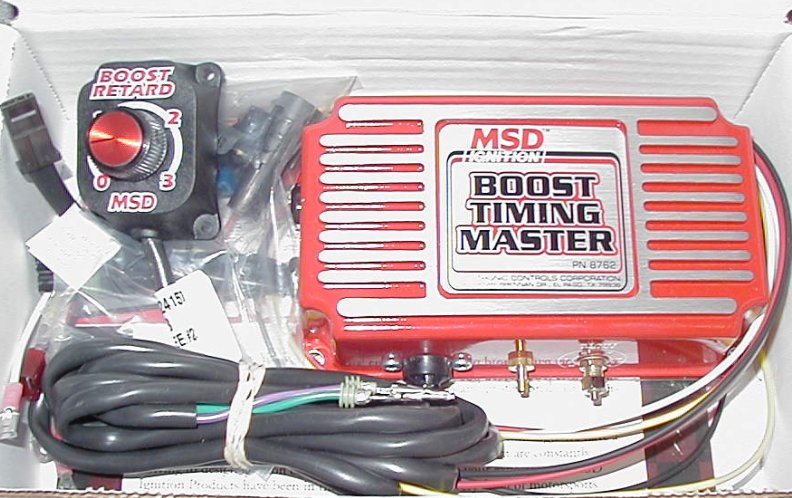
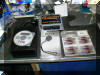
MSD Boost Retard
Auto Meter Pro Comp D-Pic
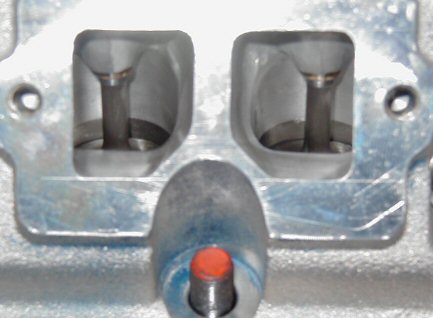
Jan 8, Made it up to HP Indy Engines today and picked up a bunch of parts. New Edelbrock 2.02 alum heads came back from porting. Some big exhaust port work was done as well as the intake side. Heads started at 200in/156exh. Finished porting the heads were at 246/212. Don't be deceived by these low #s. What counts most is the heads flow 23% more on the intake and 36% more on exhaust then they did out of the box. On the Hughes bench, that would be in the 290/252cfm range. On Edelbrocks extra generous bench they would now flow 317intake 255exhaust.
Gasket matched intake and exhaust ports
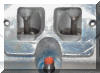
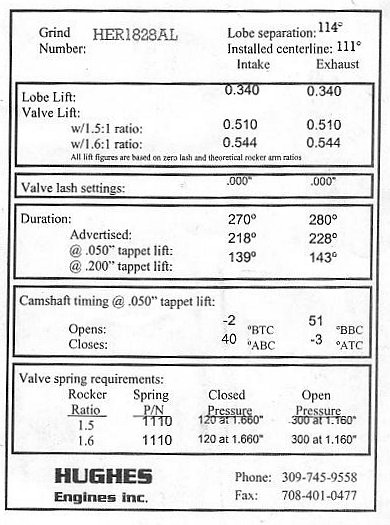
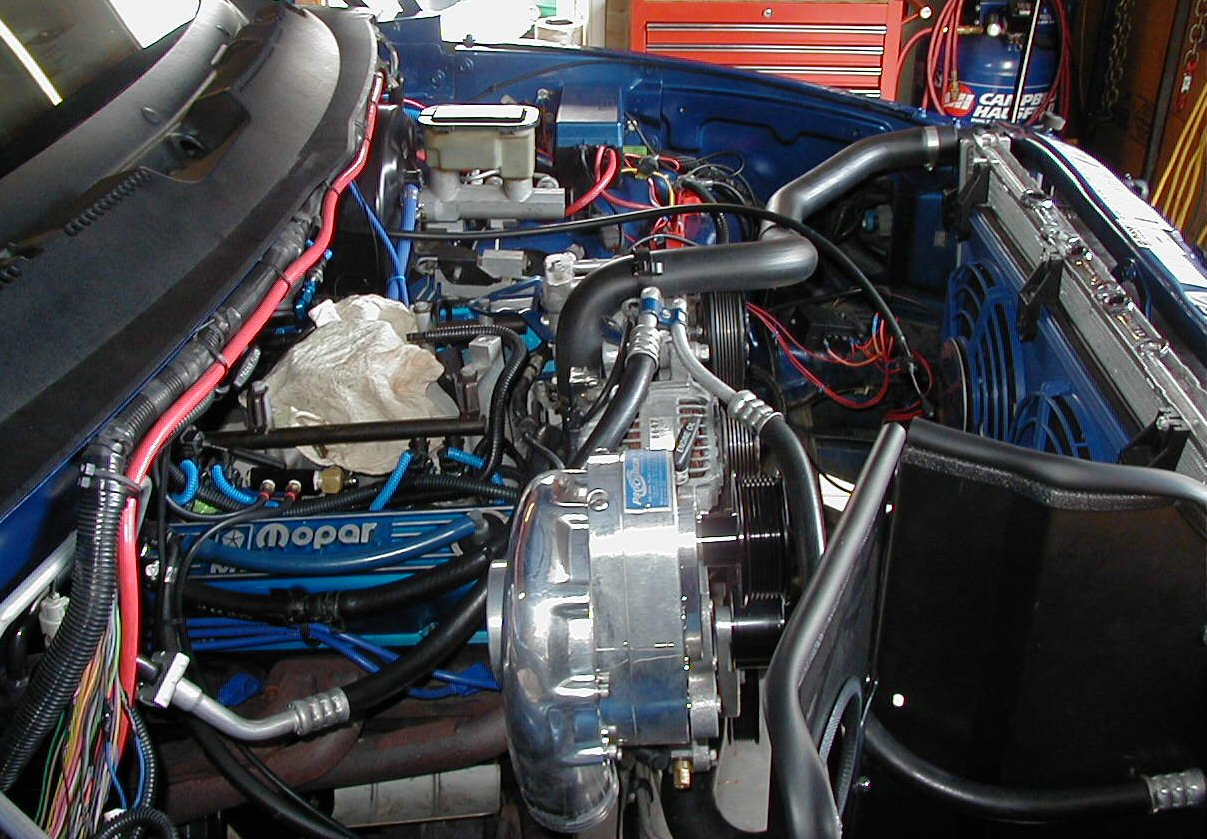
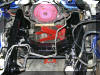
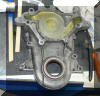
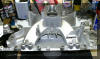
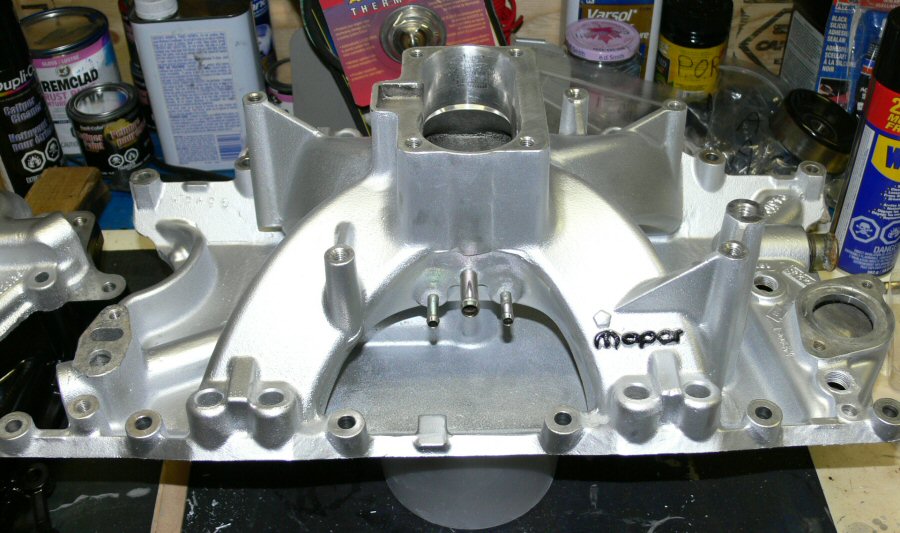
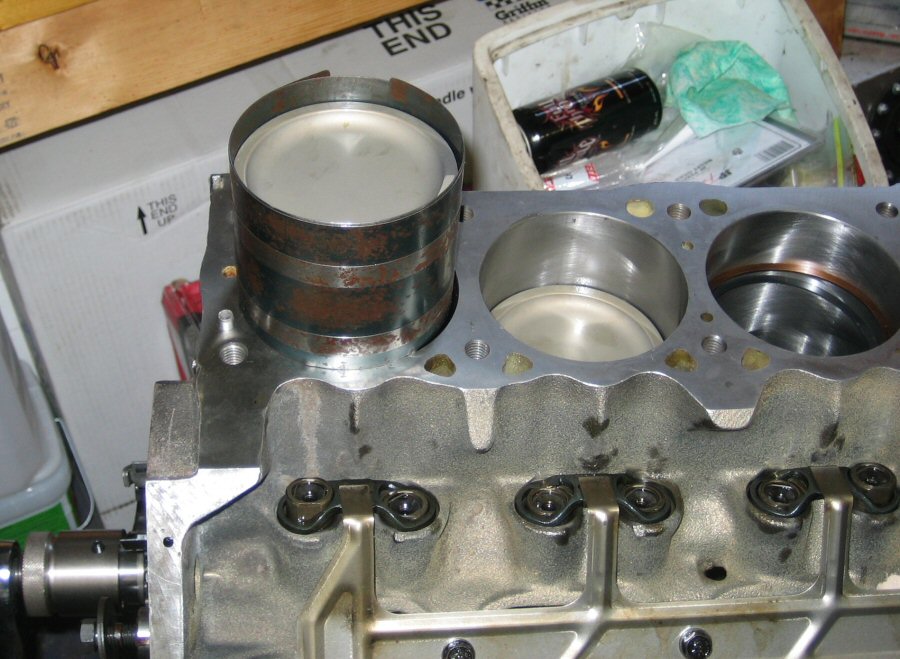
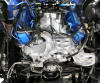
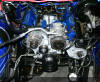
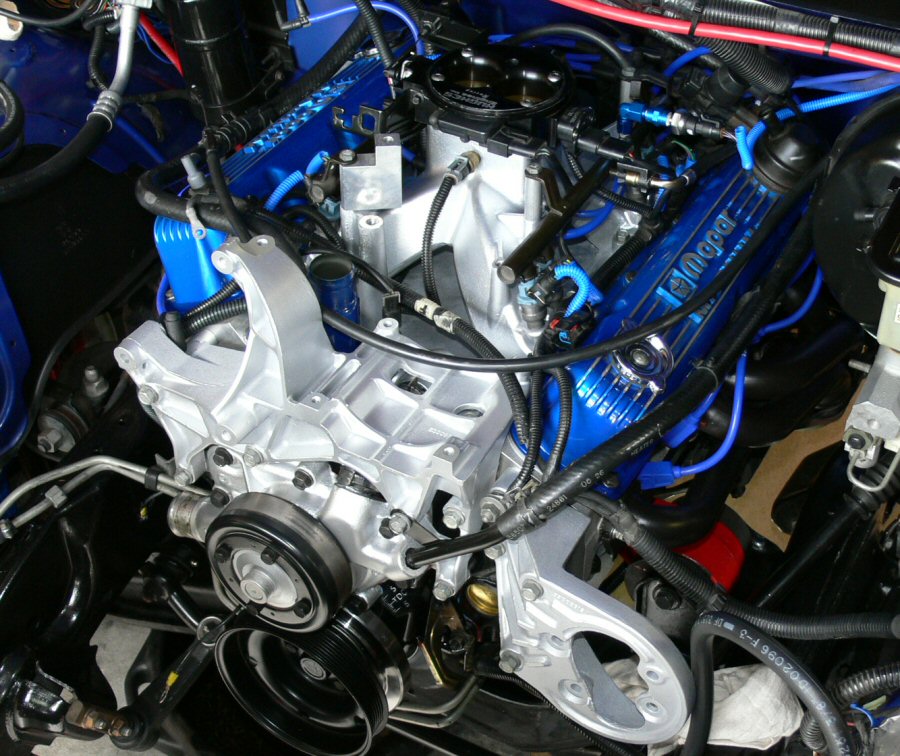
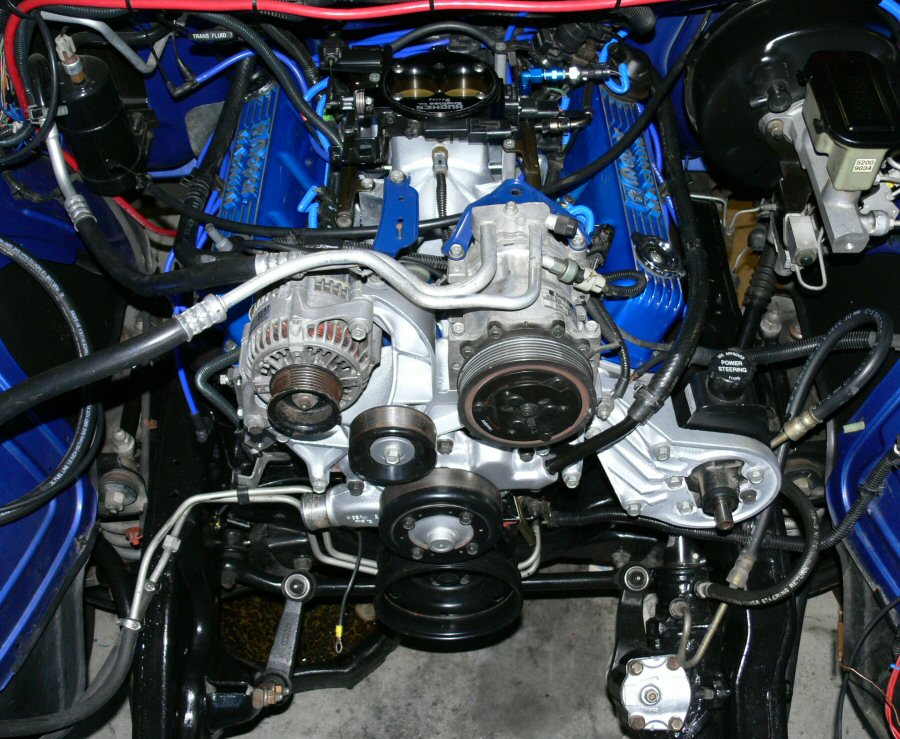
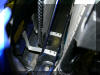
We did a mock up to make sure the head studs would be ok with the new alum hds and to check fit with an M1 on top. That's a m1/4bb we tested on it but shouldn't be any different from my m1/2bb. The Hughes billet tb on top is "The Biggin", 55mm flowing 1050cfm. that will be on the new motor. Also brought home my Hughes main girdle as well as the Hughes HER1828AL cam (see spec sheet below). Other big item is the custom oversized oil pan.
After Aurora Cylinder head did their magic the Eddy heads now flow an additional 23% threw the intake and a whopping 36% on the exhaust side.
On the Hughes bench, they should flow approx 292/253cfm. Eldebrocks bench is more generous, 317/255 @ 550L
Hughes HER1828AL cam specs
*Update* Decided this cam is just too small and have ordered a custom Comp cam grind.

|
|
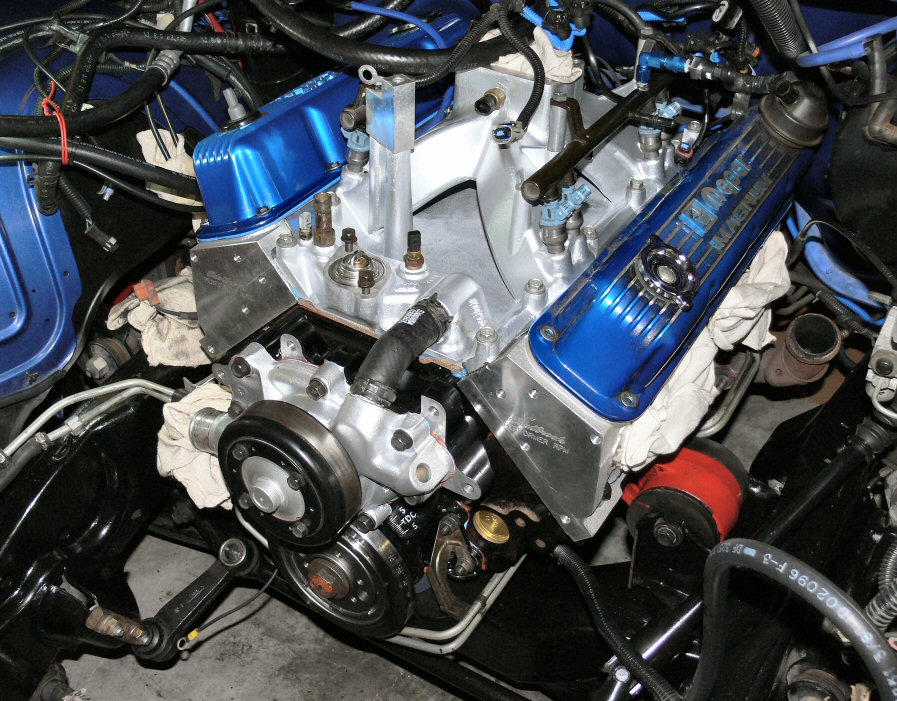
The Eddy heads look so good I almost hate to put a cover on them, Janesy suggested clear covers lol. |

![]()

![]()

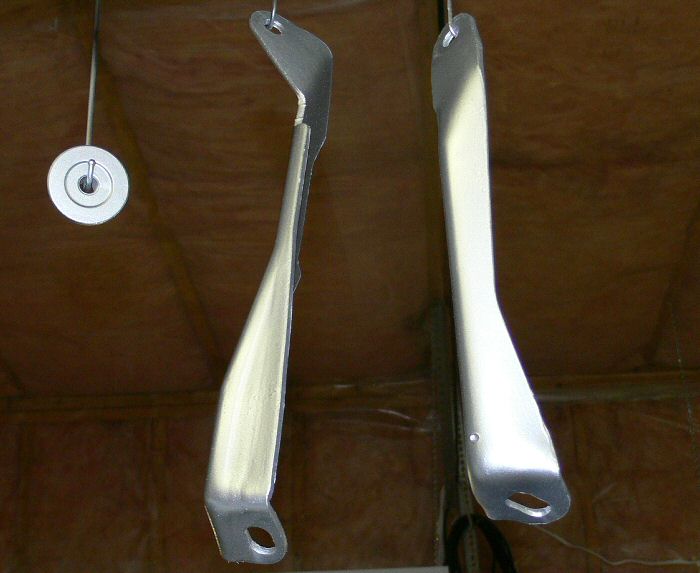
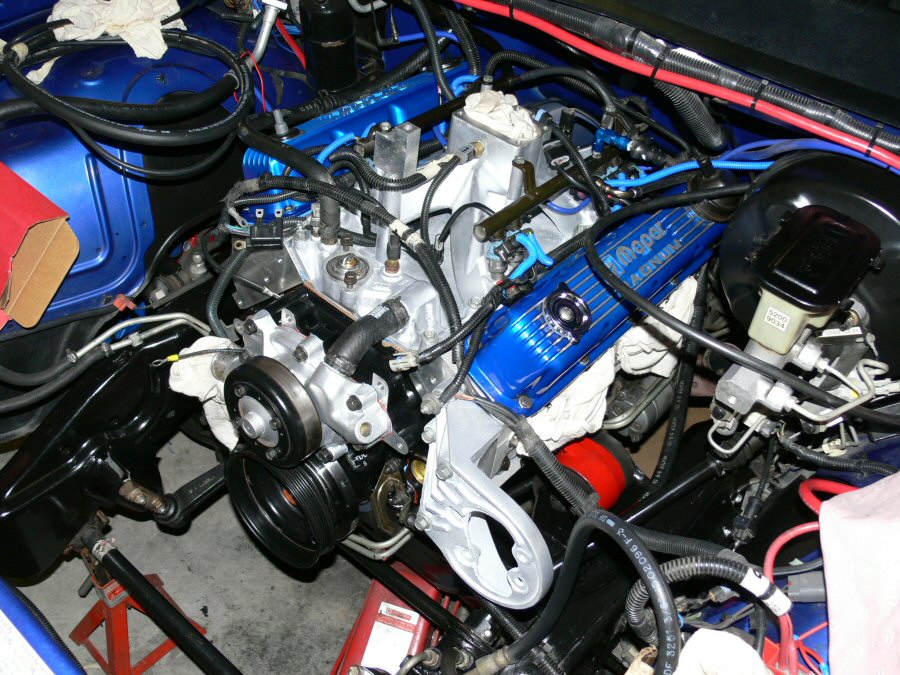
MP pinned oil driveshaft, Hughes Billet 55mm tb & main stud girdle plus Harland Sharp alum 1.6rr
Feb 12
Still up in the air on a couple things, I have a bigger Hughes cam, 408 flashed pcm I'm borrowing and a new MSD BTM but don't want to use any of it. Still looking, like a FAST standalone or equivalent so I can run a bigger cam. I don't want to have to change the cam again next year.
March 6 Custom Comp Cam 236/242 .570/.589 lift (w/1.6) cut on a 114 ordered, I really need the FAST now along with 72lb injectors. Need to remove a few things so the motor can come out. Only have the Procharger out so far. Suppose to warm up this next weekend so hopefully get some more stuff pulled off.

March 23-24 Had to drill out one bolt to get the air box for the cai out. Next, drained the oil & coolant, removed the flex a lite fans & the rad. Disconnected most of the electrical, Removed the headers as well. If the wife doesn't have other jobs for me be back in the garage again tomorrow.


March 26, Plugging away, got a few more parts off today. Valve covers, alternator, ac and main bracket but couldn't split the fuel line from the drivers side rail for some reason. My disconnect tool wouldn't do it.(wtf?) Couple bolts holding the trans lines below the engine not co-operating either.

March 26, Finally got that PITA fuel line off the rail, distributor and M1 out. Only have motor cross supports, starter motor and unbolt the tranny left.


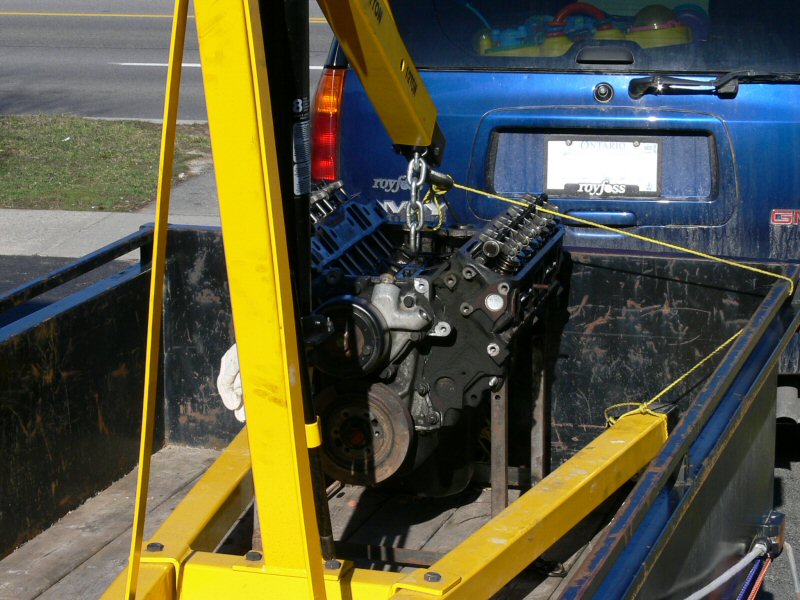
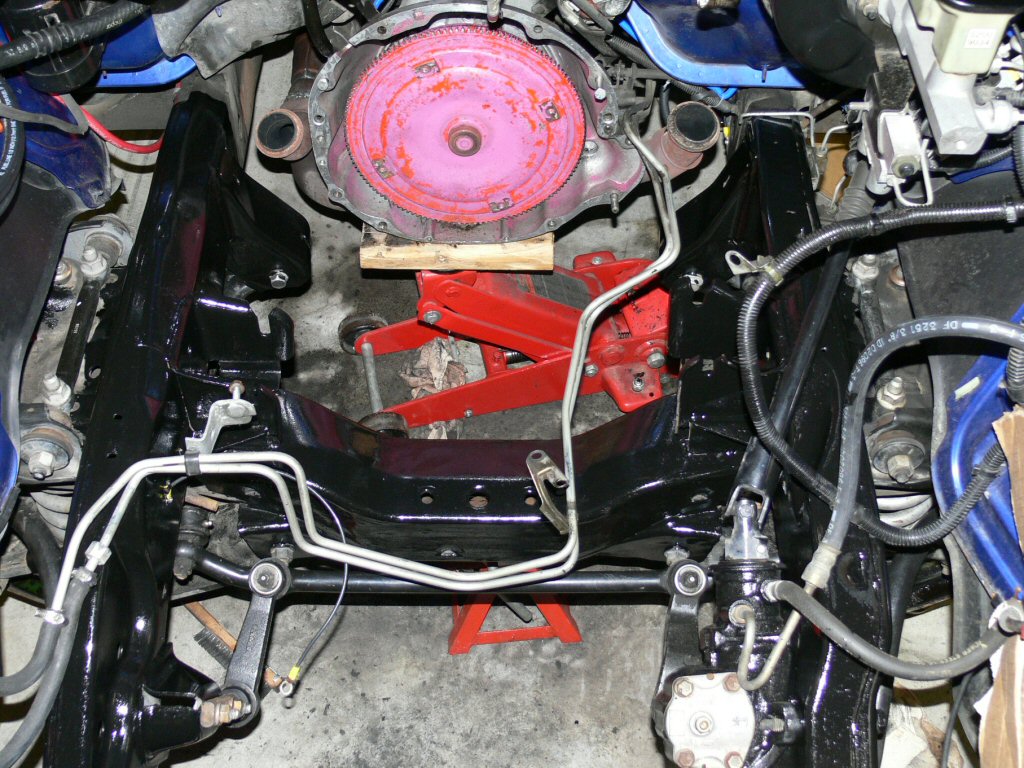
April 8-9, I got the last of the sensor disconnected, starter out, supports, Jim from HP Indy Engines came over Sunday afternoon. Busted loose the last 4bolts holding the motor in and had it in Jims trailer in no time. Disassembled it after taking it up to Jims garage and I came home with another big box of spare parts (crank, pistons, rods, heads etc, etc) Jim is dropping the caps off to the machine shop and going to order me another timing chain (15kmiles/detonation stretched it) and get the forged pistons in for thermal/moly coating.
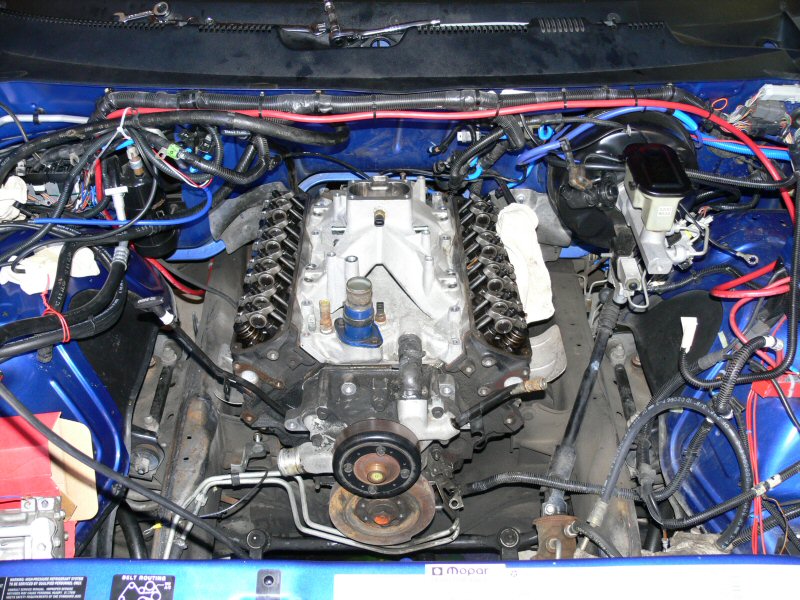
Bye bye to cast low cfm parts and all that ugliness.
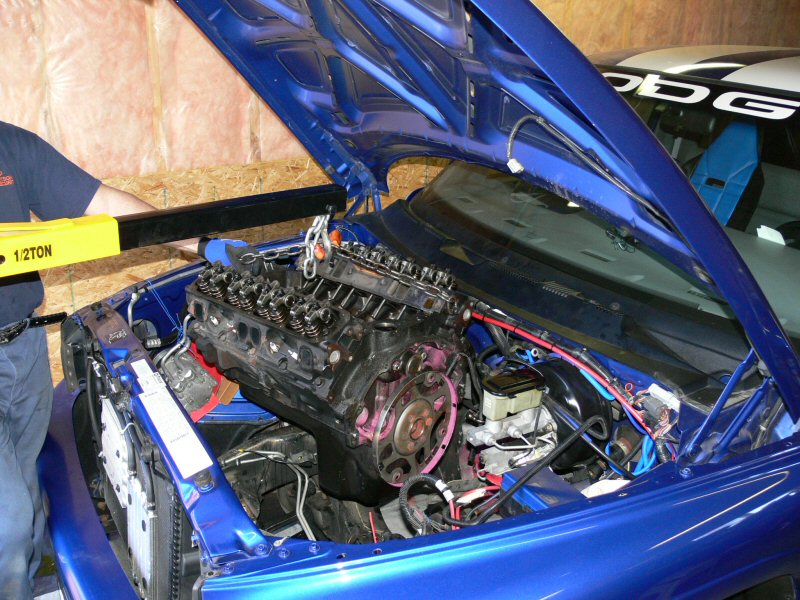
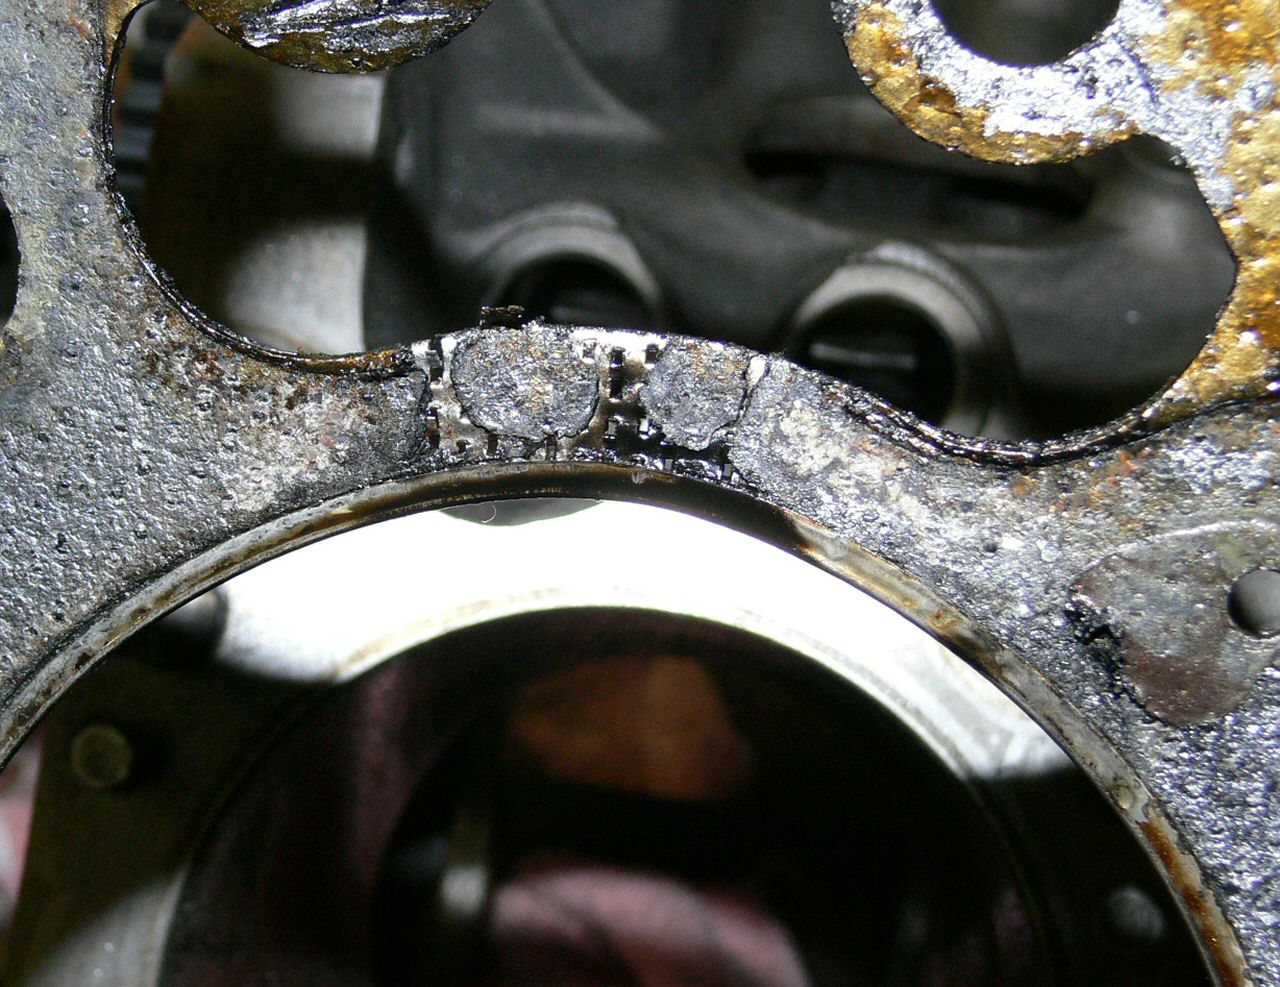
After tearing the motor down at HP Indy Engines we could clearly see the damage I had done the last time out at the track back in October. Head gaskets had leaks on 5 of 8 cylinders. Stretched a double tchain that had only 12k miles on it. Go big or don't go at all lol.

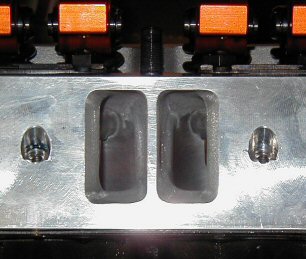
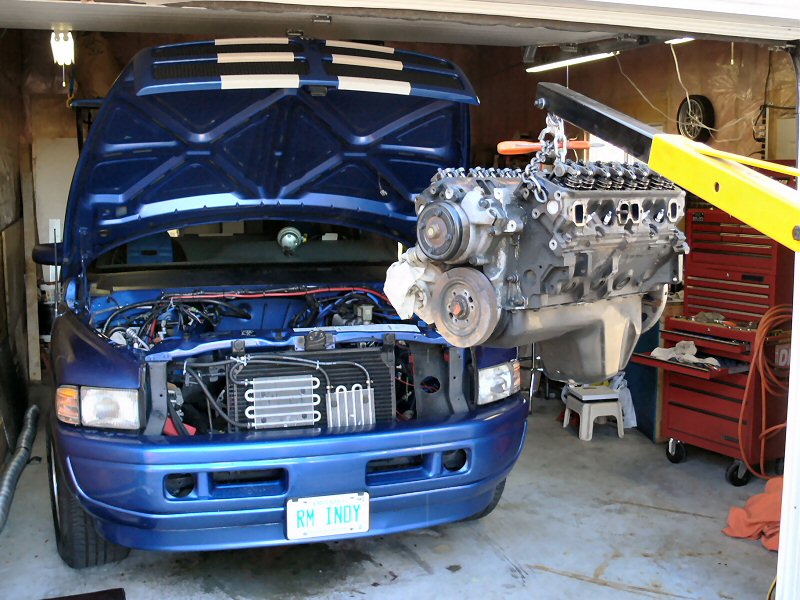
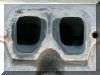
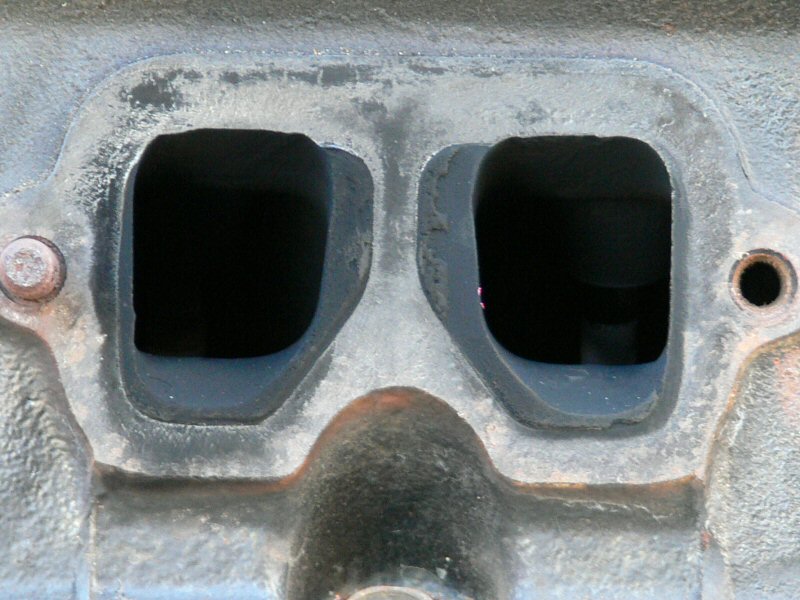
Weighed up the loaded Edelbrocks with valves, springs retainers, guides and roller rockers (HS1.6) and they tipped the scales at 32lbs. Weighing up the stock heads with only the valves in them they came to 52lbs. The Edelbrocks are probably about 23lbs less (46lbs pair) You can see how small and restrictive the stock intake ports are compared to the stgIII Eddy's below
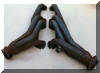
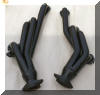
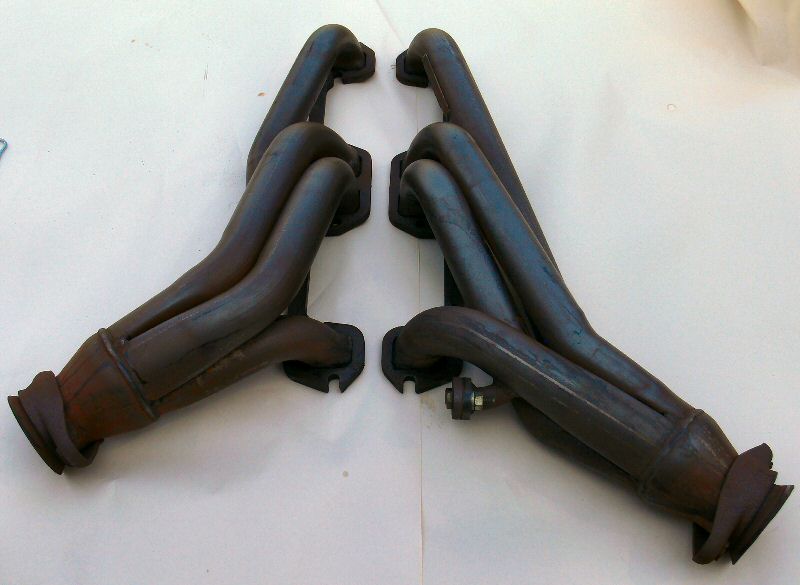
April 11, While the engine is out I will be cleaning things up under the hood a bit. Cleaned the Edelbrock TES headers and gave them a few coats of Duplicolor High Heat Ceramic paint. Chances are it wont last too long but with any luck, long enough to get a few good pictures lol.
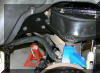
Late last year while spraying the engine with engine cleaner I got it on the frame rail and the undercoating came off and some surface rust showed up. Had to clean it up but just kept going till I got one frame rail cleaned up and ready for painting. Need to still clean the other side and the cross support. Post more pics tomorrow, on nights so I need sleep.

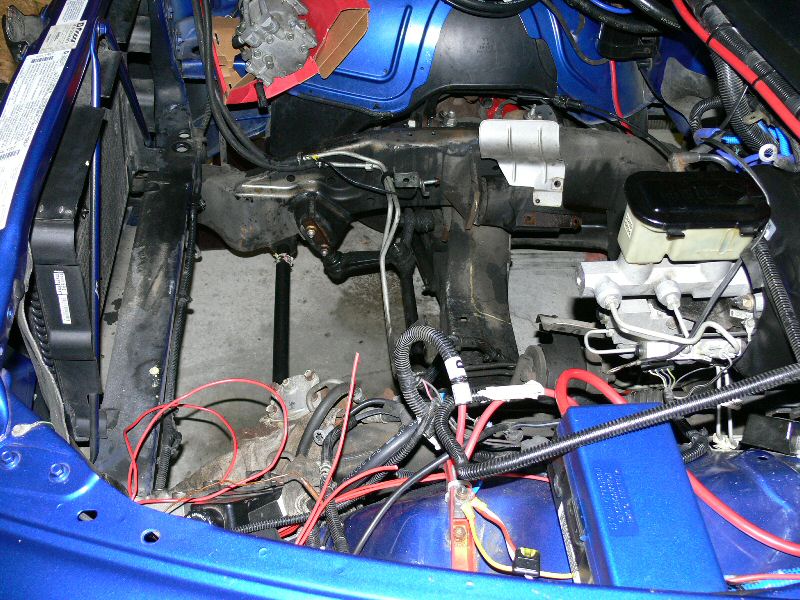
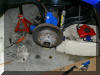
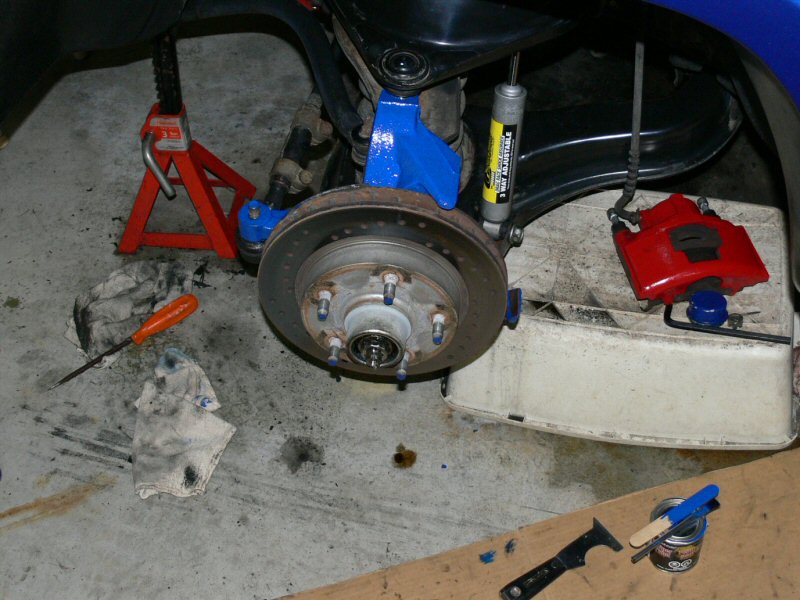
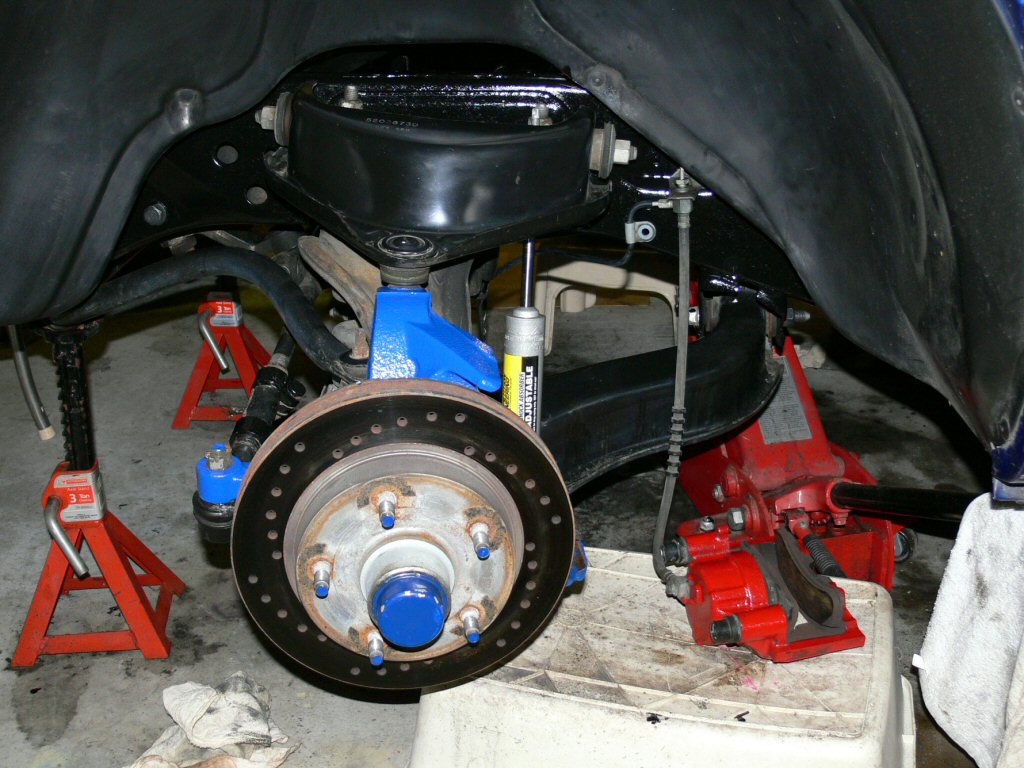
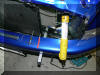
April 12-20, Work continued scrapping the crap off the frame, brake cleaner and scotchbrite pads to clean it bare. My god what did I get myself into lol. I couldn't stand looking at the rusty power steering box in some of the pics on the site so had to do something. Repainted the calipers, got one spindle painted and painted the new deep oil pan (mopar orange prior) Also painted the motor mounts while I was at it. Cooled off and rain is rolling in so paintings done for now.
The POR15, (paint over rust) Duplicolor caliper paint and HD brake cleaner(8 lrg/2smll can) are some pretty wicked stuff. I think I was probably getting high off it, I had to come in cause I was dizzy more than once. Still cool out so I've had to keep the heater going and garage doors closed all week while working on it. Hmm better check what I was posting in the chats lol.

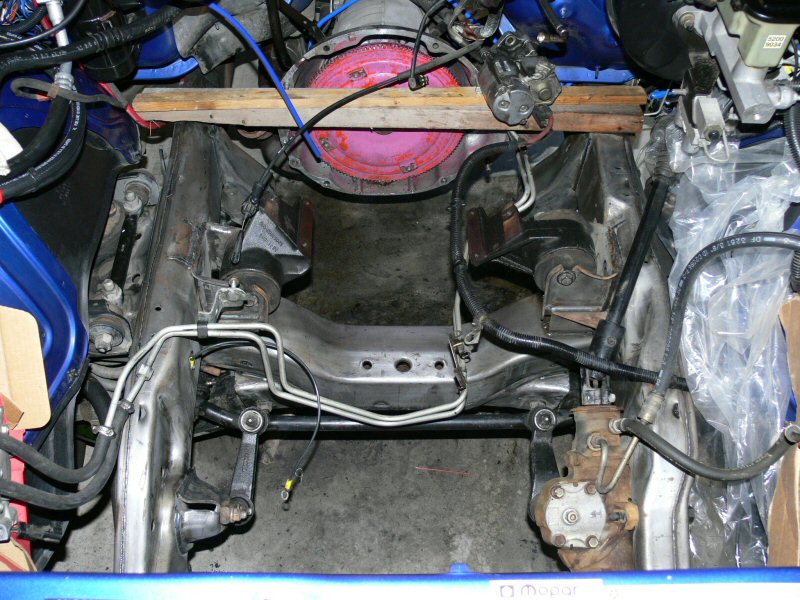

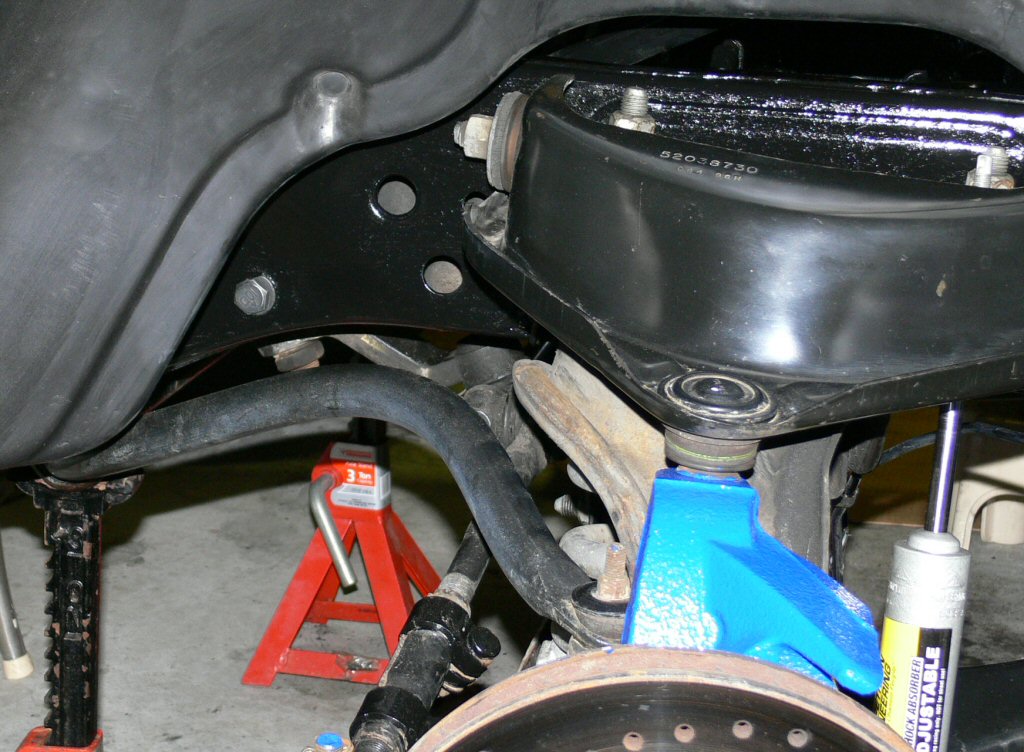
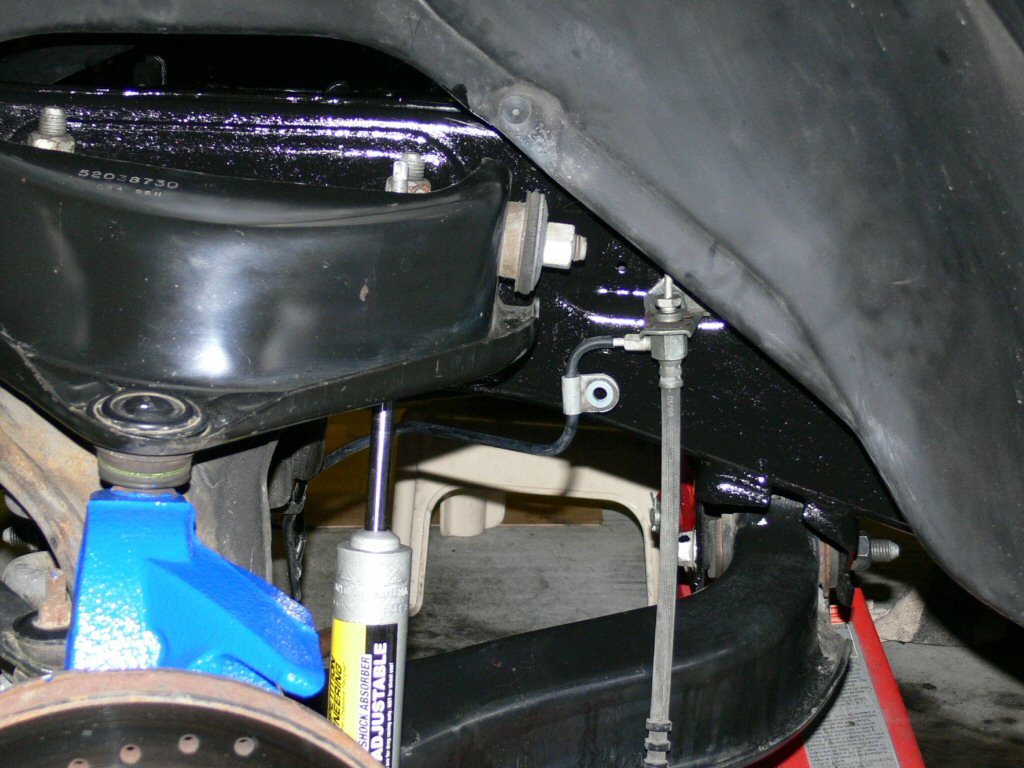
Lots of scrapping, scrubbing and wiping down with brake cleaner got the frame looking like this
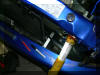
April 21-26, Lots of rain and cold conditions so didn't get much done over the weekend but back at it Tuesday with a few more things progressing. Painted and reinstalled the motor mounts, touchups on the frame, started painting pass. side spindle and added a blue stripe to the oil pan as well.
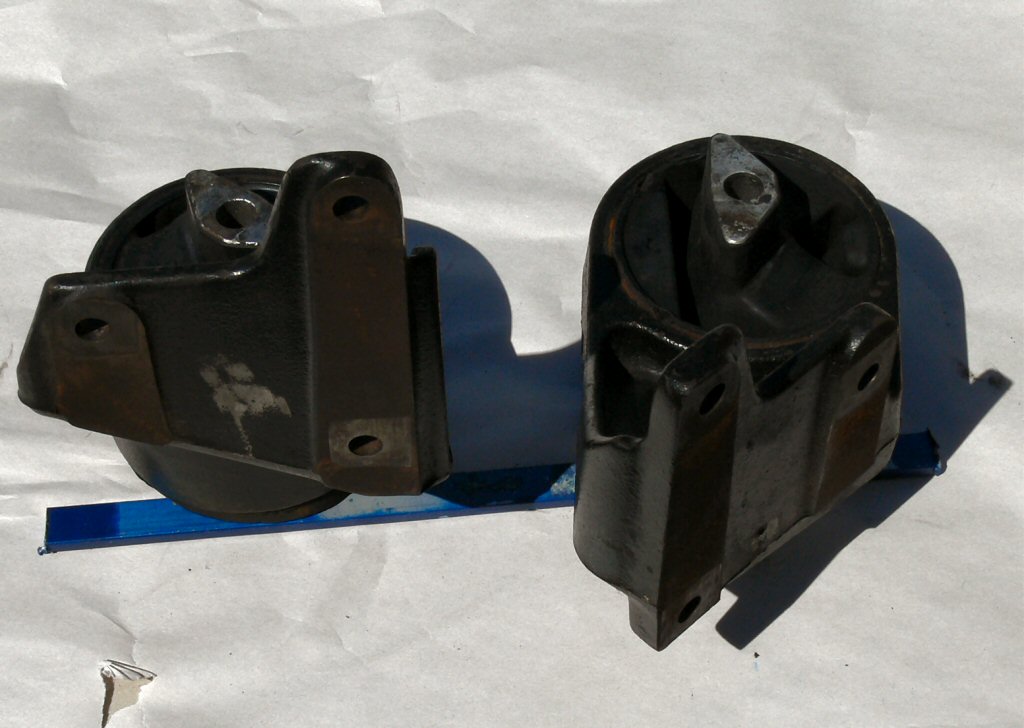

Motor mounts got a little treatment as well
Yeah I know, step away from the paint can!
Here it is all sealed up with POR15 on the frame and Duplicolor ceramic caliper paint on the engine mounts.
25 days approx. and the motor will be ready to reinstall. Machine work on the bottom end is just starting and with the spring rush underway up here they are getting busier which will slow things down a bit. Caps will be matched, then test fitted to the block with the main studs and girdle then the caps get the tops milled for the girdle. Line bored, cylinders bored and honed, it will be decked as well so both the heads and block will be square. Also the bottom of the cylinder will be opened up for the bigger rods and oil passages opened,
Still a few things I can do while waiting patiently for the motor. May see some paint on my diff and axle tubes, Lots of POR15 left from the painting I did on the front 1/3 of the frame.
Powder coating has sort of fallen off the list for now. The cost of the motor just keeps going up as I decide to replace pretty well all of it or upgrade things even further.
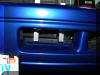
Looks a bit different since painting the spring cup, spindles and calipers. Before they were a nice shade of BUTT UGLY
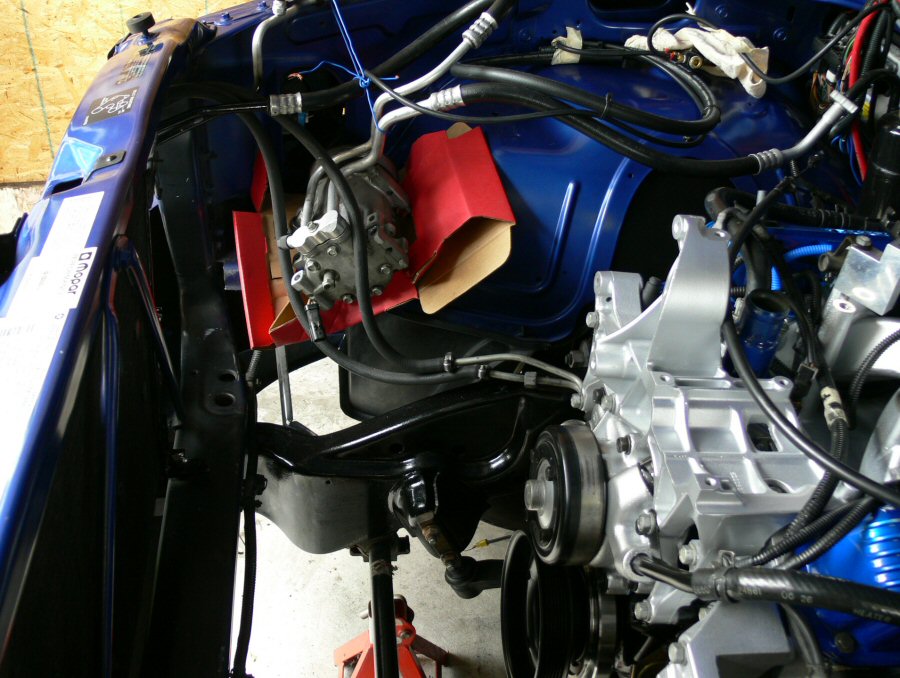
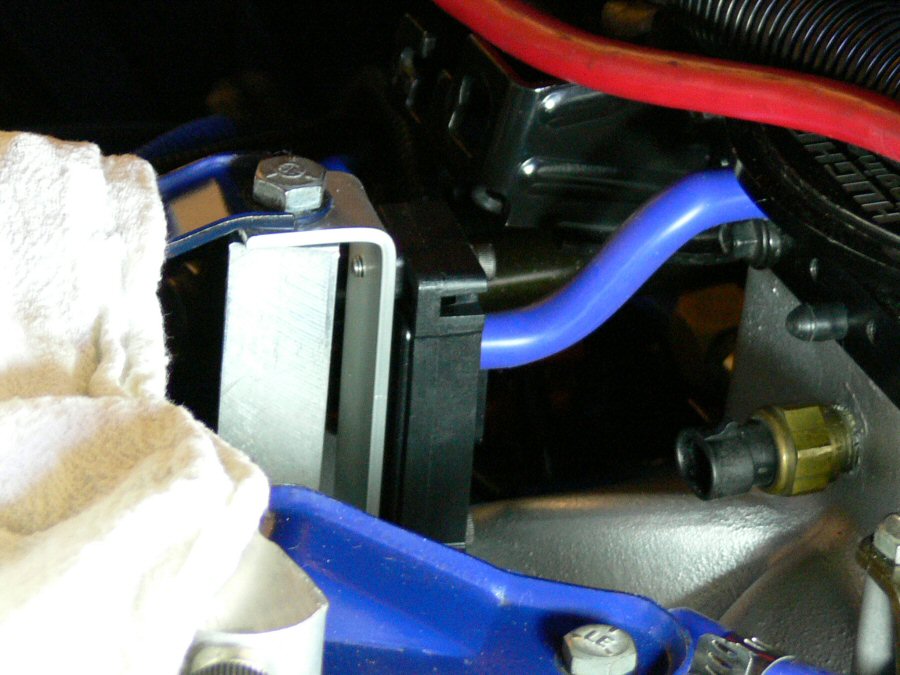
May 15 Cold moist weather the last while so all painting stopped for now. Hope to finish up next week if things co-operate. Block finally at the machine shop so things are much closer. Working on moving the ac condensor back by adding spacers to the brackets and modifying its shroud. Plan to move both the trans coolers to where the bumper openings are so the intercooler can mount in front of the condensor instead of under the bumper.
May 24, After a week and a bit of crappy weather I have started up on painting again. Motor cross supports to the trans and the alt/ac bracket are getting Duplicolor silver ceramic paint. Hope to get the power steering pump off its bracket and paint it as well (running out of time though) . No pics of before but will add some after its finished. Page is already huge and haven't even got the motor in yet lol. Need to get started on the M1. I'm opening the bore for the 55nn tb and ceramic painting it as well.

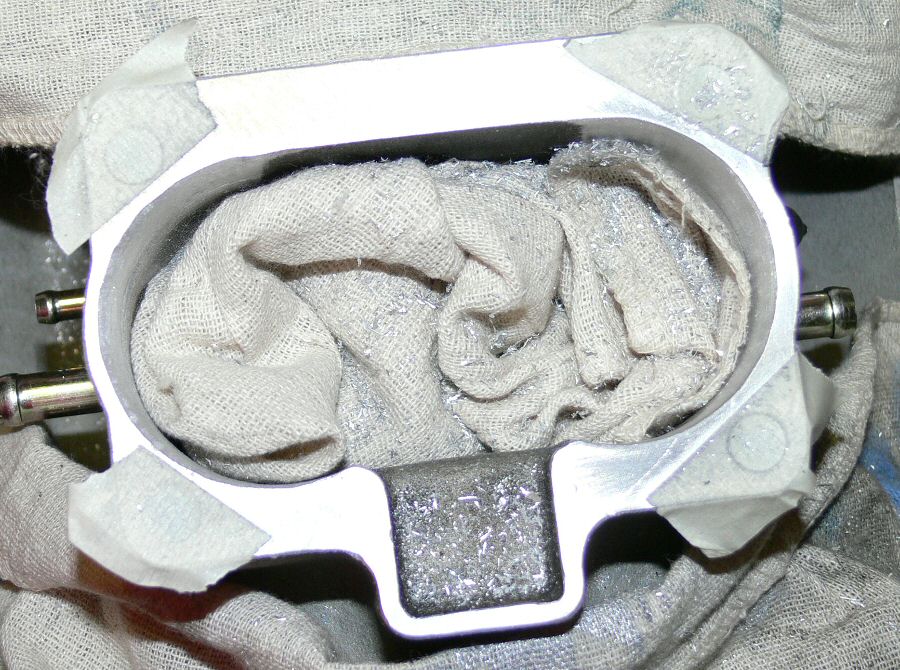
May 27-28, Matched/ported the M1 today for the 55mm tb, cleaned it & then tapped it up so its ready for paint. Too humid this weekend so Ill wait till the weather is better for spraying.
June 2, The machine work for the block is all finished and its ready to be picked up.
I am going to Jim's place (HP Indy Engines) tomorrow so I can paint the block before assembly. 3 weeks and she could be up n running again, all depends still have a few things to do.
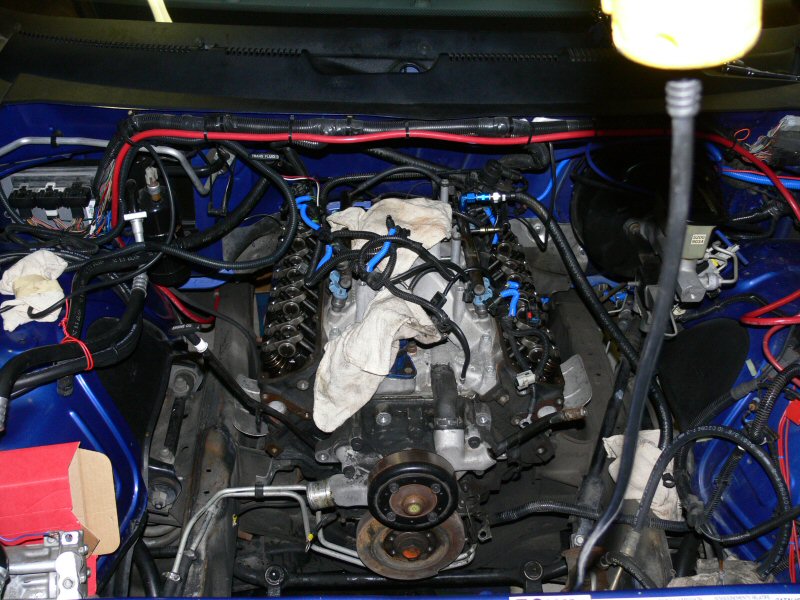
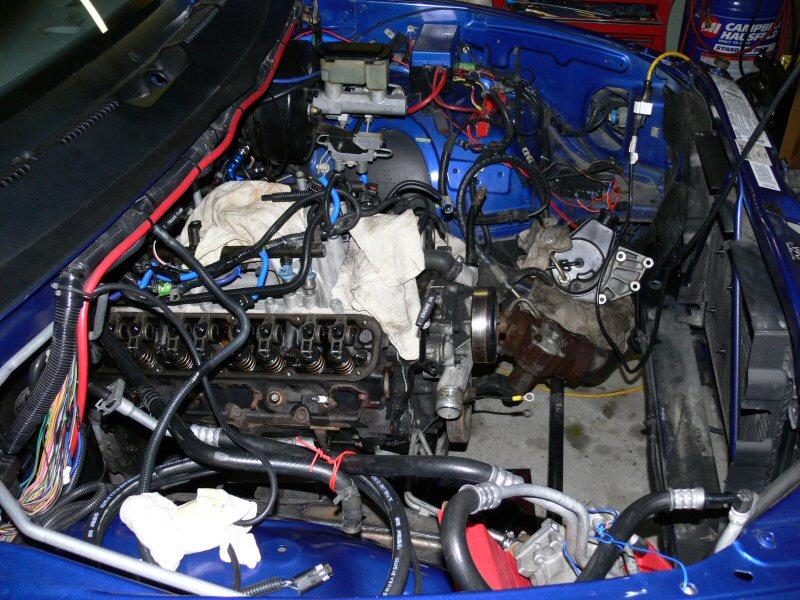
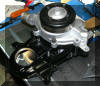
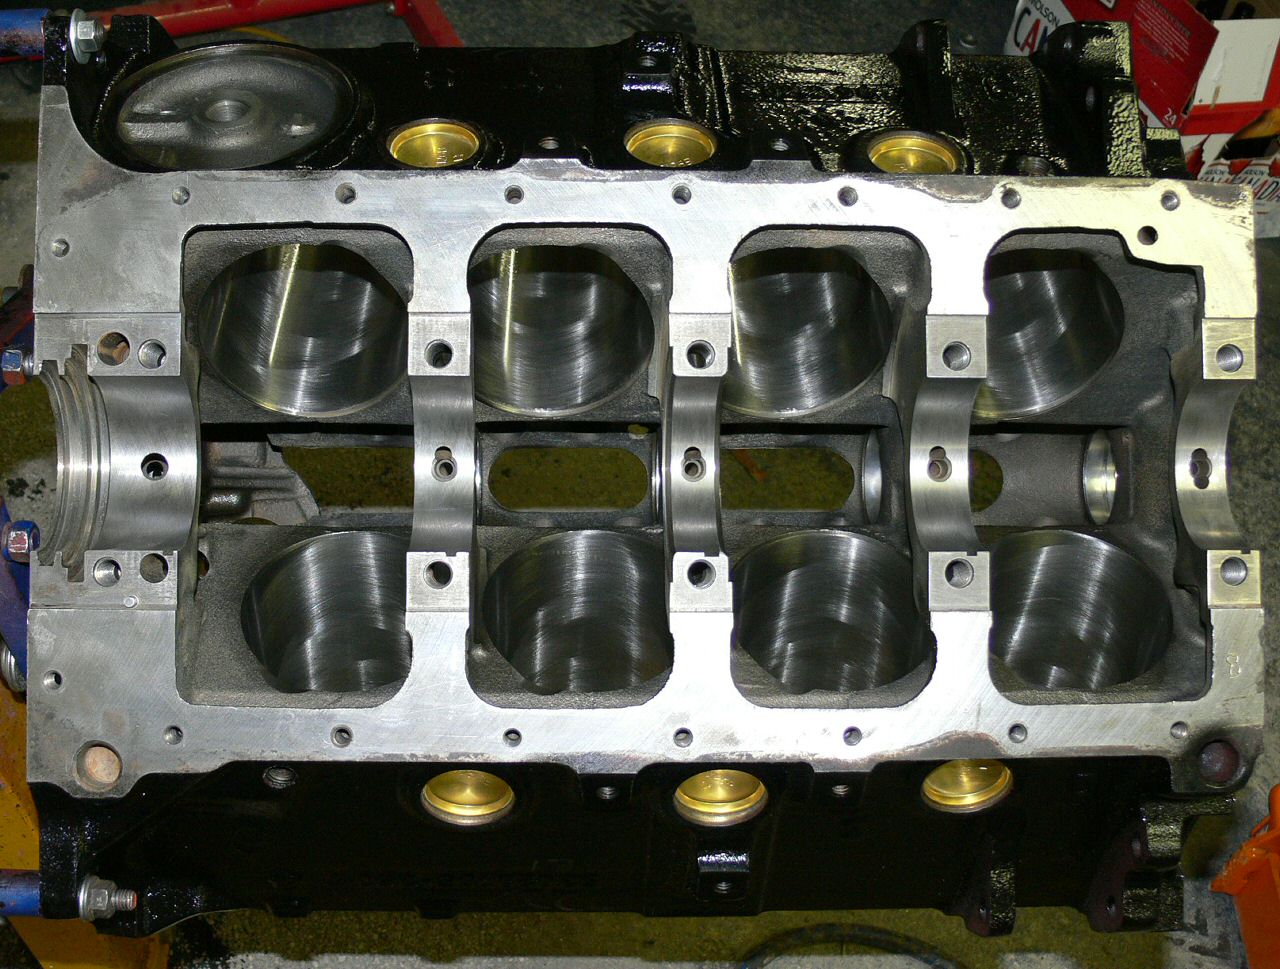
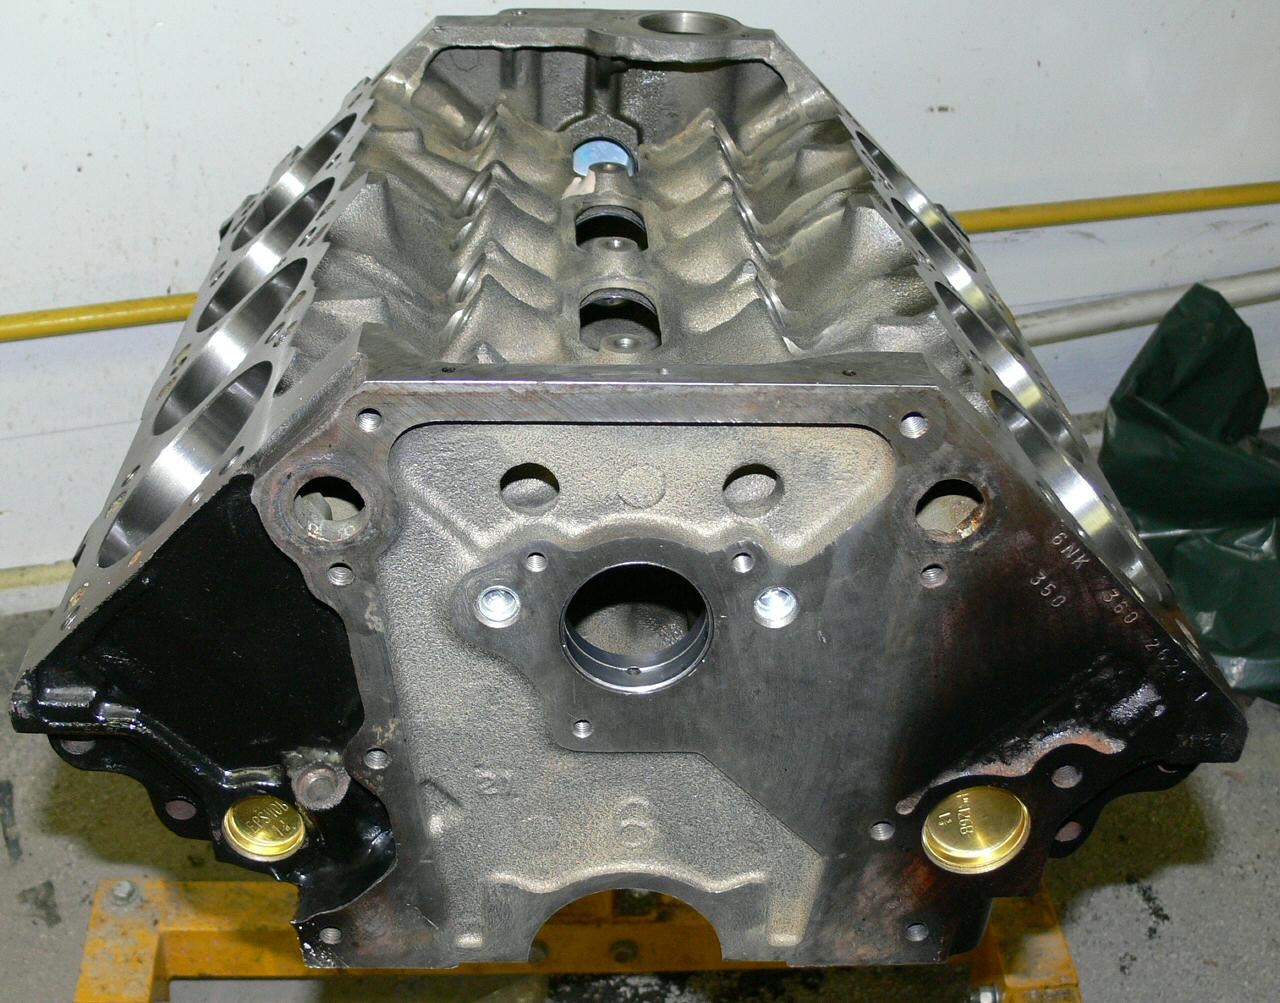
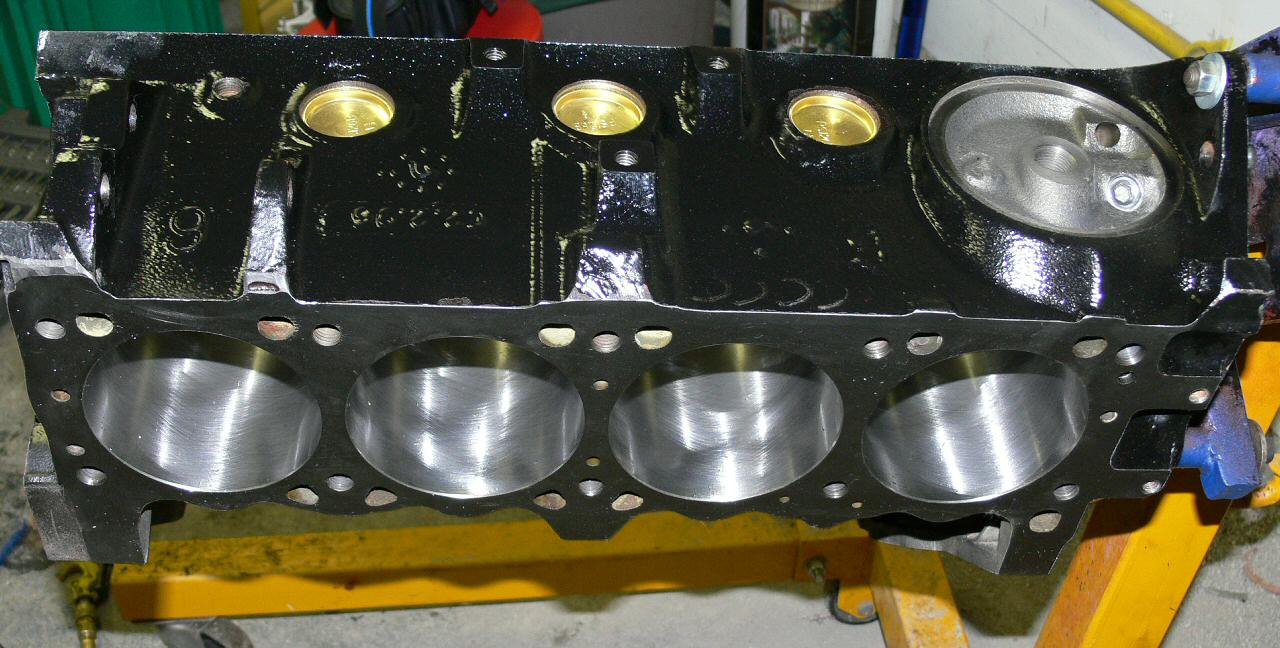
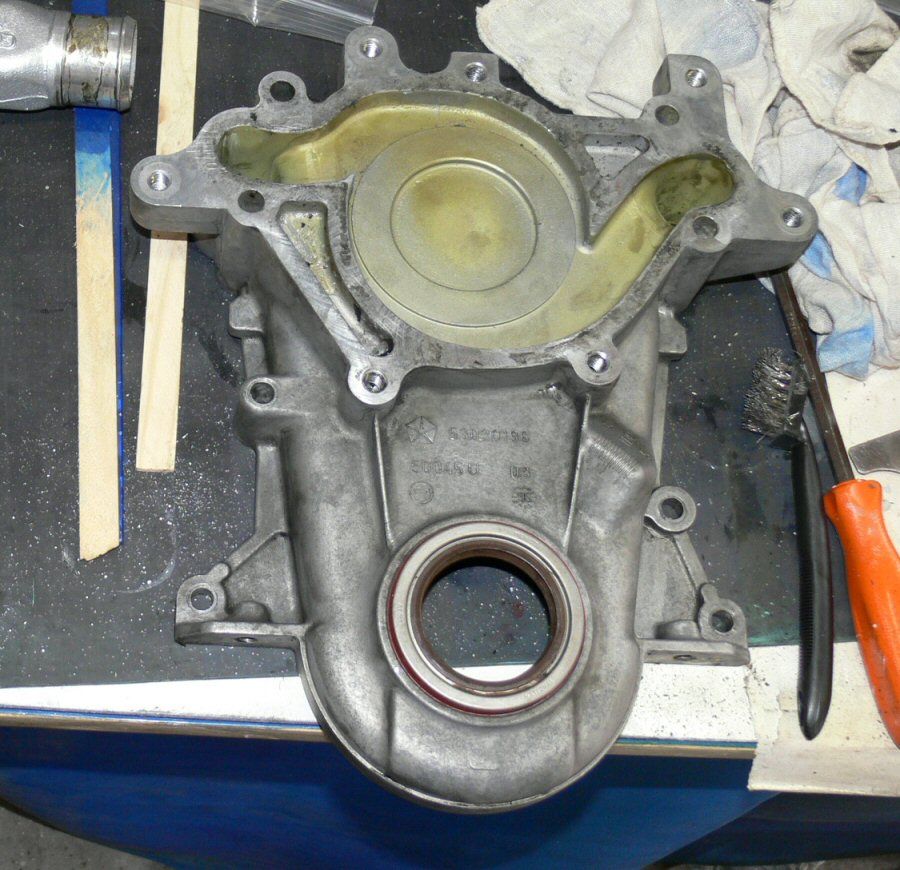
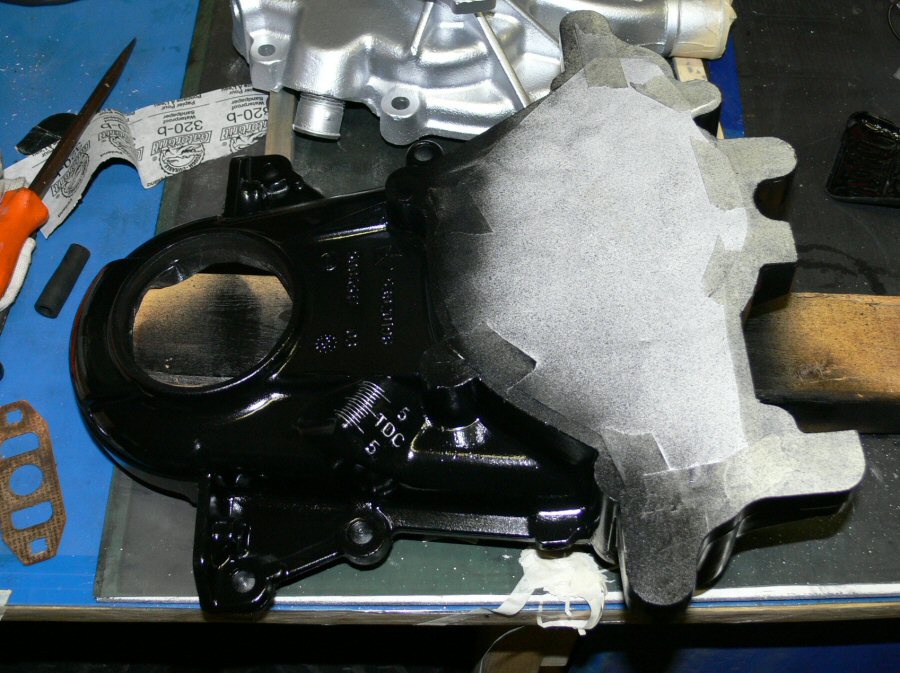
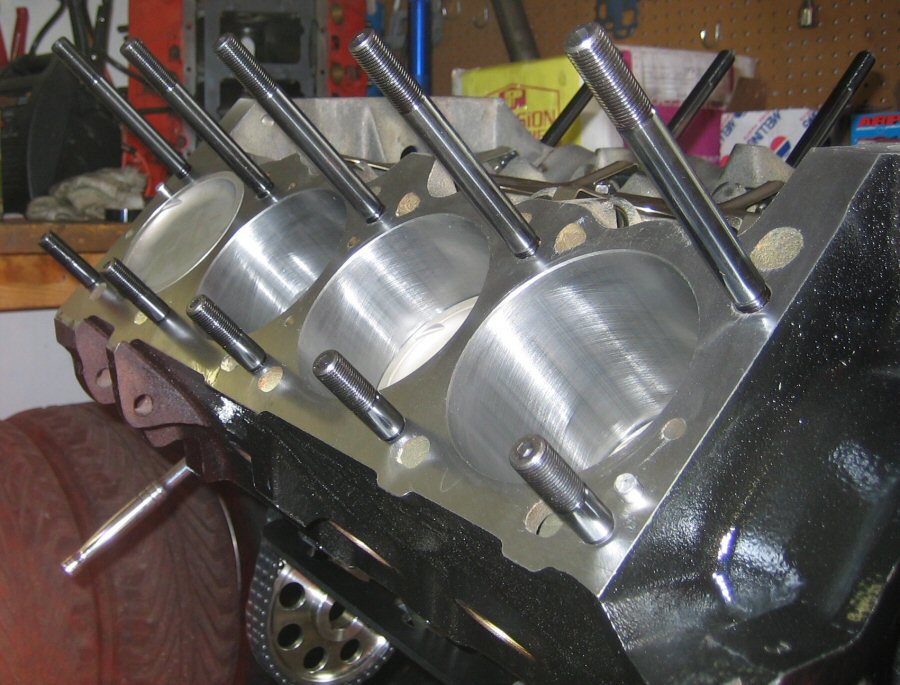
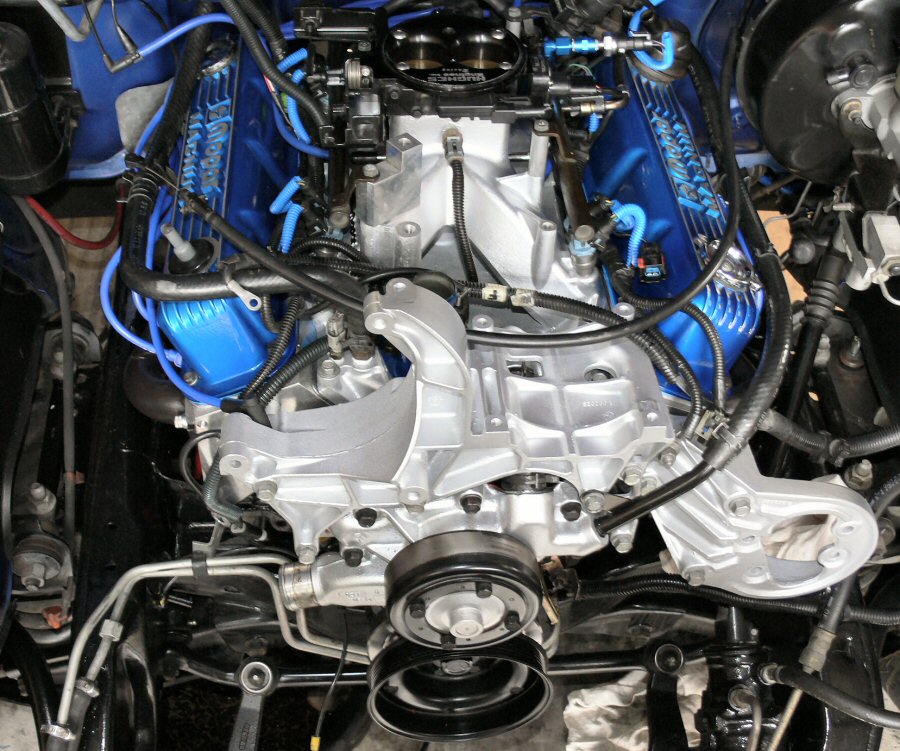
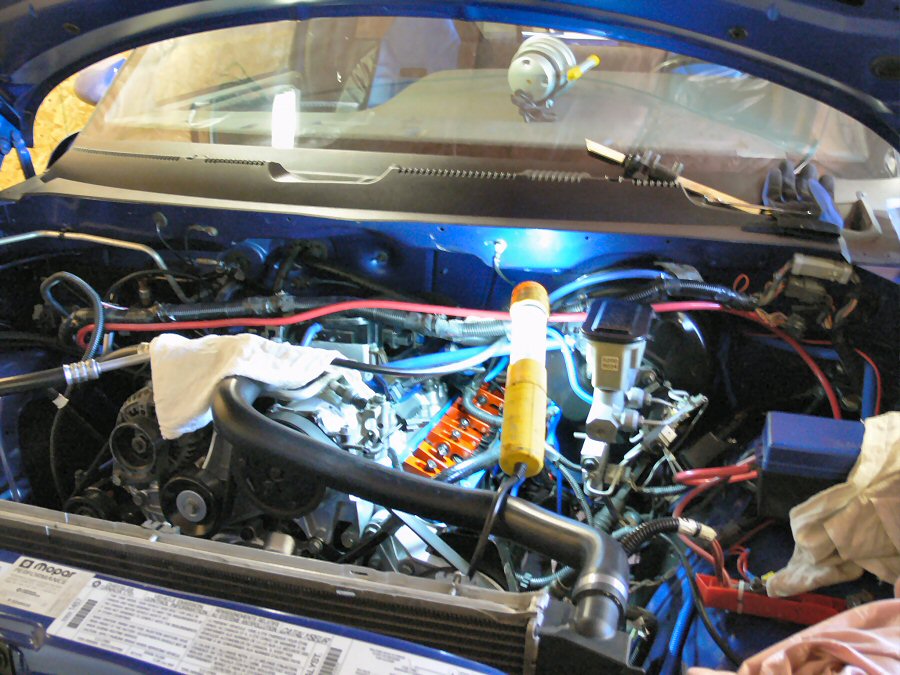
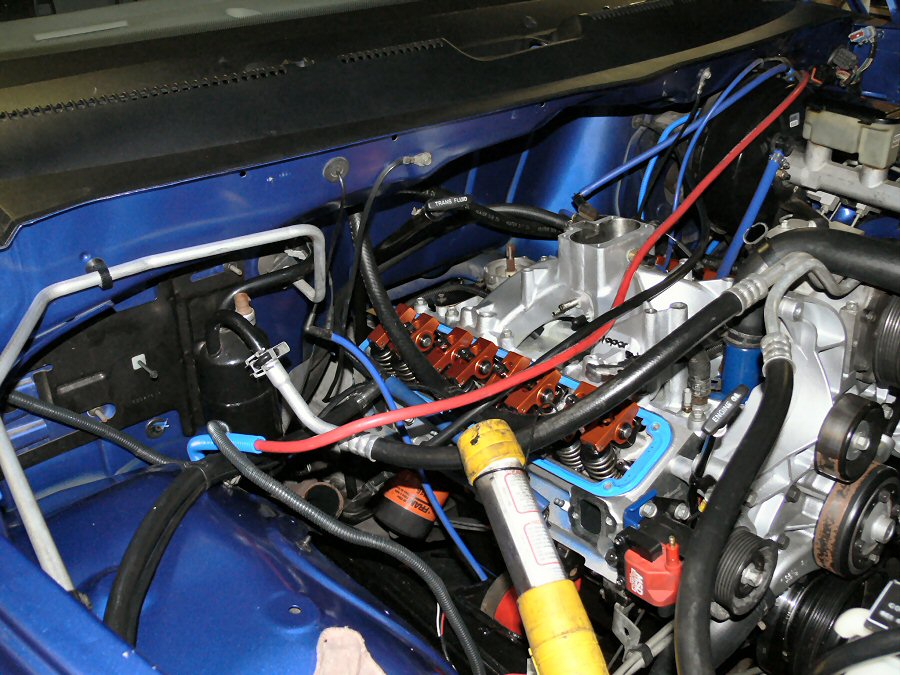
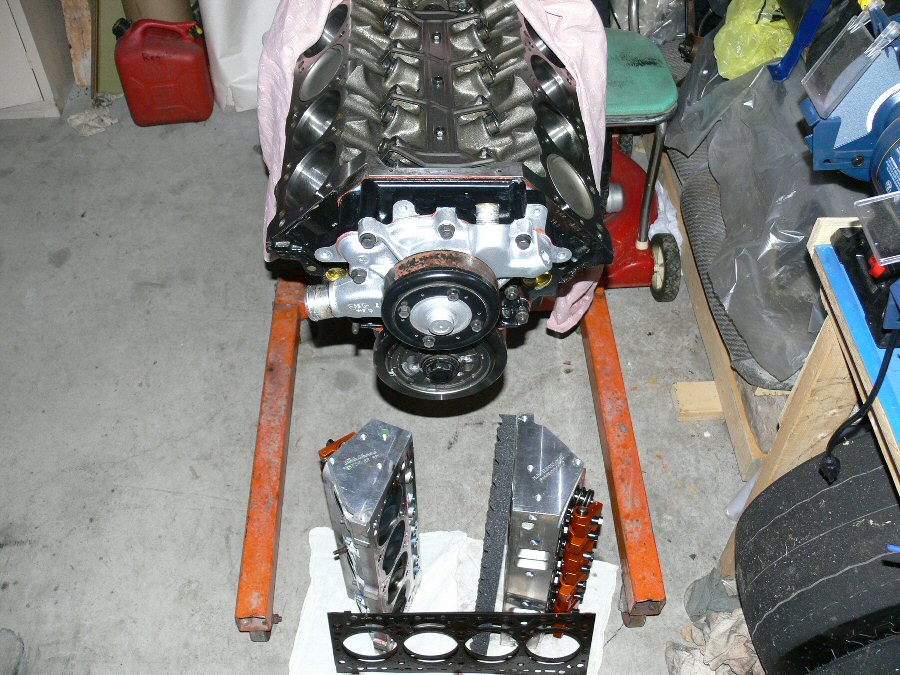
June 3, At HP Indy Engines today hanging around and helping a bit. My block looks real nice and didn't need painting which is good cause it poured all day. Machine shop asked what color I was painting it and did it for me. Cleaned up my timing cover/water pump and gave a hand installing my rt+10 cam in SexMonkey's 318 Dak (he got my 1.7rr & Janesy's 50mm F&B also) Jason (Sexmonkey) kept the jokes one liners and banter going all day lol. Brought my timing cover/water pump home and will paint it during the week. Brush on first 2 coats then spray the final coat. Here are a few pics of the block on the engine stand
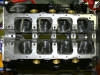
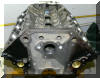
If you look close at the first picture you can see where the block was notched for the bigger stroke in the outside of each cylinder wall.
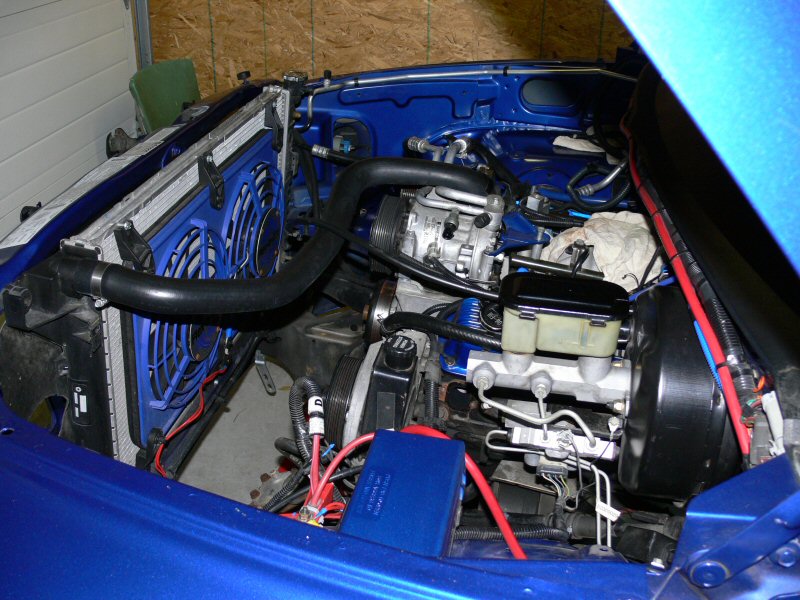
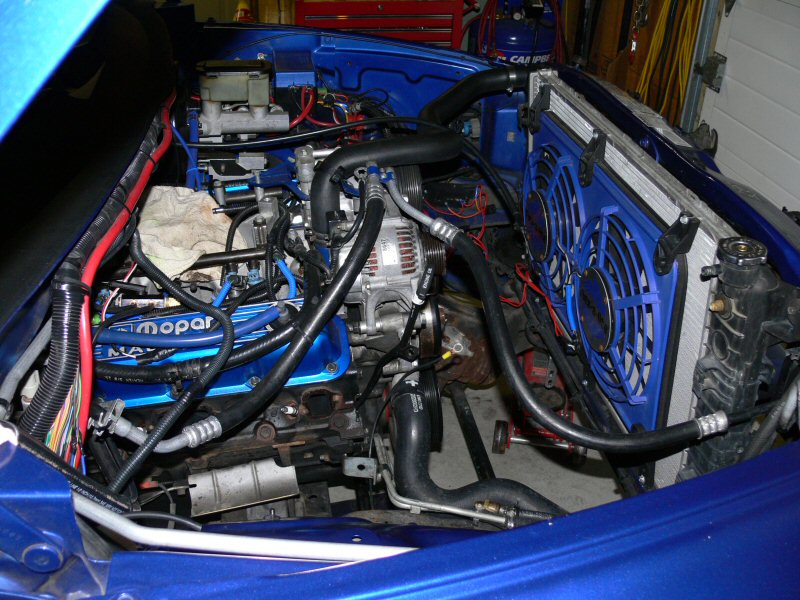
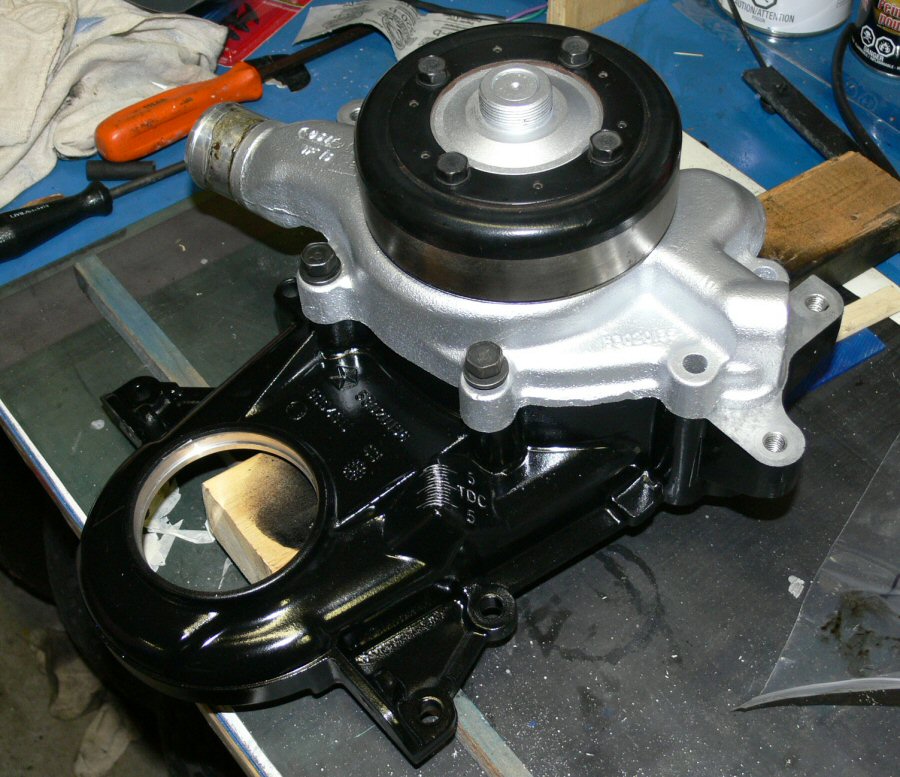
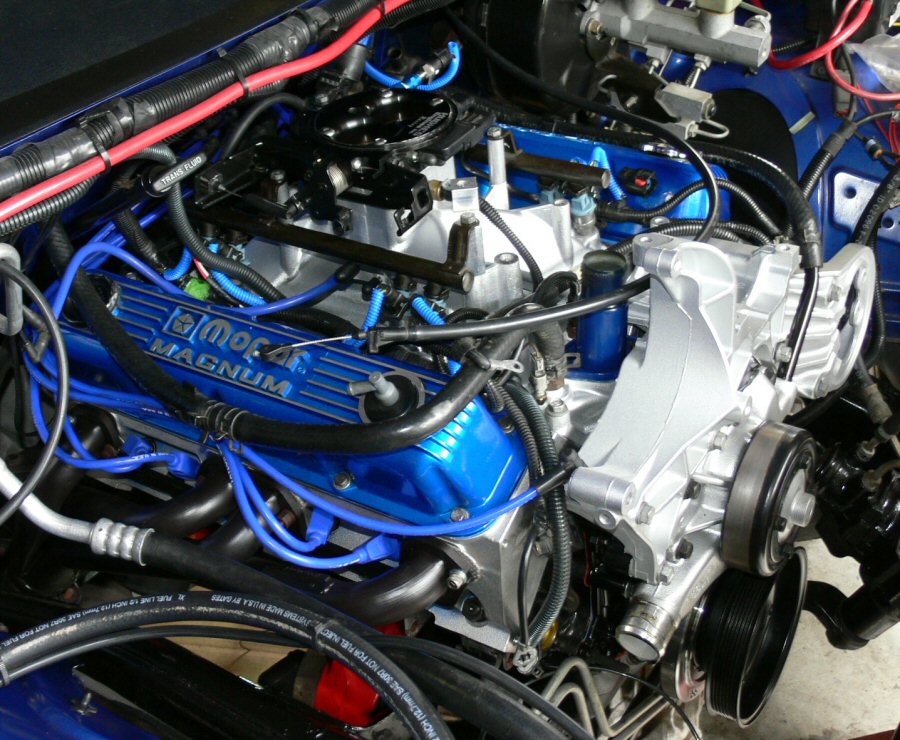
June 12, Finished up most of the paint work now for under the hood though I'm sure something will catch my eye and need touching up. Here's a few pics of before n after as I cleaned up, prepped n painted yet a few more items ;) Painted the water pump but no before pics, only after.

Belt slippage with Blower???
If your running a centrifrugal supercharger Procharger, Paxton, Powerdyne or Vortech and have belt slippage issues or belt squeal then I think I have the solution for you. While I don't have pictures yet I have confirmed that it will and does work. Take your stock tensioner and remove the pulley. Drill a hole to the right of & below the s/c pulley on the main bracket. You want to mount the old tensioner pulley so its just right of (as close as you can within reason) the blower pulley and just below rubbing on the belt as it runs towards the alternator above.
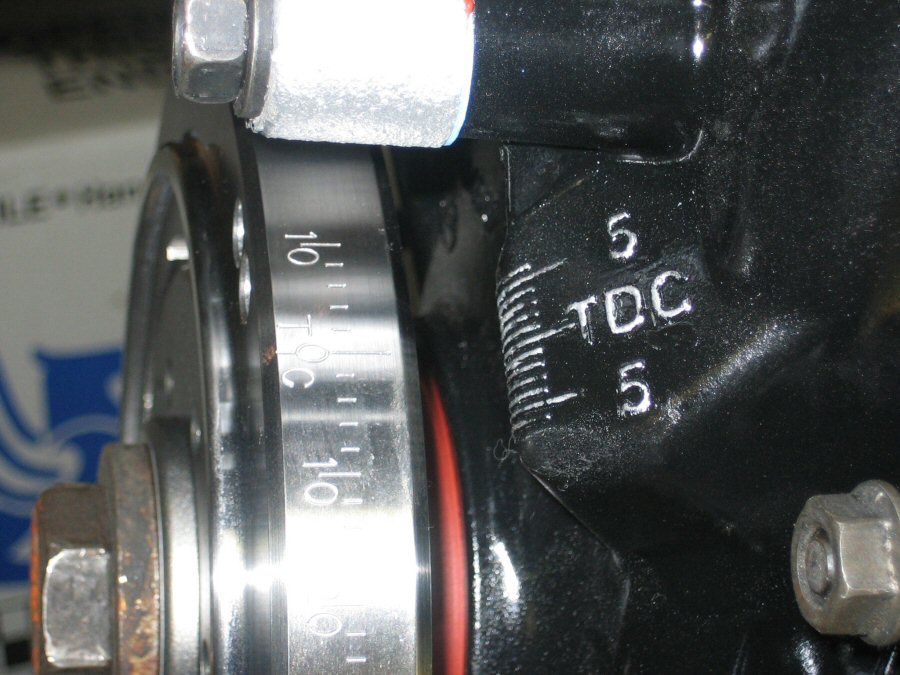
June 17-18, Short block will be going together this weekend, then we will install it the following weekend. Jim from HP Indy Engines is almost finished with it. Really looking forward to letting her rip again even na. The cam was set 4 degrees advanced to give it a bit more bottom end torque.
June 20, Borrowed a power steering pulley puller from CTC (crappy tire ) Painting the bracket for the pwr steering pump to match the water pump, m1 and alt/ac bracket.
Freakin compressor died, ordered valve/reed kit. Spray the last coats on the pwr steering bracket next week when the kit to repair the compressor comes in.
June 25, BIG THANKS to Jim Jessome @ HP Indy Engines for putting together this wicked short block and coming down on a Sunday to help me put it in. It was really appreciated!!!
Lots of pics of the build and I will put up a page for it but for now just adding a few ;) Pretty happy with my paint work & how the color scheme worked out. Still have a few more pieces I want to paint that are related to the supercharger but for now I am done. LMAO, yeah right, how many times have I said that.


I think it should look pretty good when I get everything back together
June 26-27, Repaired my air compressor with a new valve/gasket kit, used the spray gun for the final coat of silver on the power steering pump bracket to test it. Detailed the drivers side valve cover (only sitting on head in pic above) and bolted it down. Got the flexplate bolted to the torque convertor as well. Off work the rest of the week so I can get a lot more time in reassembling & detailing everything. Making some modifications along the way and any touchups to paint that maybe needed.
June 28, Finished securing the motor to the mounts and trans, tc shield on, starter motor, head grounds and pwr steering bracket on with grounds, connect injectors and most of the sensors. Cleaned up the alternator as best as I could.
June 29, Picked up more paint today (Duplicolor Black) and some thermostat gaskets. Painted the tstat tube gloss blue again and install it (carefully dry with heatgun) Mounted the alt/ac bracket, painted the crank bolt, did some touch ups on the black frame rails, Put the cap n wires back in. Had less than 8k miles so reused the ones I had. (replace it all when adding s/c).
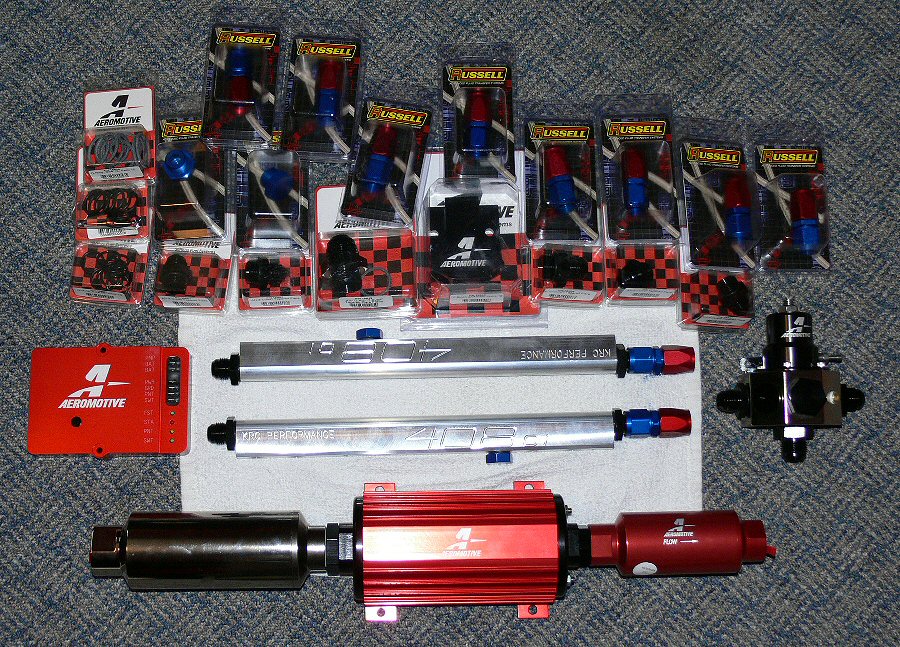
June 30-July3 (Happy Canada Day!), Talked to Marty at KRC and ordered billet fuel rails while they were still on sale. Later on I will be ordering an Aeromotive 1000 fuel pump, regulator, braided line, fittings and a 15gall alum cell for under the bed (behind the axle)
Wrestled my header studs out of my stock heads. Got the passenger side 1/2 on when I realized I had double studs on that side. The other stud the nut was siezed and I couldn't break it free so I found some stainless bolts to use where I could. Like to find some SS 12points to replace the old ones. Got the exhaust all buttoned up but need to fix the rear hanger. Mounted the power steering pump but still have to put the pulley back on.
Alt and ac in place but not secured, missing a mounting bolt for the back of the a/c into the m1, still debating what pulleys Ill run. May have to put my under drives on cause I don't have a stock belt. Cleaned up the ac and alt as best I could before installing but they look like crap compared to everything else.
Condensor modifications not panning out too well. Bottom is moved back 1" and I had to cut off the excess of the brackets as it was interfering with the install of the rad. Got a guy in the machine shop at work to make me alum. spacers for behind the upper mounting brackets but the ac hardlines not co-operating. Reassembled without moving it back at the top. It has to wait for later when the Procharger goes back in. Looking for the plastic/nylon ties for mounting the trans coolers in a new location and so I can change the mounts on the Flexalite fans. I am trying to clean up all wiring, hoses & brackets to make it a bit cleaner looking under the hood. Making 4 brackets to mount the trans coolers behind the bumper openings.
When I find the nylon ties I can mount the electric fans. The only other thing holding me back from firing it up is the power steering pulley pump. The pulley is only 1/2 way on. Cheap bolts I'm trying to pull it back on with are low grade. Have to get some grade 8s or borrow an installer from Crappy Tire to get it the rest of the way on.
Very close now to firing it up the first time

July 4th - 7th (Happy Independence Day) Fired it up the first time using a bypass belt and only had the water pump. Couldn't get the power steering pulley all the way on without an installer. Ran real rough cause I had 5/7 mixed up lol. About 5min running it would finally idle. Got it up to operating temperature constantly checking all gauges to make sure oil pressure, air to fuel and fuel pressure, water/oil temps were good. Dumped all the oil and filled it back up with fresh oil.
Had issues trying to get the power steering pulley back on without an installer. Crappy tire said they had loaners yet at 3 stores nada. Used grade 8, 3/8" threaded rod and got it 3/4 on. Couldn't seat it though so went to Andy Renkin's shop down the street, Straight Line Racing & he seated it in a minute. Next was setting the Cam Sync signal, but we couldn't get the Snap On Scan Tool to recognize anything but the ac functions diagnostics. Everything else in the B&G 408 flashed pcm is gone. I tried retrieving codes cause it had a CEL before going to Andy's shop but it wouldn't go into diagnostic mode.
Returned to Andy's shop this time with the stock computer. Jim had my MP PCM so wasn't sure if I would make it there but it did and set the fuel sync with his Snap On Scan tool. Ordered 65lb Fast injectors and 4 remount kits for my fans and trans coolers. Got home (wanted to stall under braking) and swapped back to the B&G then retorqued headers. Took it back out for a test with the B&G and it ran much better and wouldn't stall when braking or while stopped. After cleaning up the big mess in the garage I went to move her and noticed a leak on the driveway. She was hot but looks like its the pan. Have to jack it up Saturday and find out for sure.
Ill be taking her out for a longer test drive tomorrow and may get video/sound files of it at idle or running. Exhaust is a bit louder and I have the 14x3 on it and it whistles as loud as it did with the blower. Test drive ran like crap, parked in the garage n noticed oil leak in 2 spots and a small drop of antifreeze. (drivers side/front/rear) Leaking from either heads (cometics) or from the valley where M1 & heads meet. (crappy cork gasket)
I will not be running the motor again till I get the 65lb injectors and stand alone engine management. Expecting them to arrive before the end of the month.
July 17, after being off all last week its time to get back to work (job & truck) Ill be fabricating a few mounts for my twin trans coolers and relocating them to the bumper openings. Trying to make room for the intercooler to mount in the grill.
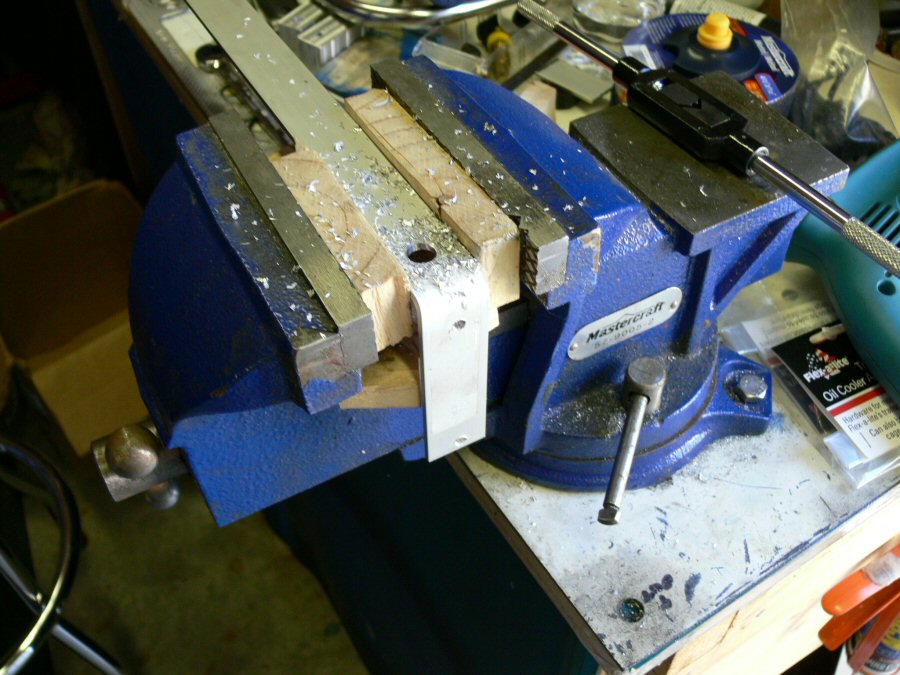
July 27, Got sidetracked with the wife's new car. She has only driven auto and the 07 Yaris we got her is manual. I put a few miles on it trying to break it in and have been teaching her how to drive it. Sooner she learns the sooner I get my V10 back lol. Anywho,,,I did manage to finish up the 4 new alum brackets for relocating the trans coolers. Here's some of the pics
The large black plastic washers just didn't work so I made some out of aluminum instead
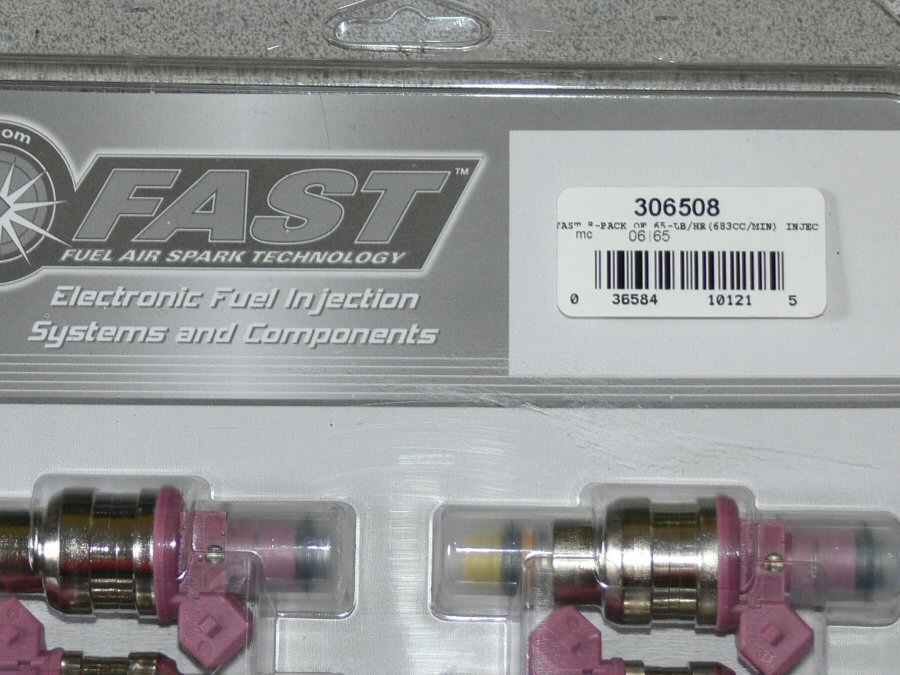
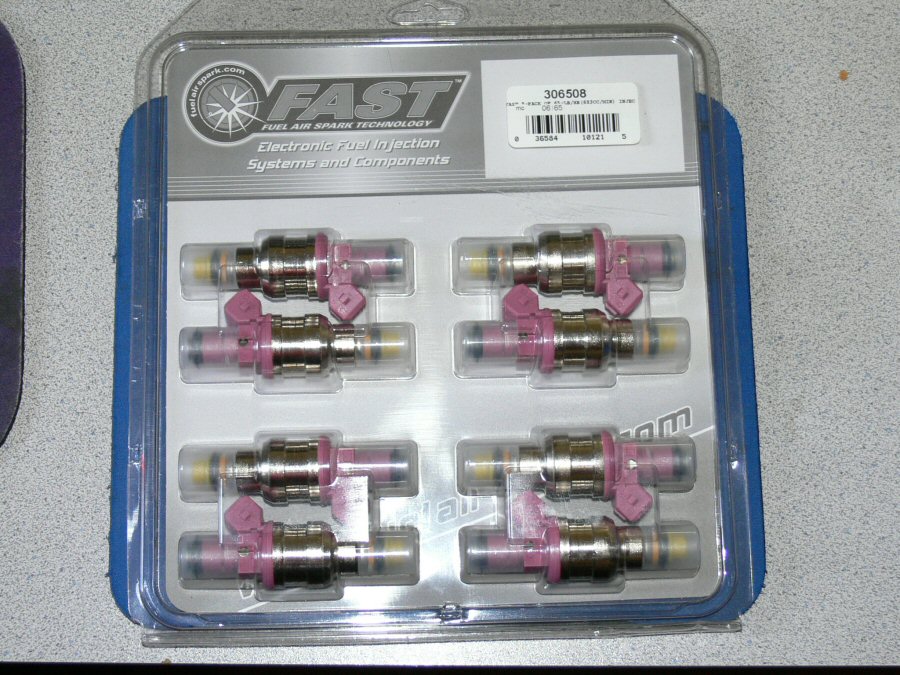
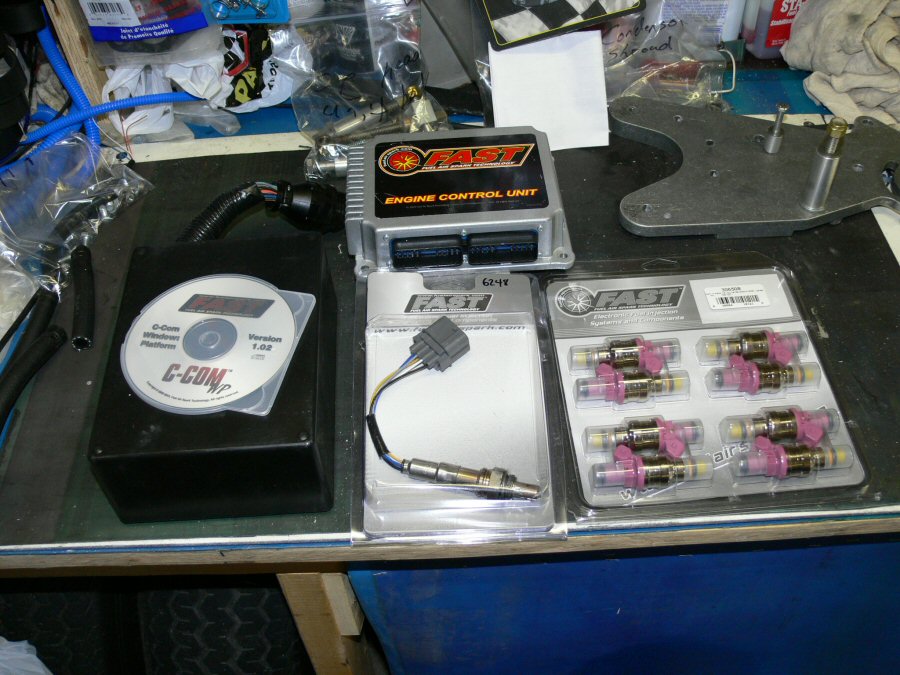
July 28, My FAST 65lb (683cc/min) injectors came in today. Nice pink with chromed bodies. When I'm finished it should look pretty wicked under the hood.
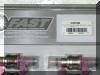
Aug 3, Fast stand alone arrived today. Off work next week so perfect timing. Just hope its cool enough to work in my garage. May have to install the injectors on the stock rails for now
Unfortunately I'm still waiting on KRC to send me the billet fuel rails. The $299 June special cost me $475 cause I added 408ci to them. They don't mention it on the site it's extra but ask when ordering on the phone. Total BS seeing they cnc engrave KRC Performance yet it cost me $175 for 408CI??? For that reason I got my FAST stand alone somewhere else. Jim at HP Indy Engines got me a deal and I had it on my bench in less than 3 weeks. KRC would of cost me $500+ more (Cdn) and taken about 12-14weeks longer.
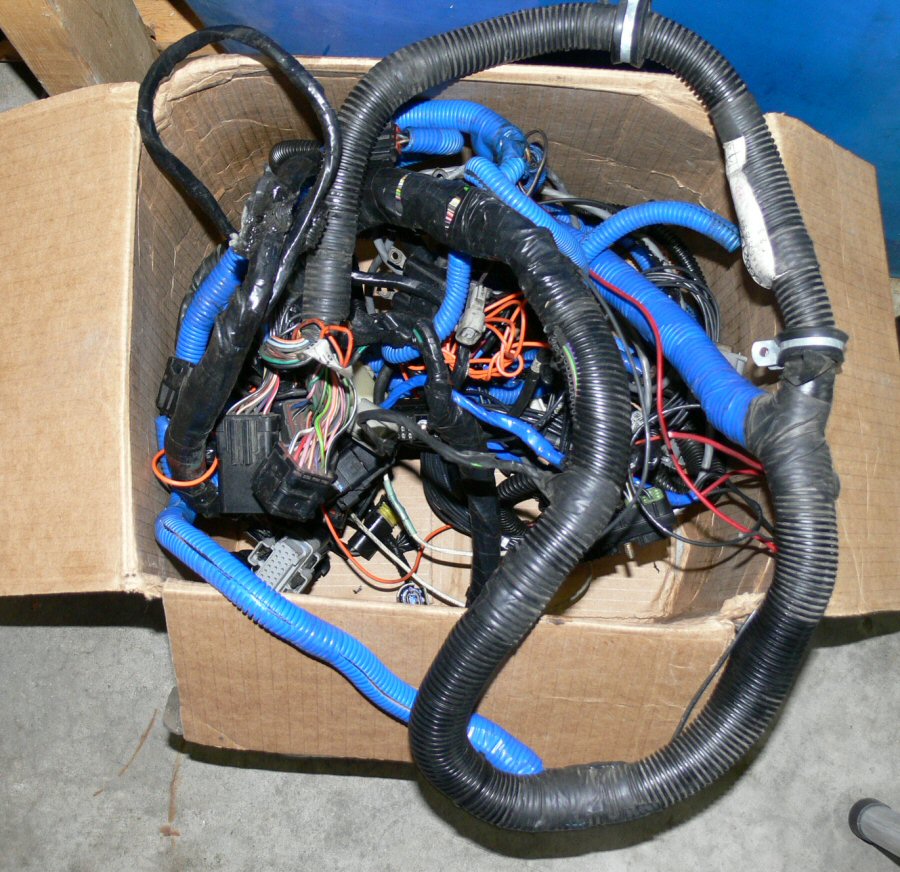
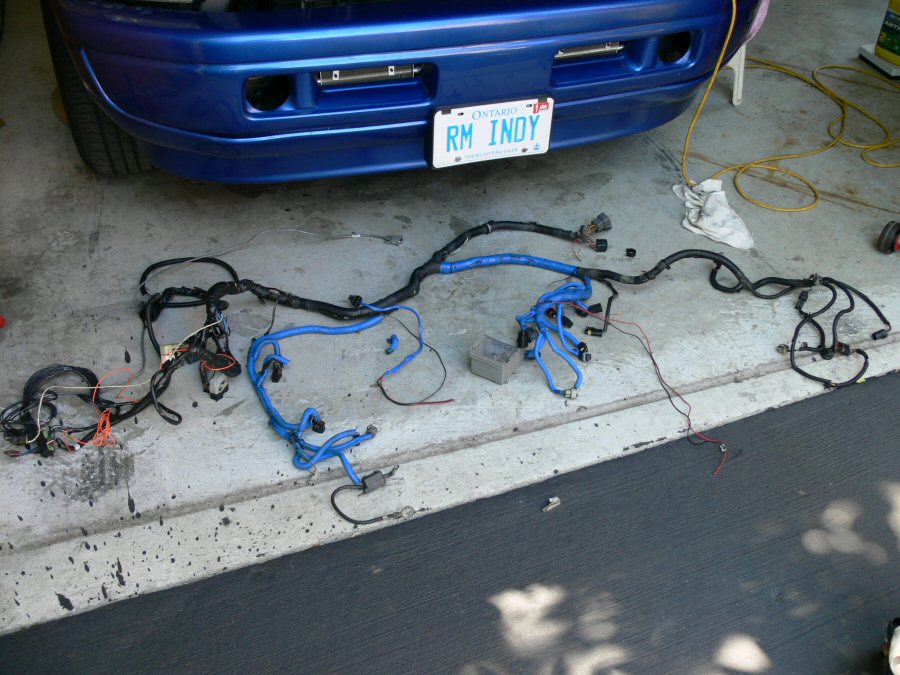
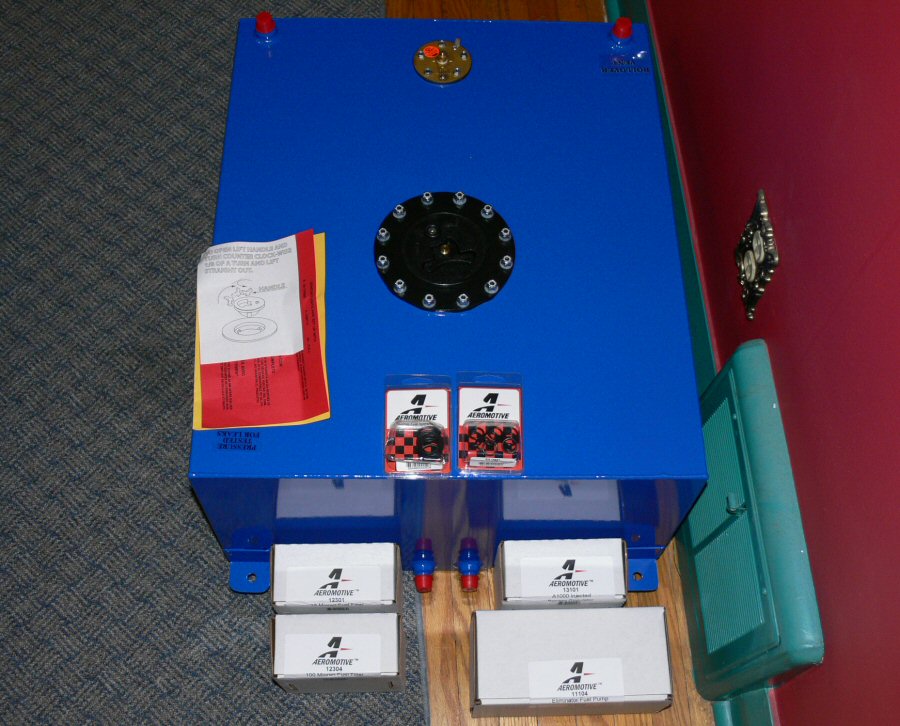
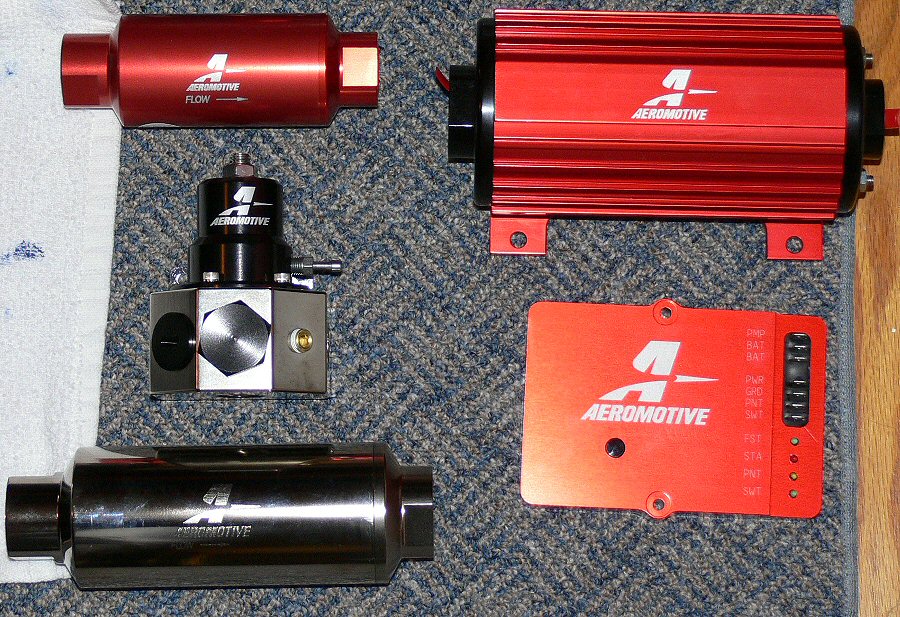
Aug 10, Fabricated a bracket for the Accel 3bar map sensor. Started to remove the complete engine wiring harness and checking all connectors to make sure they are the same as the FAST harness I have. Removed valve covers and headers and checked to see if the heads backed off at all. Still at the 90ftlbs they should be. Ordered the Aeromotive Eliminator fuel pump. Rated for up to 1500hp na or 1100hp force induction plus the matching regulator, 100 and 10 micron in line filters and the Summit alum 20 gall fuel cell powder coated blue. Still need to order Autometer 20- 220 ohm sender unit. multiple fittings and braided fuel lines (return).
Will I make it to the track this year? Probably not, just too many things still left to do. Way over budget and I still have more parts to order which has slowed me down a bit. Getting the rails from KRC is taking forever!
Few things on my list to do, get the engine harness out and put in the FAST wired harness, make brackets for the FAST ecu, FAST CEL delete box and the fuel regulator plus 4 brackets to hold the billet fuel rails (if they ever get here) Also removing the SMT6, Aeromotive FMU, Pro Flow inline pump and the rest of the stock fuel system. Then the fun of installing a fuel cell behind the axle under the bed.
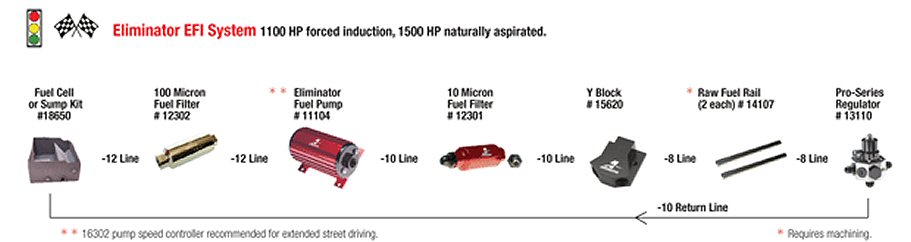
Aug 15, talked to KRC, some BS about why I haven't got the rails yet. Said they will have a new set made for me Friday. That's ok, ordered the wrong regulator and one of the filters from Summit. I need the Aeromotive Pro regulator and for street use the regulator controller and 12an 100micron filter for in front of the pump not 10an. Here's the Fuel System schematic with part #'s. except I will have Summit Cell & KRC rails. If you need a fuel system heres a link to all the schematics on their site. (use back button to return)
Aug 16, 3 things hold the harness in now. One clip on top of the tranny and 2 of the 3 large connectors on the firewall by the drivers side. (so close but cant get my big hands in there lol) Fuel rails and injectors are out & the Pro Flow pump. I have about 1/2 tank of gas so its going to be a bit trickier than last time to drop the tank.
Aug 24, All my fuel parts arrived from Summit today in only 2weeks. Ill post pics later. Have to return the A1000 regulator and 100micon filter. Ordered the Pro regulator and 12an 100 micron filter. Still waiting on my KRC rails. Got the wiring harness out finally, have to try to get the clips off the stock harness (if I can) and try putting them on the FAST prepped harness.
Sept 15. This week I have been stripping the motor back down getting it ready to come out. Got a call from KRC with a tracking # so my fuel rails are finally on the way!!! WOW 11weeks and they finally are shipping them.


Sept 21, 11weeks 6 days and I actually got my KRC fuel rails today. KRC ships with UPS, they are as big a screw up as KRC and I wasted most of this week trying to meet up with the delivery. My June $299 special came in at $656Cdn.
Sept 25, Started to order some of the many fittings needed for my fuel system. Have the Viper 3800stall torque convertor on the bench now as well.
Oct 4, I finally got my stock fuel system out front to rear (1/2tank of gas ughh).. Leaving the fuel door on for now. All the electrical is out but Aeromotive DFMU and battery. Looking for a new battery box to mount in the back right quarter panel. Only thing left holding the motor in are the dowls and 4 motor mount bolts. Have to start to strip down the frame so I can paint it with POR15. Going to take me a while to do that. Probably do it in 4stages. Under the cab to bed for each rail then under bed each rail. Have to add in new cross supports at the back and remove the structure for holding the spare tire (fuel cell location).
Still have to decide if the cell will be under the bed or cut open the bed and expose it flush mount??? Kind of like the flush mount cause it means more wt reduction and I think it will add a cool factor. Lets face it, only thing this truck will haul is @ss!
Oct 25, Picked up the last filter today and more fittings than I need lol. Looks like I have to modify the fuel cell. Seems no one makes a double 8an to single 12an fitting so I'm going to get a fabrication shop to cut the twin 8s out and put in a plate with a single 12an fitting. The fuel line running to the pump will look like a fire hose LMAO !!! Ill post a real pic of the fuel parts this weekend You cant see much with them in the boxes in the pic above duhh.
Fuel cell will go in flush mounted. The pump will not flow its rated amount if it is above the cells fuel outlets or could burn the pump out. I don't want either so flush mount it is
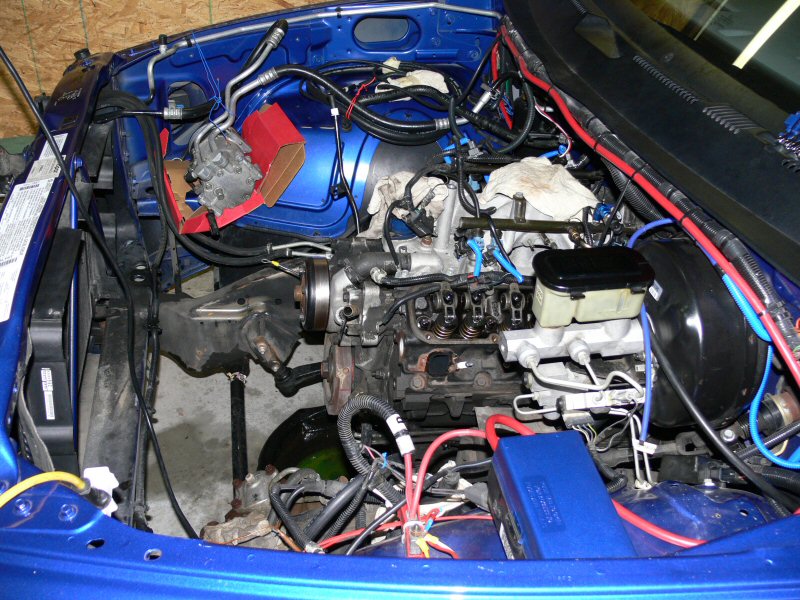
Nov 5, Jim came down and we pulled the motor out and removed the heads. I got the block all cleaned back up but still have to remove the HS roller rockers and clean up the heads. Ill have to touch up the paint in one or two spots, scuffed the oil pan on the way out.
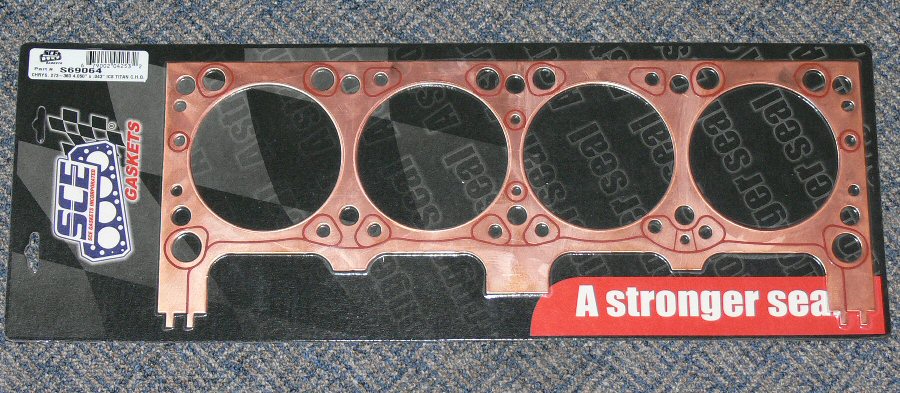
Copper ISC Titan head gaskets look really good compared to the crappy Cometics that wouldn't seal. No silicone on the Cometics but the Titans have it everywhere plus built in
o-rings as well. The Titans have been tested in a small block at up to 43psi boost! I am only looking to make 10-14psi so I should have no worries.
Here's a few recent pics of fuel parts, motor out with heads off & new Titan copper gaskets
